


A long bob asks for a blow-dryer, a flat iron, and fifteen minutes most mornings don’t have. Short pixie hairstyles ask for a comb, a little product, and about ninety seconds. Cut well, they can look sharper than hair three times their length.
That’s the trade you’re making: less time at the mirror, more attention when you walk into a room. Below are sixteen ways to wear one this season, from a glass-smooth side part to natural curl left to do exactly what it wants, plus the specific finish that keeps each version from sliding into unkempt. For the wider roundup, our best pixie hairstyles page is a good place to start.
Pick Your Pixie First
| Style | Best For | Upkeep |
|---|---|---|
| Classic Cropped | Round, oval, or heart faces; first pixie ever | Reshape around five weeks |
| Curly Pixie | Naturally curly or coily texture | Cut dry, minimal daily styling |
| Undercut Pixie | Thick hair, anyone who wants edge on demand | Buzz touch-up between full cuts |
| Wet-Look Pixie | Events, shoots, one-night styling | Washes out same night |
| Volume Crown | Fine or flat hair that needs lift | Root-focused blow-dry, no extra cutting |
Classic Cropped Pixie
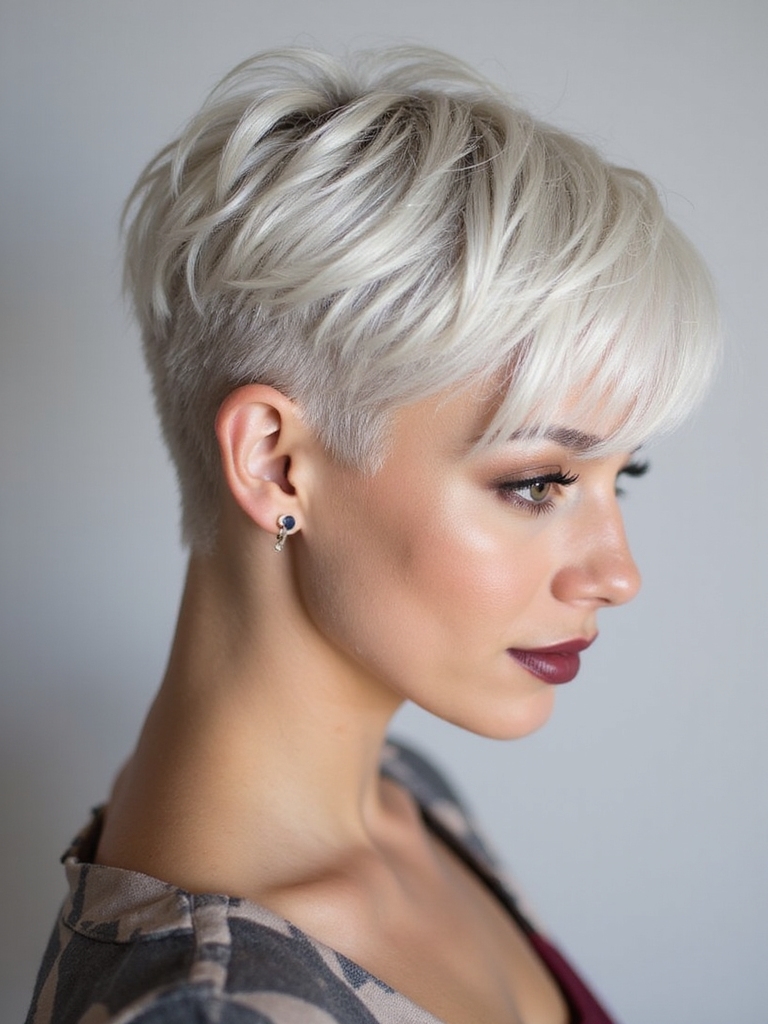
The classic cropped pixie keeps length short and even all over, with just enough softness around the face to stop it from reading severe. First-timers land here most often. The shape flatters on its own: round the temples slightly for a softer look, or sharpen the nape for more structure.
Ask for a graduated nape and a touch of extra length through the crown, so you have somewhere to build from later. Two finishes, one cut. Smooth the top and sides with cream and a paddle brush for polish, or work in a little paste for an undone version of the same shape.
- Suits round, oval, and heart faces best; square faces do well with softer temples
- Low daily effort: a comb and one product is usually enough
- Reshape it before it grows past the ears, or the outline starts to sag

Feathered Pixie
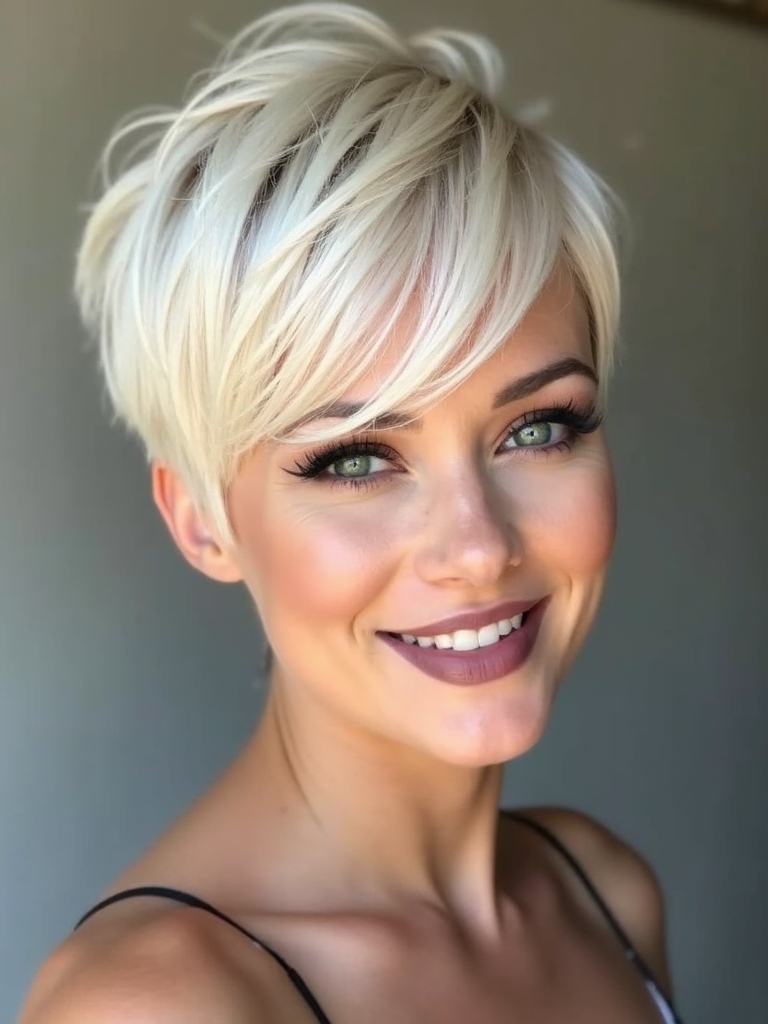
Feathered layers blend into one another for a softer outline than a blunt crop gives.
The shape moves with the smallest turn of your head and mostly air-dries into place on its own. That’s rare for a pixie. A little texture cream worked into towel-dried hair is usually all it needs; too much product weighs the feathering down.
It suits fine to medium hair especially well, since the layering fakes body a blunt crop can’t. On coarser hair, have your stylist point-cut the ends for a softer line, so the feathering actually reads once it’s dry.
ℹ️Dry-Time Reality
Feathered layers cut air-dry time more than almost any other change you can make to a pixie. Most people are done within ten minutes of stepping out of the shower, no diffuser needed.
Sleek Side-Part Pixie
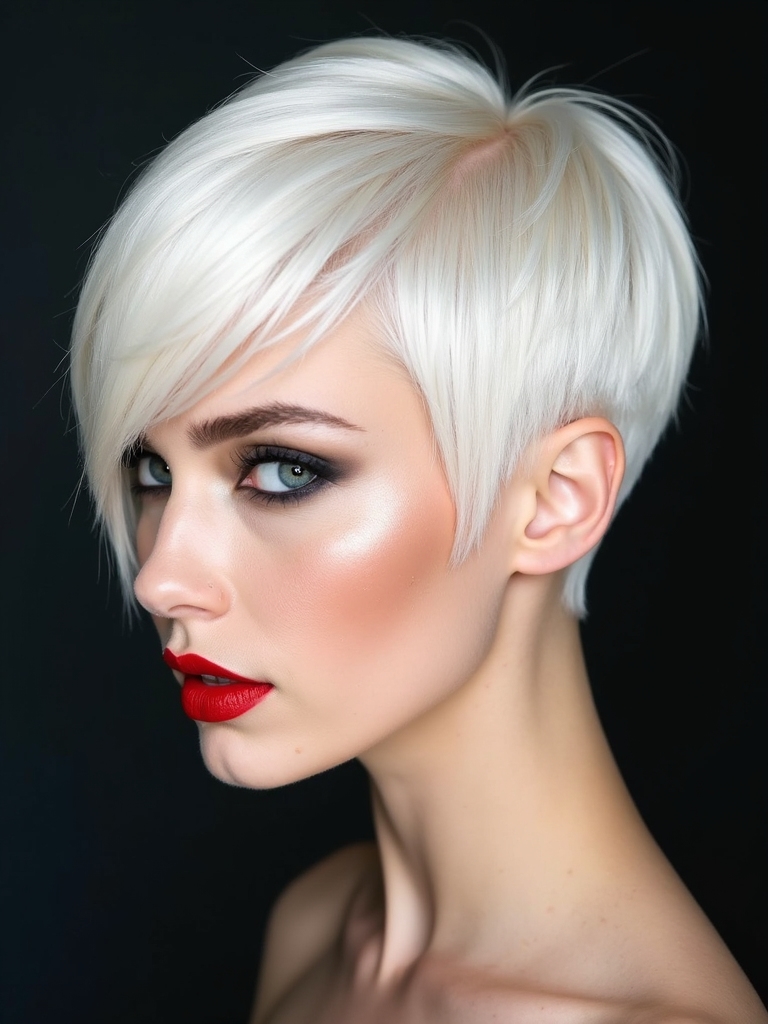
A deep side part turns a plain crop into something sharp and put-together in under a minute. The part has to be clean and the finish glassy. A rough part undoes the whole effect before you’ve even left the bathroom.
Flat-iron the top down against the part, smooth a drop of serum through with your palms, and you’re done. It’s the pixie for an interview or an event, and it tends to photograph best of the bunch, since the shine holds together under camera flash. Fine hair holds the part cleanly on its own. Very thick hair may need a light gel first so it doesn’t lift back out.
Tousled Pixie
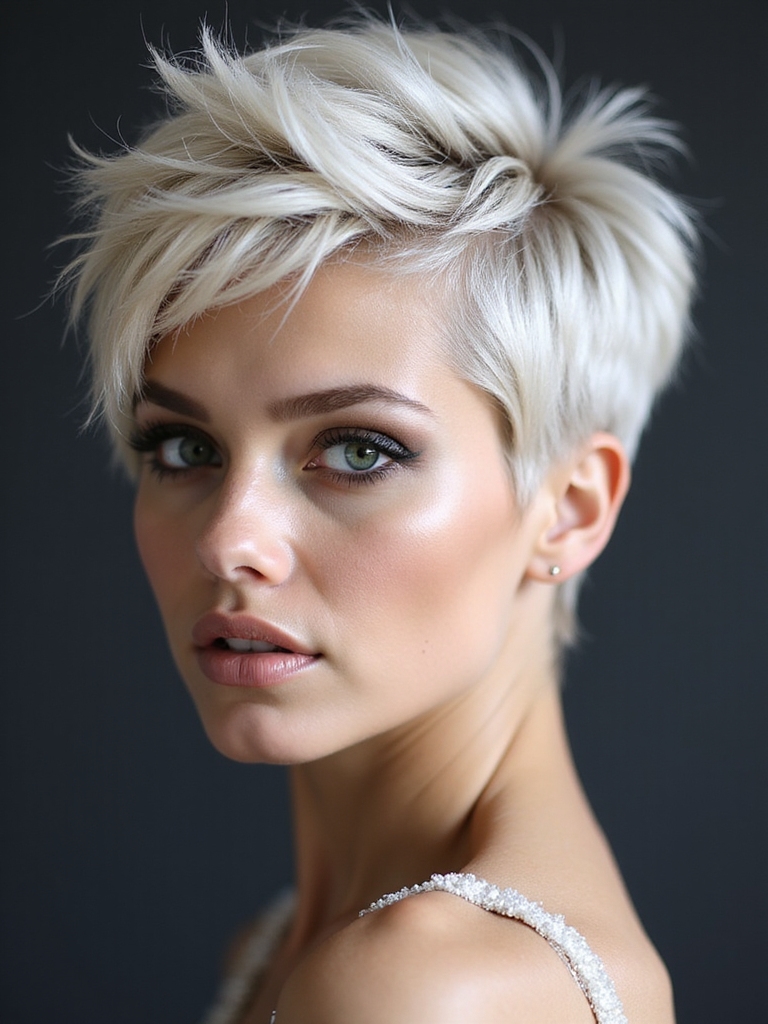
You can tell a tousled pixie from a merely messy one by how it’s finished, not how it’s cut. Shape comes first here, texture second, never the reverse.
Scrunch a small amount of paste through towel-dried hair, let it air-dry or diffuse, then separate the pieces with your fingers once it’s fully dry, skipping the brush entirely. The unevenness is the point. A comb smooths it right back into looking plain.
- Best on wavy or curly texture, which holds the piece-y shape without extra product
- Straight hair usually needs a texturizing spray, or the tousle drops within an hour
- Needs the least daily upkeep of any cut here; most days skip heat tools entirely
Two fixes when a tousled set drifts too far either direction:
1Gone too flat
Mist a little dry texture spray at the roots and re-scrunch with your fingertips to lift it back up.
2Gone too crunchy
Rub a drop of oil between your palms and smooth it over the driest, stiffest pieces to soften them.
Micro Fringe Pixie
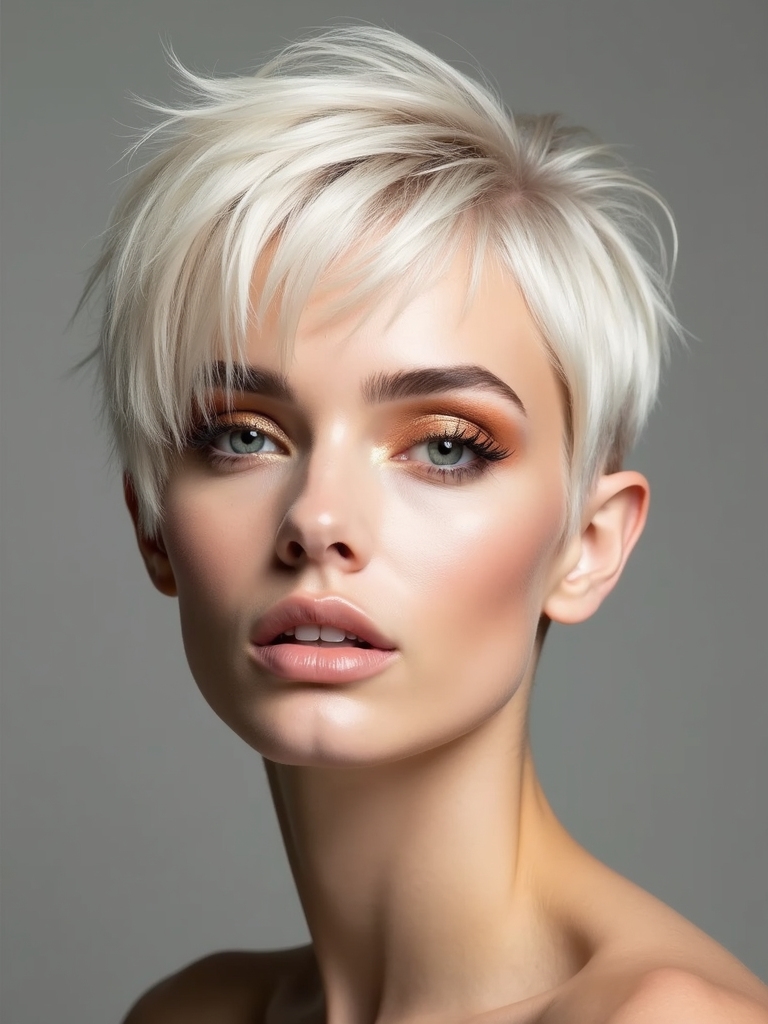
A micro fringe sits high and blunt above the brow. It’s the boldest way to wear a pixie, framing the eyes more dramatically than any other cut here. It’s also the request I get most from clients who say they’re bored and want to feel it the moment they look in the mirror. See our edgy pixie guide if you want to push the graphic angle even further.
- Keep the fringe line blunt and the rest of the crop simple, so the bang stays the focal point
- Trim the fringe yourself between visits with small, straight-across snips, going slower than feels necessary
- Blow-dry it down against the forehead first, then set the shape with a fingertip of pomade
Textured Tapered Pixie
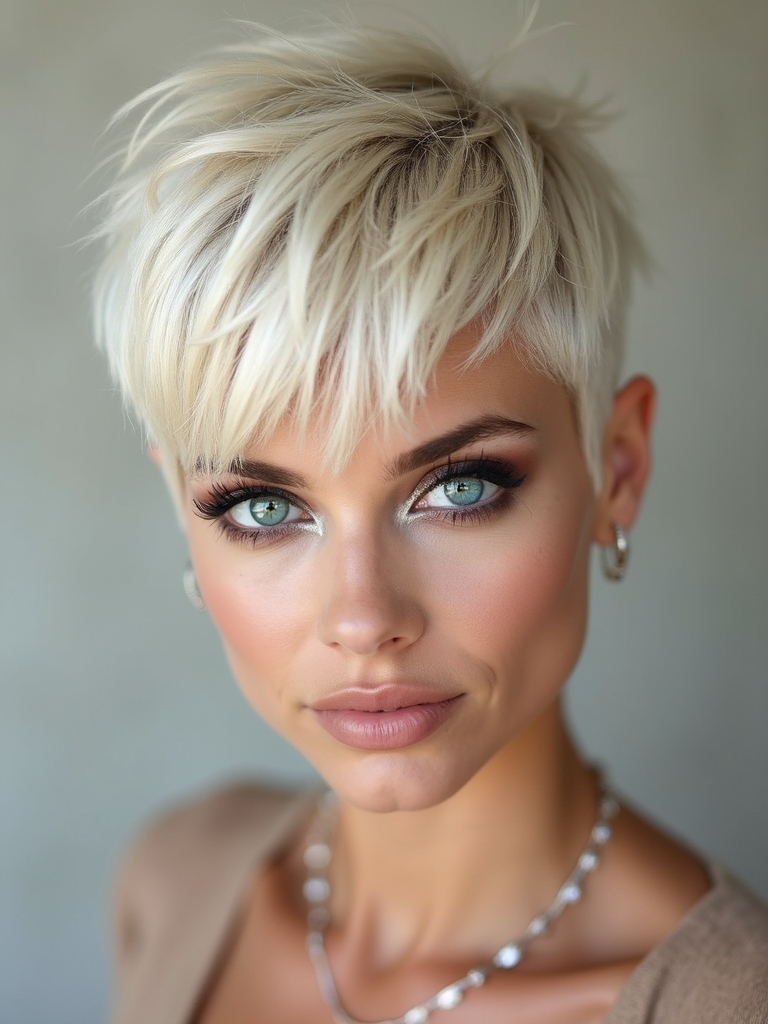
A tapered pixie keeps the sides and nape graduated close to the head while the top stays longer and piece-y, so the cut stays clean at the edges while the top looks undone.
That contrast is what keeps it looking current between trims. The taper holds its line even as the top grows out and softens. Matte paste worked through dry hair, warmed between your palms first, separates the texture without adding shine you don’t want here.
Curly Pixie
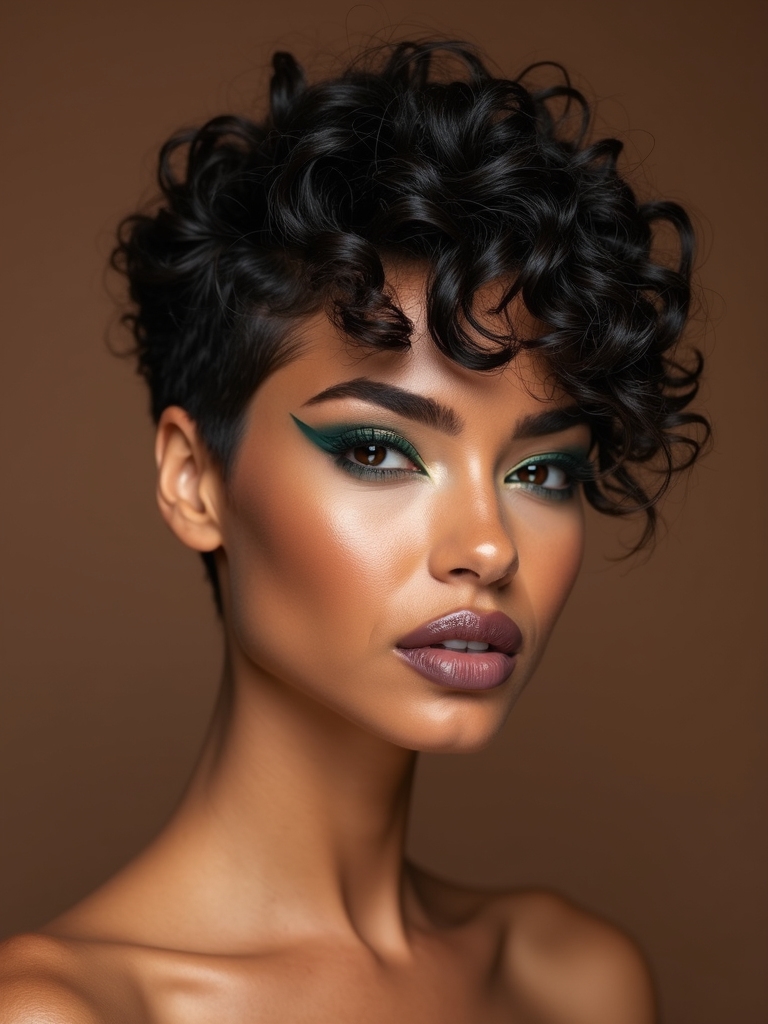
Curl pattern decides more about this cut than face shape does. Cutting naturally curly or coily hair while it’s dry and in its curl state lets the stylist see exactly where each curl will land, instead of guessing at how it’ll spring up once it dries.
- A curl cream or custard, scrunched into wet hair, keeps the definition without frizz
- Between washes, dampen the curls slightly and smooth in a dime-size drop of leave-in with your fingers
- Our full write-up on curly pixie cuts goes deeper on curl-pattern shaping
Wavy Pixie
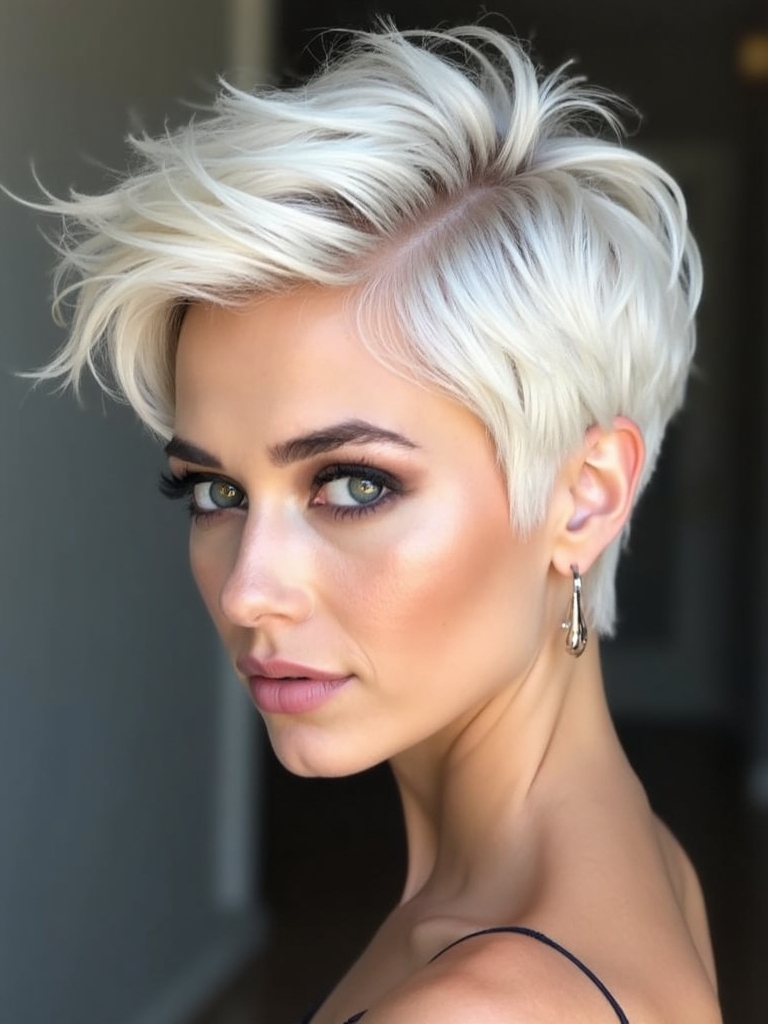
Natural waves give a pixie real body without extra volume from a brush.
Work a sea-salt texturizer through hair that’s still a little wet, scrunching as you go, then let it dry on its own. The bend does the work. That keeps fine, wavy hair from lying flat once it’s dry.
It’s about as low-effort as pixies get: five minutes, no heat, most mornings. It also suits nearly any face shape, since the movement softens sharp angles without hiding them. See our wavy pixie guide for more finish options.
Undercut Pixie
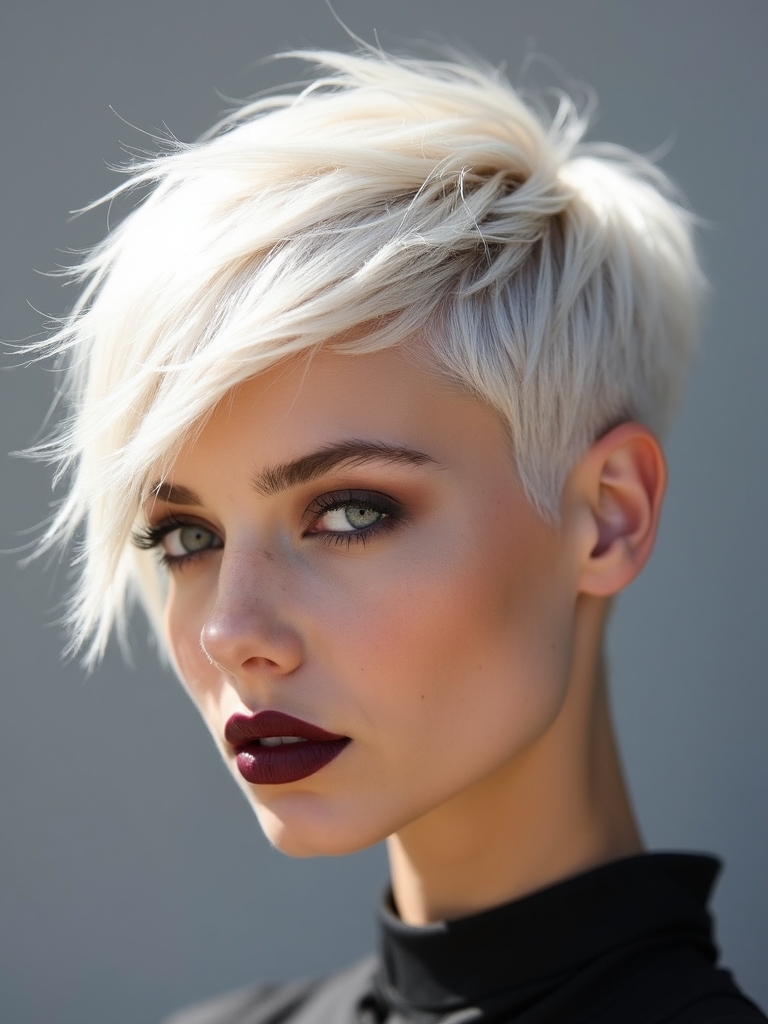
An undercut hides a buzzed section beneath a longer top. It’s less about shock value than about weight: on thick hair, it removes bulk a regular taper can’t touch.
Polish here comes from contrast, the buzzed section staying crisp while the top gets styled however you like, sleek or textured. Ask about a buzz length that stays clean for a few weeks between full cuts.
It works well for anyone who likes having edge as an option without wearing it daily. Style the top down over the buzz for work, sweep it up to reveal the undercut for a night out. Full styling breakdown in our undercut pixie guide.
Asymmetrical Pixie
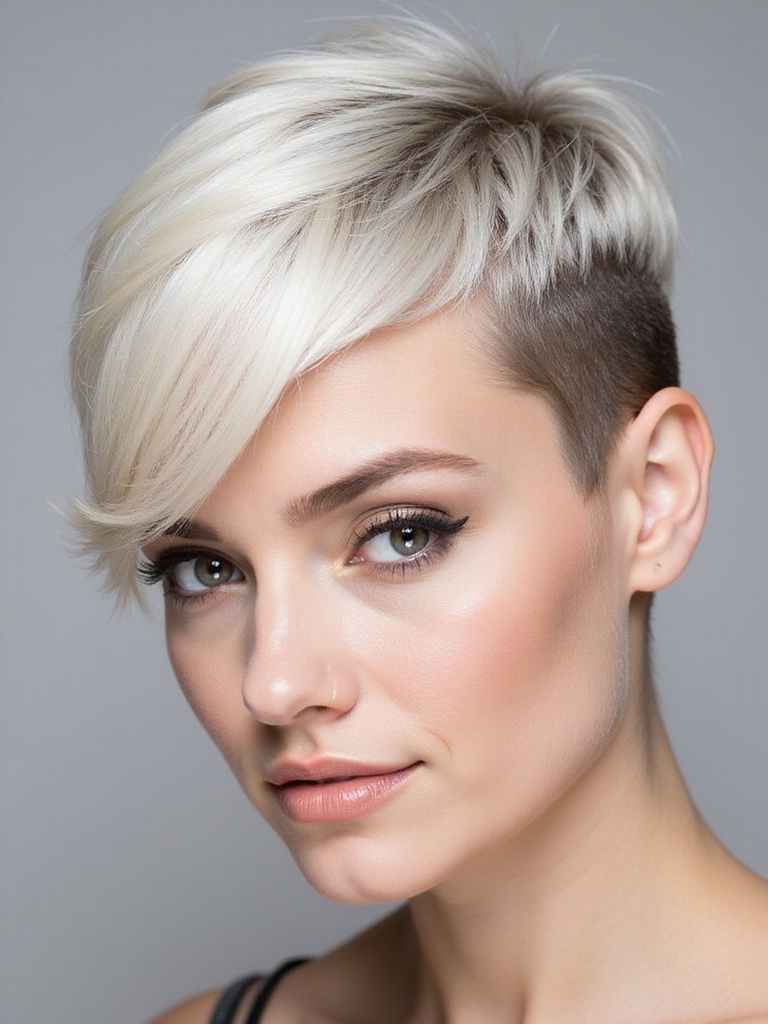
An asymmetrical pixie keeps one side noticeably longer, the angle cut on purpose. The longer side is styled smooth and swept against the shorter one, so the imbalance looks like a choice.
- Flatters round and square faces especially, thanks to the slimming diagonal line
- The longer side needs a light gel or serum to stay swept and framing the face
- Grow-out is more forgiving than on a symmetrical crop, since the angle just shifts gradually
Two things people assume about asymmetrical pixies that aren’t quite true:
❌ Myth: Myth: it needs constant flat-ironing to look right.
✅ Reality: Fact: it holds its line with just a comb-through and a dab of product on the second or third day, since the cut itself carries the shape.
❌ Myth: Myth: you can DIY the reshape once you know the angle.
✅ Reality: Fact: the two sides grow at different visual rates once one is longer, so professional upkeep matters more here than on a symmetrical crop.
Long-Top Pixie
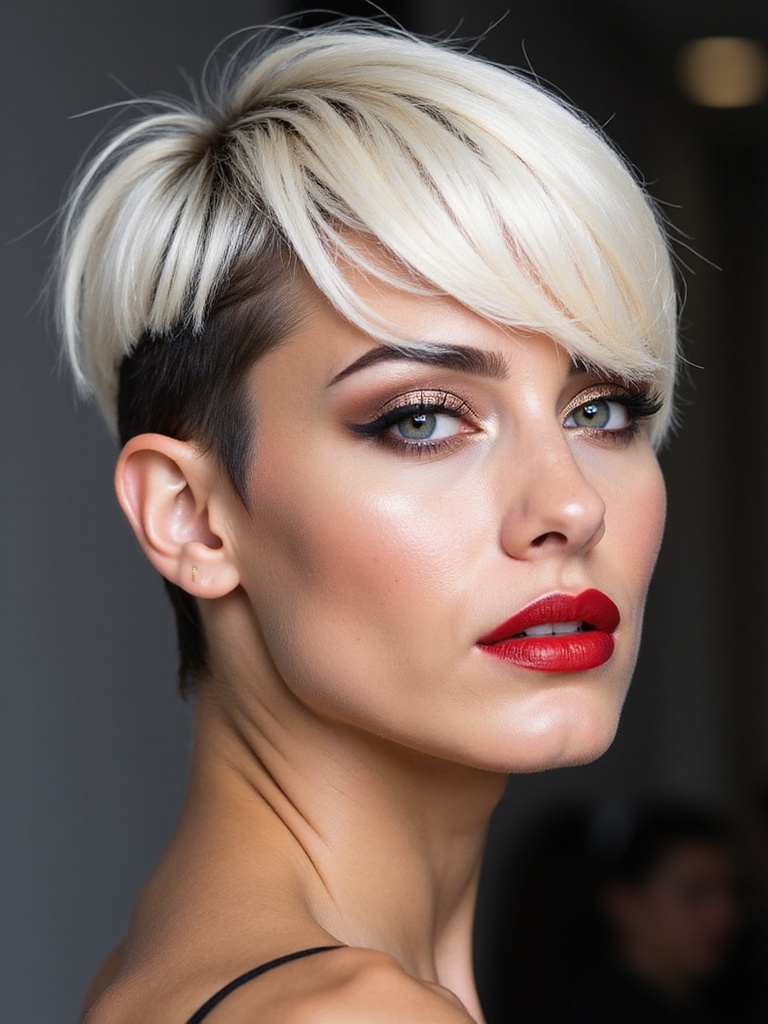
A long-top pixie leaves real length on top over tapered, short sides, which gives you more to actually do with your hands each morning than the shorter versions allow.
Sweep it to one side, spike it up, quiff it forward, or smooth it flat. The tapered sides stay neat no matter what you do up top, and that flexibility is what makes it easy to live with when your mood changes week to week.
Side-Swept Bangs Pixie
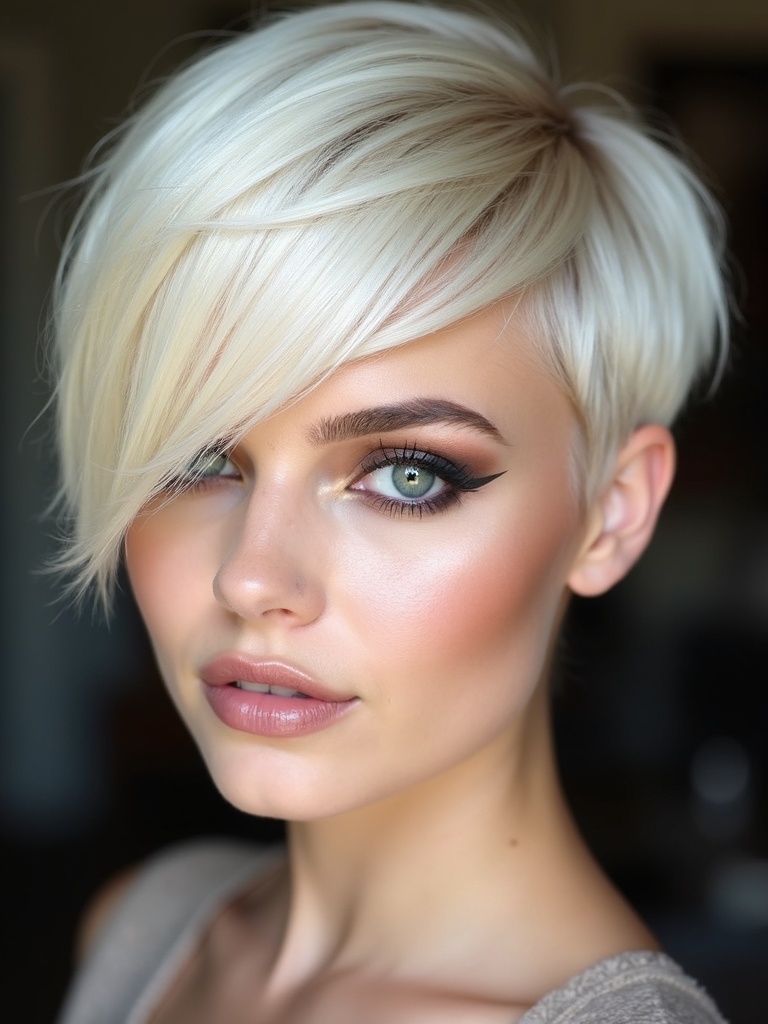
Soft, side-swept bangs soften a crop instantly, sweeping across the forehead instead of stopping in a hard line.
Dry them across with a round brush and a bit of tension so the sweep holds through the day. It’s a forgiving detail on almost every face shape, and it grows out into a longer fringe without the awkward in-between stage that comes with longer bangs, a rare low-commitment detail for a cut this short.
Wet-Look Pixie
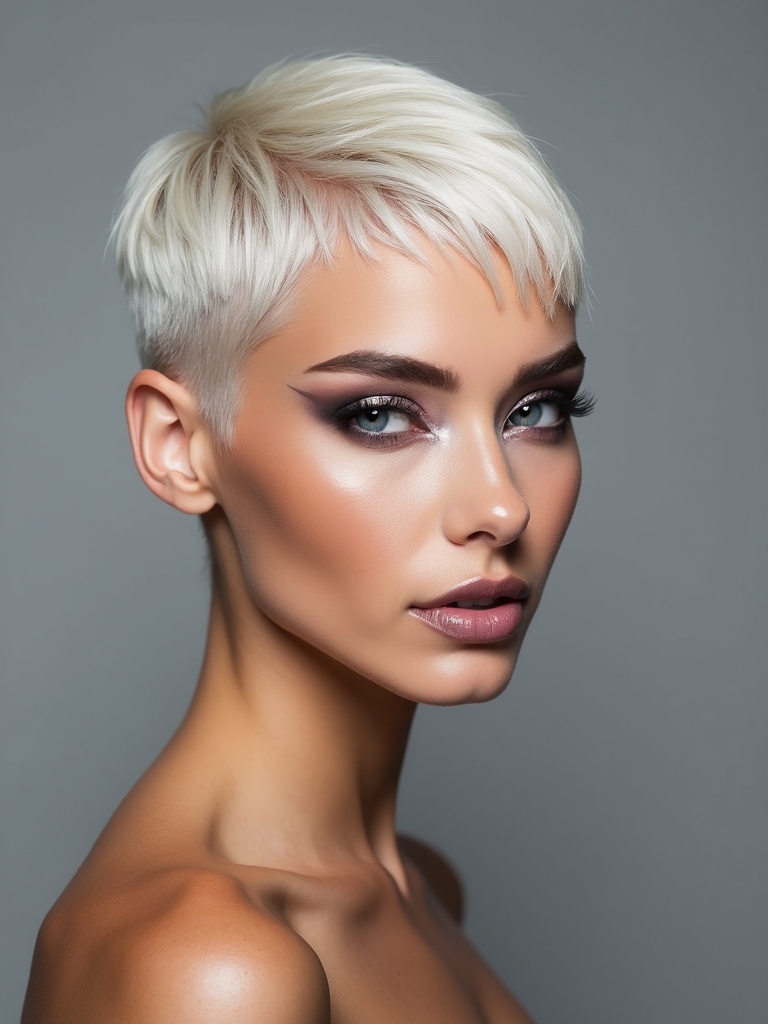
For editorial polish, a wet-look pixie leans all the way into shine: gel combed through and slicked back until the whole shape looks lacquered.
Most people save it for a night out or a shoot, since it’s also nearly foolproof: the gel does the shaping for you. Comb a strong-hold gel through damp hair, slick it back in one direction, let it set, and wash it out before bed.
Volume Crown Pixie
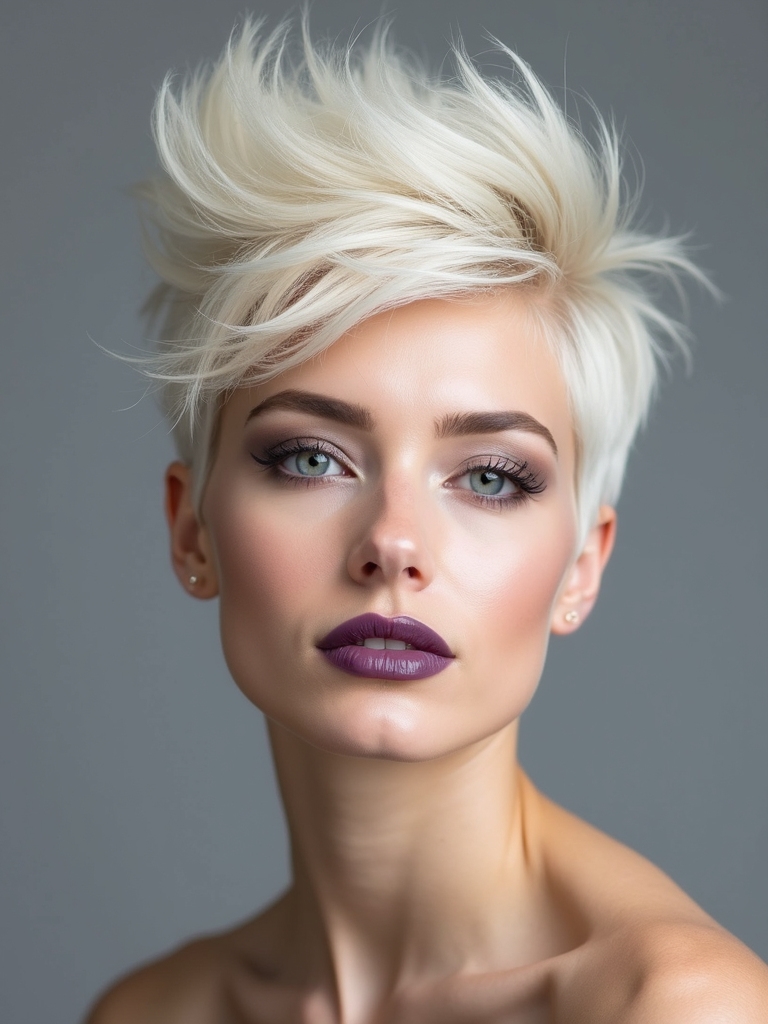
Height at the crown and smooth sides make this pixie do a job the others don’t: correct for fine or flat hair instead of just styling around it.
- Dry the crown upward against the roots first, then flatten the sides last
- A root-lifting spray on damp hair gives the blow-dry something to hold onto
- Best on fine, thin, or limp textures; thick hair rarely needs this much lift
💡Root Lift Rule
Product timing matters more than product choice here. Work lift spray or mousse into soaking-wet hair before the blow-dryer ever touches it; add it once hair’s already dry and you’re fighting gravity with nothing left to grab.
Pixie Styling Products
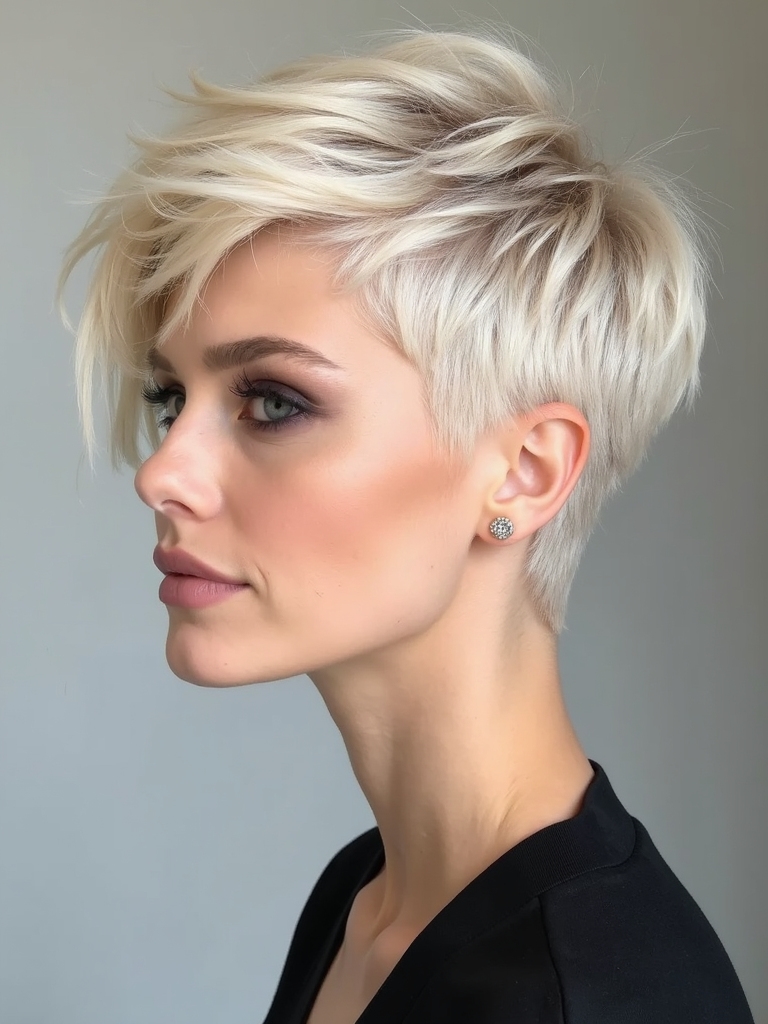
A polished pixie runs on very little product, which is part of why it’s cheaper to maintain than it looks at first glance.
The Short Kit
Match the finish to the goal: matte paste for undone texture, a pomade for sleek shine, a light texture spray for lift at the crown. Start with less than feels like enough. A pea-sized amount covers most short cuts, and too much is the fastest way to slide from polished into greasy.
Dry shampoo earns its place here too, since a pixie shows oil at the roots faster than longer hair hides it. One spray at the crown between washes keeps the shape from going flat by day two.
Pixie Maintenance
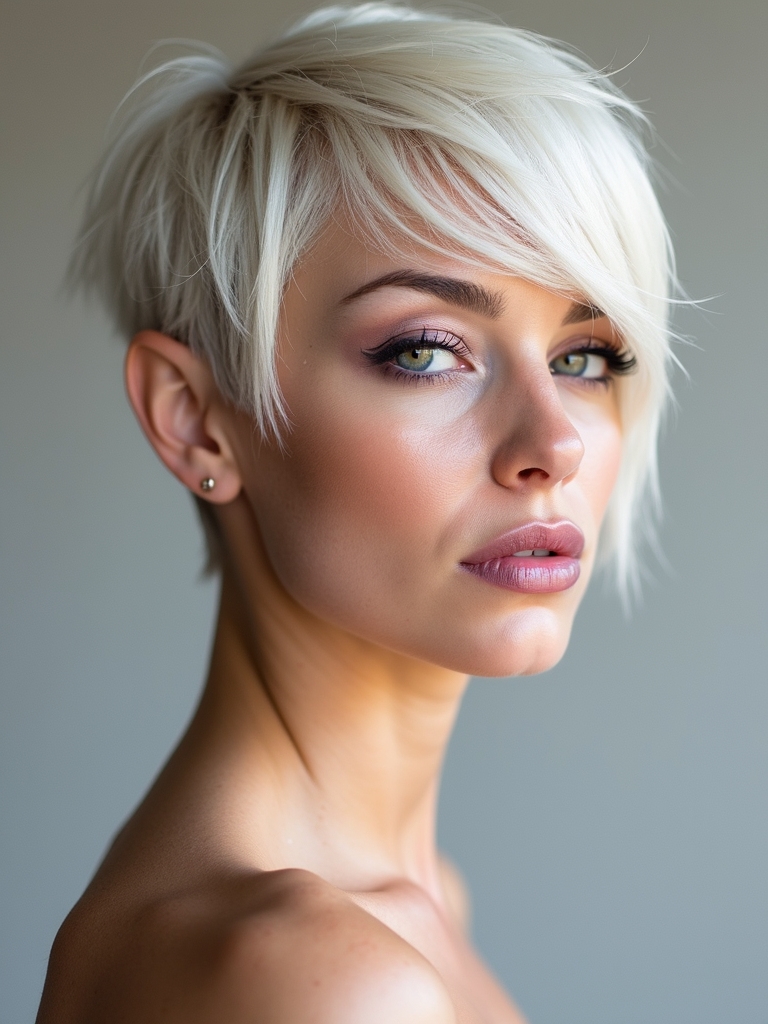
The real cost of a pixie isn’t the product. It’s the calendar.
The shape softens as it grows, so most wearers book a reshape around the five-week mark, with tapers and undercuts wanting a quick tidy sooner than that. Plan on around $55 for the reshape itself, give or take your salon and city. Week five is also when I hear from clients the most, usually a photo asking if it’s time yet; if you’re asking, it probably is.
In exchange, you get almost no styling time day to day, which is the trade most pixie wearers say is worth it once they’ve lived with it a while. Thinking about growing it out instead? Our growing out a pixie page is honest about the awkward stages.
Washing and Sleeping On It
Between cuts, a pixie needs less washing than most people expect. Every other day is plenty for most textures, since over-washing strips the very texture you’re trying to keep. Sleeping on it can undo a whole morning’s styling, so a silk or satin pillowcase is worth the switch if you keep waking up with one side flat.
Product buildup shows faster on short hair than on any longer length, so a clarifying wash roughly twice a month clears paste and pomade buildup before it dulls color and shine. If you’re coloring it too, ask about a gloss refresh alongside your cut, an easy way to keep a pixie looking as sharp as the day you left the chair.
Questions Before You Book a Pixie
?Will a pixie work if my hair is naturally thick?
Yes, and often better than on fine hair, since thickness gives a cropped shape more structure to work with. The one adjustment is weight removal: ask about point-cutting or an undercut section underneath, so the top doesn’t puff out instead of laying close to the head.
?What’s the real difference between a pixie and a buzz cut?
A buzz is one uniform length done with clippers. A pixie is cut with scissors and shears into distinct layers, longer on top than at the sides and nape, which gives you somewhere to go stylistically that a buzz doesn’t.
?Can I still wear a ponytail or half-up style this short?
Only on the longer versions. A long-top or grown-out pixie can usually manage a small half-up twist with a couple of bobby pins, but anything cropped closer than about two inches won’t gather. If styling versatility matters, ask for extra length on top from the start.
?How do I know which of these shapes actually suits my face?
Bring more than one photo to your consultation and let your stylist weigh in; hair density and growth pattern usually matter more than face shape alone. As a rough starting point, softer, rounder crops flatter angular faces, while an asymmetrical or textured shape adds definition to a rounder one.
Which One Are You Taking to Your Stylist?
The cut gives you the shape here; the styling gives you the polish. Skip the finish and even a sharp cut looks unfinished. Get it right, and the same crop reads like it took an hour instead of ninety seconds.
Bookmark whichever version caught your attention and screenshot the photo before your next appointment. A specific reference does more work in a consultation than trying to describe a look out loud ever will.
Next Up





