


Three months into growing out a pixie is where most women panic and book an emergency chop. The hair hits a flat, mushroom-y stage where nothing sits right, and it feels like proof the whole plan was a mistake. It almost never is. A few strategic layers, a part change, and a real plan usually turn that stage around within weeks.
The awkward phase is not bad luck, it is a stretch you manage with small, deliberate moves. Below is a stage-by-stage approach for riding the in-between out looking intentional the whole way.
Quick Answers on Growing It Out
How long does it take to grow a pixie to a bob? Hair grows about half an inch a month, so plan on eight to twelve months to reach a chin or jaw-length bob, and 18 to 24 months for shoulder length.
Do I really still trim while growing it out? Yes. Regular shape-up trims on a roughly six-week rhythm are what keep the grow-out looking shaped and intentional.
What is the hardest stage? The three-to-five-month mark, when the sides reach the ears and want to flip out. Layers, a part change, and texture carry you through it.
Make a Grow-Out Plan, Not a Guess

The women who grow out a pixie happily are the ones who treat it as a series of cuts, not a waiting game. When you know roughly what each stage looks like, the awkward months stop feeling like failure and start feeling like progress. Map it out with your stylist on day one.
- Months 1 to 3: still a long pixie. Keep the shape sharp and enjoy it.
- Months 3 to 6: the in-between. Add layers and texture so it looks like a crop or shag.
- Months 6 to 12: a soft, layered bob arrives. Now you are shaping, not surviving.

Why You Still Trim While Growing It Out

It feels backward to cut hair you are trying to grow, but a grow-out with no trims at all turns unkempt fastest, not slowest. The fix is the micro trim, sometimes called dusting, where your stylist takes only the frayed ends and cleans the neckline without touching your length.
What dusting actually removes
What you are really doing is controlling the shape as it changes. Letting the nape and sides grow wild while the top lags behind is what creates that bottom-heavy, shapeless look people dread. A light cleanup keeps the silhouette balanced.
Plan on a dusting roughly every one and a half to two months, which usually runs $20 to $40, far less than a full cut. Tell your stylist plainly that you are growing it out so they take the bare minimum.
Not sure which stage you are in? Match your hair to the phase:
1My sides still sit above my ears.
You are in the long-pixie phase. Keep the shape crisp and enjoy it while it lasts.
2My hair flips out at my ears and feels flat on top.
Classic middle stage. Time for layers, a curtain fringe, and more texture.
Layers That Stop the Pyramid

The dreaded pyramid is what happens when the top of your head stays short and full while the bottom grows out and widens. It gives you a triangle silhouette that feels frumpy, and it is the number one complaint I hear at the halfway point.
Layers are the cure. By having your stylist connect the shorter top into the longer sides with soft, graduated layers, you redistribute the weight and keep the shape rounded and flattering. The layering should follow your head shape, since every head falls differently.
This is the single most important conversation to have at your trims from month three on. Skip the layering plan and you are signing up for a year of bad hair days instead of a smooth grow-out.
Let It Become a Shag

The smartest reframe I can offer is this: stop growing out a pixie and start growing into a shag. The shaggy cut is built on exactly the choppy, uneven lengths a grow-out produces, so it works with the very stage you are in.
Turning limbo into a real haircut
As your hair passes the ear-length mark, ask for choppy, textured layers and a soft, piecey fringe. Suddenly that limbo length has a name and a shape, and people take it for a deliberate haircut.
It is also a gentle on-ramp to longer styles later. A grown-out shag transitions into a layered bob or a longer lob without any awkward chop in between.
ℹ️Good to Know
Hair grows roughly half an inch a month, or about six inches a year. That means a pixie reaches a jaw-length bob in eight to twelve months and shoulder length in around two years. Knowing the real pace keeps the mirror-checking in perspective.
Keeping an Early Grow-Out Sculpted
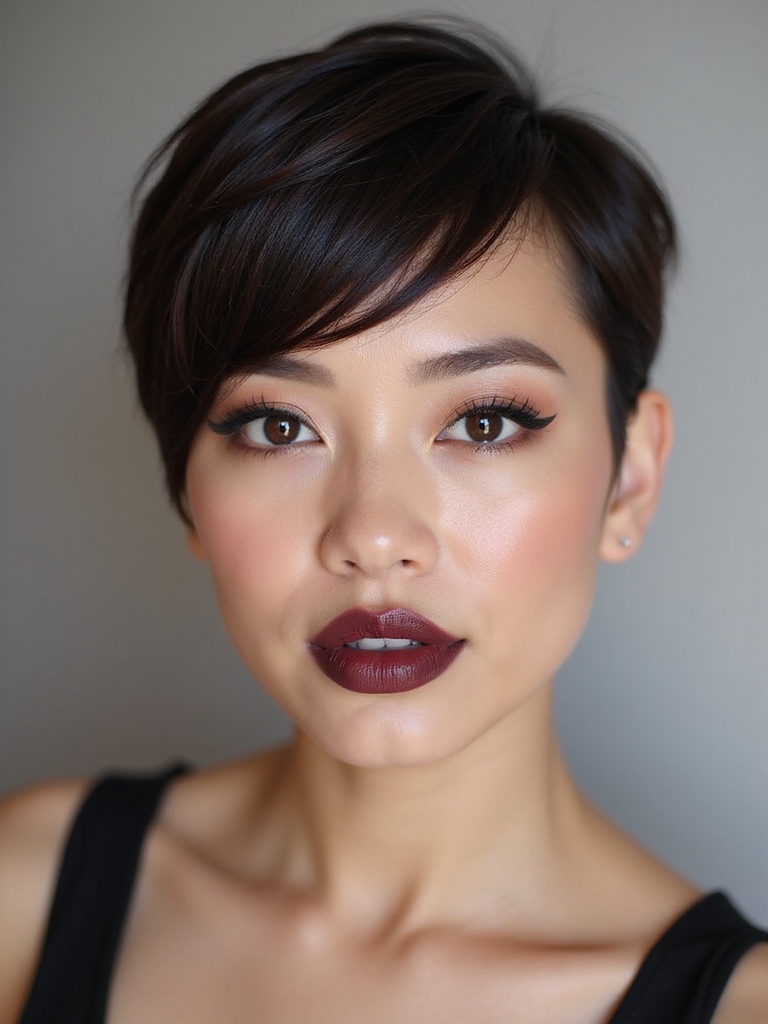
In the first few months, before there is enough length to layer, your best friend is structure. A sculpted crop shape, kept clean and intentional, looks far more polished than letting a pixie just drift longer and shaggier on its own.
Ask your stylist to keep a defined line at the neck and some shape through the crown even as the overall length increases. The goal is for every stage to look like a haircut you chose.
This early phase is the one to lean into and enjoy. A well-kept long pixie is a chic look in its own right, and there is no prize for getting through it quickly.
Bridge the Middle With a Curtain Fringe

When the top and front lengths hit that gangly middle stage, a curtain fringe is the rescue. By cutting the front pieces into a soft, center-parted fringe that frames the face, you give all that in-between length a purpose and draw the eye to your features while the shape catches up. It is the move I lean on most at the five-month wall.
- Ask for a soft curtain fringe that blends into the face-framing pieces and stays soft.
- It grows out gracefully, so it never traps you in another awkward stage.
- Sweep it to the sides with a boar-bristle brush and a blast of warm air for an instant polished look.
“The clients who hate growing out a pixie are almost always the ones who skipped their trims to save length. It backfires every time. Six weeks between dustings is the rhythm that keeps you sane.”
Texture Over Tidy in the Short Stage

While the hair is still short and growing, texture is what saves you. A smooth, flat grow-out shows every uneven length. A tousled, piecey finish hides it and looks current. This is the stage to embrace messy on purpose and put the flat iron away.
- Work a pea-sized bit of texture paste through dry hair and scrunch.
- A spritz of sea-salt spray on damp hair builds piecey separation as it dries.
- Tip your head and rough-dry with your fingers for lift instead of a sleek blowout.
Move Your Part to Balance the Face

Never underestimate what a part change does during a grow-out. As the lengths shift, the part you have always worn can suddenly make your hair sit flat or your face look unbalanced. Experimenting costs nothing and can transform an awkward week.
- Try a deep side part to add volume and sweep length across the forehead.
- A soft zigzag part hides regrowth lines and adds fullness on top.
- Switch your part to the opposite side of a cowlick so the root lifts and covers the regrowth.
👍Growing it out
- +Versatility ahead: updos, tucks, and longer styles to come.
- +A shag and bob phase you may love more than you expect.
- +A fresh change without a drastic new cut.
👎Keeping the pixie
- –Months of shaping trims and daily styling to get through.
- –An awkward middle stage that tests your patience.
- –Regular salon visits are non-negotiable to keep the shape.
Lean on Clips, Bands, and Scarves

Accessories are the unsung heroes of a grow-out, because they give you something to do with pieces that are too short to tuck and too long to ignore. A few small clips pinning back the sides, a headband taming the top, or a scarf tied over a flat day all turn a problem length into a styled choice.
This is also where a grow-out gets fun. Stock a little basket of claw clips, bobby pins, and a couple of headbands, and you will reach for them constantly through the middle months. They photograph well and buy you time on days nothing else cooperates.
Heatless Waves That Hide the Length

Once you have a couple of inches to work with, heatless waves are a grow-out gift. Bends and waves break up the uniform lengths that make a grow-out look flat, and they add the movement that looks intentional. Best of all, they spare your fragile growing hair from daily heat.
There are several easy ways to get them with no hot tools at all, and they work beautifully on the shorter lengths of an early grow-out.
- Twist damp sections into little flat pins and leave them to dry for soft bends.
- A foam roller set on barely-damp hair gives controlled waves overnight.
- Scrunch in a curl cream and air-dry for a relaxed, undone texture.
The Pastes and Creams That Carry You Through

You do not need a shelf of product to survive a grow-out, just the right two or three. The job is to add control and texture without weighing short hair down, so everything should be lightweight. Heavy creams and oils flatten a grow-out and make it look greasy.
Once you find your handful, the daily routine takes under five minutes, which matters across the many months this whole process takes.
- A matte texture paste for piecey separation and hold on short lengths.
- A light sea-salt or texture spray to build movement on damp hair.
- A tiny bit of smoothing cream for the longer front pieces only, to tame flyaways.
Work With Your Cowlicks

Cowlicks and natural growth patterns get loud during a grow-out, because there is just enough length for them to push hair in directions you did not ask for. Fighting them daily is exhausting, so the smarter path is to style with them. Here is how I coach clients to tame a stubborn cowlick.
- Dry the cowlick area first, while soaking wet, directing it back and forth to break the set.
- Blow-dry the area with a small round brush on hot, then finish with a cool-air blast to train the piece where you want it.
- Part your hair to use the cowlick for lift, putting that stubborn growth to work.
Use Color to Fake Intention

Color is a quiet trick for making a grow-out look like a plan. A few soft face-framing highlights or a glossy dimensional tone draws the eye to movement and shine, which distracts from any unevenness in the shape underneath.
A shine gloss every few months keeps the whole grow-out looking healthy and deliberate, and healthy hair always looks more polished than a perfect cut gone dull. This matters more as your hair gets longer and the ends get older.
Keep it low-commitment. You want color that grows out as softly as the cut, so balayage and gloss beat a solid root that demands constant upkeep during an already busy stretch.
What to Say at Each Salon Visit

The single most useful thing you can do is communicate clearly at every appointment. Walk in and say the words out loud: I am growing this out, please take the minimum, and help me shape it for this stage. A surprising number of unwanted inches disappear because a client did not say that plainly.
Bring a photo of where you are headed and ask your stylist to name the next milestone. When you both know the destination, every trim becomes a step toward it. For the longer end of the journey, the long pixie and how to style short pixie hair guides help you style each phase.
A Low-Maintenance Routine You Will Actually Keep

The grow-out is a marathon, so the routine has to be one you can keep for months without resenting it. The women who make it through without chopping lean on one or two reliable moves that take five minutes.
Find your formula: maybe it is salt spray and a scrunch, maybe a part change and two clips, maybe heatless waves twice a week. Once you trust a couple of quick fixes, the bad days stop feeling like emergencies.
Be patient with the calendar, too. Half an inch a month is slow, and obsessing over the mirror makes it feel slower. Take a photo every month instead, and you will see the progress your daily eye misses.
Who It Suits Best
Growing out a pixie rewards patience above all, so it suits the woman who can commit to regular shaping trims and a little daily styling for the better part of a year. If you love your pixie but crave change, or you simply miss having length to play with, the grow-out is absolutely worth riding out with a plan.
It is a tougher road for anyone who cannot get to the salon every couple of months, since the shaping trims are what keep it from going shapeless. If that is you, consider keeping a grown-out pixie or a choppy crop as a long-term style you love. There is no shame in loving short.
Growing Out a Pixie Questions
?How do I survive the awkward stage of growing out a pixie?
Layers, a curtain fringe, texture, and accessories. The awkward stage is almost always the mushroom-shaped middle, around months three to five, and those four tools reshape it into something deliberate while you wait for length.
?Should I get my hair trimmed while growing out a pixie?
Yes, roughly every one and a half to two months, but only a dusting. Your stylist takes just the frayed ends and cleans the neckline without touching your length, which keeps the grow-out shaped instead of shapeless. Say clearly that you are growing it out.
?How long until my pixie is a bob?
About eight to twelve months, since hair grows roughly half an inch a month. A shoulder-length cut takes around 18 to 24 months. A few well-timed layering trims make every month of that look intentional.
The In-Between Is a Phase, Not a Verdict
Growing out a pixie is not something you suffer through, it is something you style through. With a stage-by-stage plan, regular shaping trims, and a few reliable tricks like layers, a curtain fringe, and texture, every month of the grow-out can look like a haircut you meant to have.
Map it with your stylist, trust the half-inch-a-month pace, and lean on clips and texture on the hard days. The bob you are after is closer than the mirror makes it feel.
Don’t Miss These





