


A wavy pixie looks a certain way in photos for a reason that has nothing to do with luck: it’s cut to hold a bend, and it’s finished with a few minutes of styling nobody sees in the picture. Skip either half and the same cut ends up reading flat or frizzy.
What follows sorts six of them by how bold the wave gets, with the cutting and styling specifics for each: how to build the bend whether hair starts out straight, wavy, or curly, and the handful of mistakes that turn an easy, undone crop into something that just looks unfinished.
Wavy Pixie Haircut, Sorted by Starting Point
| Starting Texture | What to Ask For | Styling Time |
|---|---|---|
| Straight hair | A little extra length on top plus a heatless overnight set | Under five minutes once it’s set |
| Natural wave | A cut that follows the wave already there, a light reshape | A couple of minutes with product |
| Curly or coily | A dry cut, shaped to the pattern at rest | A quick scrunch and go |
A Tousled Crop With Airy Side Bangs
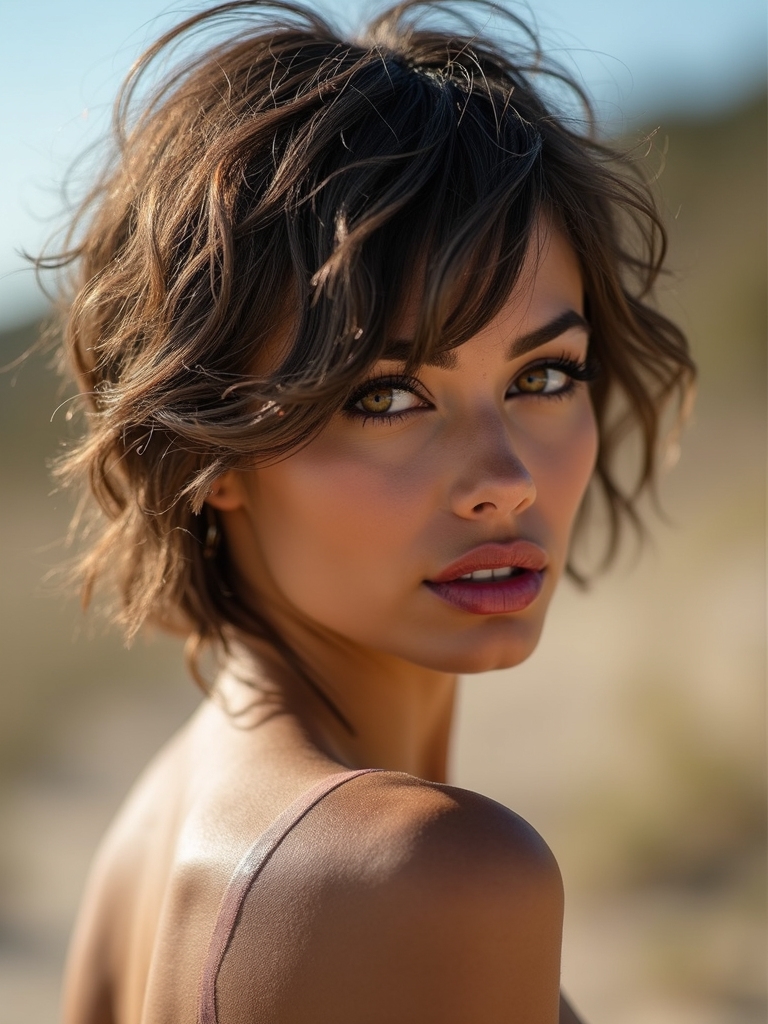
Start here if you’re only trying one wavy pixie: a tousled crop with soft, airy side bangs, the wave kept gentle and the fringe sweeping to frame the face. It reads relaxed and put-together at the same time, and it forgives a lot in the styling.
The Place to Start
Leave more length on top than the finished photo suggests. The wave needs somewhere to actually bend, and the side bangs blend softly into the crop as one continuous piece, so expect them to spring up a little once they dry.
Between full cuts, this shape stays wearable the longest of anything here, since there’s no sharp line underneath to grow out and blur. A light-hold texture cream worked through damp hair, rough-dried with the fingers instead of a brush, is close to the entire daily routine. That combination of low upkeep and long shelf life is exactly why it’s the one to try first.

A Piecey, Undone Pixie
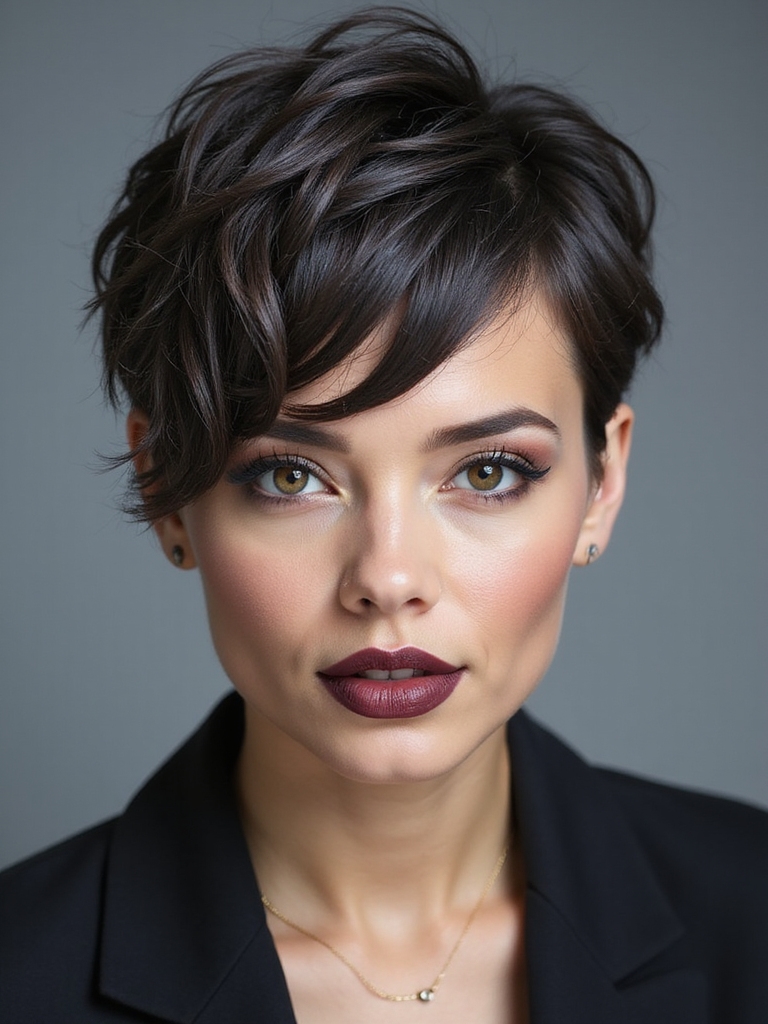
Add grit and separation to the soft crop and it turns into something with a deliberately undone edge, close in feel to a full choppy pixie cut but softened by the wave underneath.
A specific product routine is doing real work to get that look, even though the end result looks like it took no time at all. It’s a strong pick for anyone in a creative field who wants short hair with an edge but zero patience for a fussy morning, and it photographs especially well, since the separated pieces catch light and shadow in a way a smooth crop never does.
- Scrunch a salt spray into damp hair for gritty, piecey definition
- Rough-dry it, then pinch pieces between your fingers to separate them
- A dry texture spray on day two brings the definition right back
A Curly-Edge Wavy Pixie
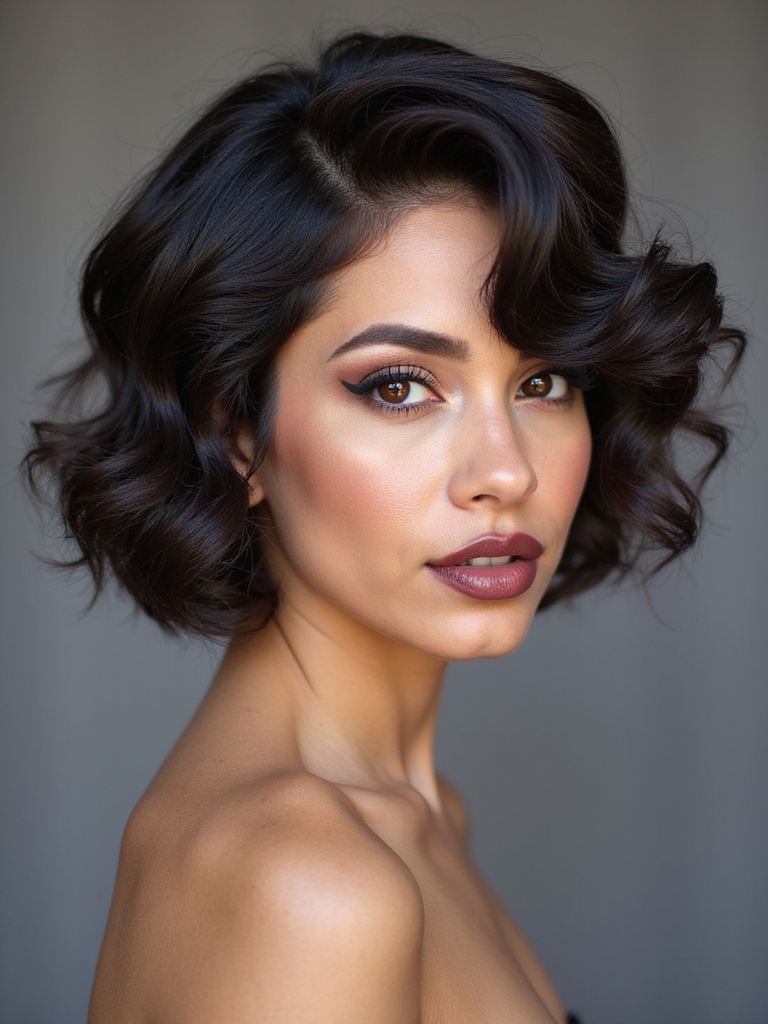
This version exists for hair that won’t commit to either category, wave on top, curl underneath, or somewhere in between depending on the week. Rather than average that out into a uniform bend, the cut follows whatever pattern is actually present, the same logic our curly pixie guide walks through in more depth for tighter textures.
Cut for the Texture You Have
The one non-negotiable is that it has to be cut dry, on the pattern at rest. Wet wave and curl drop and settle in places they won’t hold once they spring back up. Ask about chair time when booking; a dry, texture-specific cut runs longer than a standard wet trim, and it’s worth confirming the appointment is scheduled for it.
Shrinkage shows up here too, especially on tighter sections, so the finished length reads shorter than the hair measures when stretched out. A stylist experienced with textured hair walks through that gap before the first cut, so there’s no surprise once everything settles into its resting length.
“I ask every curly-edge client one question before picking up the scissors: how much time do you actually spend on your hair most mornings? The honest answer decides how much shaping happens versus how much gets left to the natural pattern, and it’s the single biggest reason two clients with near-identical curls walk out with different cuts.”
A Soft Undercut With Swept Waves
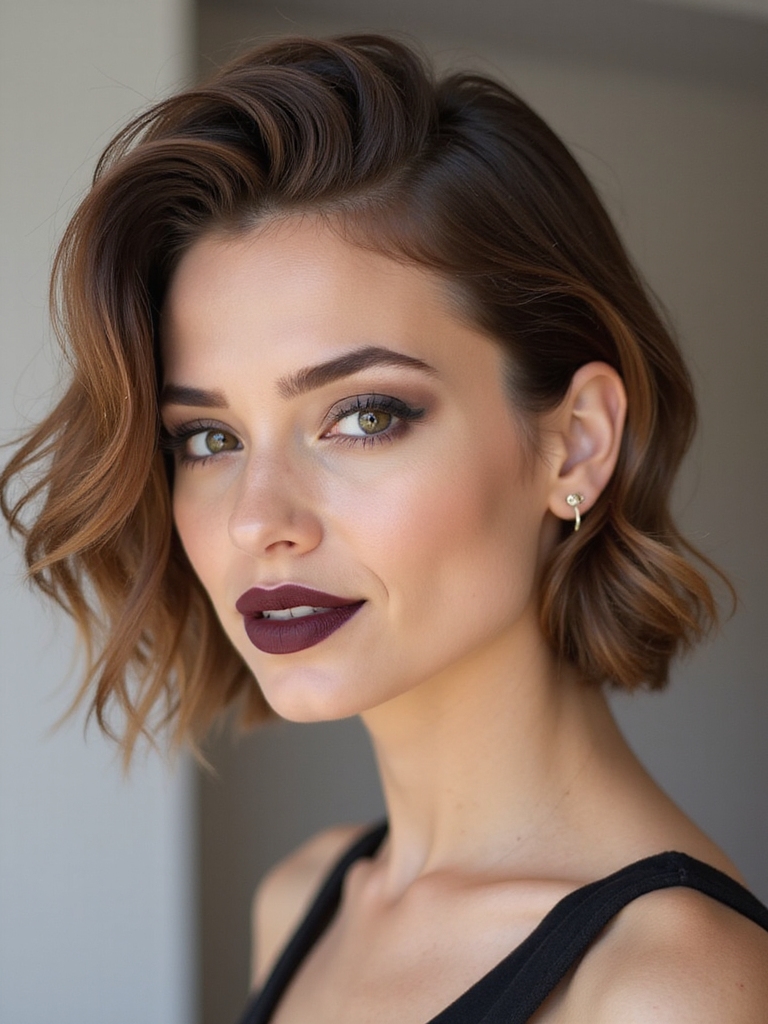
Pairing a soft undercut with swept waves gets edge and softness into one cut. The undercut, usually tucked at the nape or sides, removes weight so the waved top sits fuller and higher than it would over the full density underneath, while the swept waves keep the whole thing from looking severe.
Edge Without Losing the Softness
It’s a strong pick for thick hair, since the undercut solves the heaviness that flattens waves on dense strands. A gradual fade rather than a hard shaved line lets it grow out without an awkward stage, and it stays hidden under the top length between visits when that’s the preference.
The undercut pixie guide breaks down placement in more depth for anyone who wants the shaved section more visible than hidden.
A Micro Pixie With Defined S-Shaped Bends

At the boldest end, a micro pixie with small, sculpted S-shaped bends proves even the shortest crop can hold real wave pattern. The hair stays cropped close everywhere else, with tiny, deliberate bends pressed into just the top for a graphic, retro-leaning finish that’s really a styling statement built on top of a very simple base cut.
This takes the most precise styling of anything here, since the bends are small enough that a slip with the tool shows immediately against so little surrounding hair to disguise it. Blow-dry the top smooth and fully dry first, so the tool is building the S-pattern from scratch rather than fighting whatever natural bend was already there.
A fine-barrel wand or a small flat iron presses each S-shape in, working from the front hairline back, section by section, set with a light-hold spray before it cools so the shape locks in for the day.
- A fine-barrel wand or small flat iron for pressing in the bends
- Work in small sections; this isn’t a cut to rush through
- Best for anyone who actively enjoys the styling process itself
ℹ️Precision Over Speed
This version takes closer to fifteen minutes to style well, longer than every other look here. It’s the trade for a wave pattern this defined at this short a length.
An Off-Balance Wavy Pixie

Leaving one side noticeably longer turns a wavy pixie dynamic, with the off-balance line cutting a diagonal that lifts and frames the face, a gentler cousin of a full asymmetrical pixie.
On its own, that length gap would look stark; the wave takes the hardest edge off it, so the cut reads confident instead of costume-like. The longer side needs its own attention in the styling routine, since it holds more weight and takes a beat longer to dry than the cropped side.
- The longer side does the face-framing work; style it forward
- Works especially well on oval and heart-shaped faces
- This line blurs fastest of anything here; book the next shape-up around five weeks out
The Styling Routine That Actually Works
The styling deserves more credit than the cut itself usually gets, and the good news is it’s fast once the order clicks. Start with hair that’s damp, not dripping. Waves set best while the hair is still finishing its dry, roughly the same damp stage as the rest of this list.
Work a light product through, a curl cream for natural texture or a salt spray for beachier results, focused on the mid-lengths and ends where the bend actually lives. Skip the roots; product there just adds weight, no shape. Cup the pieces in your palm and press them up toward the scalp to encourage the wave to stack.
Then leave it alone completely. Touching the hair while it dries is the single biggest cause of frizz on a cut this short, since every pass with a finger or comb breaks the bend before it sets. A diffuser on low heat speeds things up on mornings when air-drying alone takes too long.
Mistakes That Undo the Wave
The biggest mistake is cutting it too short to hold a bend in the first place. A wavy pixie needs a little length left on top to work with, so a true micro crop everywhere leaves nothing for the wave to do. Saying the word ‘movement’ out loud in the consult is usually enough to keep that length in place.
The Three Repeat Offenders
The second-most-common misstep is product. Too much flattens the wave. Too little lets it drop within the hour. A coin-sized amount is usually plenty at this length; more sits on the surface and does nothing useful. Match the finish to the goal: matte for piecey texture, a touch of shine cream for smoother waves, and skip anything heavy enough to weigh the crop down.
Heat is the third trap, specifically a flat iron or curling wand used on hair that’s already fully dry and already carrying some natural bend. It fights the existing pattern, and that’s usually how a soft wave turns into a frizzy halo by midday. Save heat tools for hair without a pattern of its own to add one.
Who Ends Up Happiest With This Cut
A wavy pixie suits more hair types than expected, though a few things make it easier. Natural wave or curl is the shortcut, since the cut just frees what’s already there. Straight hair works too, using the heatless overnight method covered below.
Face shape matters less here than with most short cuts, since the soft texture and the option of a side sweep or face-framing pieces flatter a wide range of proportions. The real requirement is patience through the in-between stages between trims, more than any specific face or texture.
Anyone who liked this list but wants to see the cut grown a little longer can compare it against a grown-out pixie for that stretch. For straight hair specifically: damp hair gets wrapped around foam rods or twisted into a few loose sections, pinned or tied down, and slept in overnight, then unwrapped in the morning to a set wave without any heat involved.
Lifestyle matters more than most people expect going in. Anyone who showers at night and can let hair air-dry overnight gets the easiest version of this cut, since the wave is already set by morning. A strict morning-shower routine still works, it just adds a diffuser and a few extra minutes to most days.
Wavy Pixie Haircut Questions
?Does an undercut change how the waved top behaves, or just the sides?
Just the sides and back. The waved top gets cut and styled the same way regardless of what’s happening underneath, and removing weight down there can actually give the top more lift to work with, not less.
?Is the micro pixie with S-bends hard to walk back from once the styling gets old?
It’s one of the easier bold looks to soften, since there’s no length to grow out, only a technique to stop using. Skip the flat iron for a week or two and the S-bends relax into a looser, more casual texture on their own.
?Does a wavy pixie grow out gracefully, or does it need rescuing at some point?
It grows out better than a blunt pixie, since the wave disguises the in-between length. A shaping trim every six to eight weeks keeps the proportions from drifting too far before the next real decision point, priced and timed like any other pixie shape-up, roughly $40 to $75 and under an hour in the chair.
Two Things, Working Together
A wavy pixie really comes down to two things working in tandem: a cut with the right length and layering to hold a bend, and a few minutes of styling matched to the actual texture in the chair. Get either one wrong and the other has to work twice as hard to compensate, which is usually where the frustration starts for people who feel like the cut just doesn’t suit them.
Try the tousled crop first if none of the six has already caught your eye, since it’s the most forgiving version to learn the styling on before moving toward something bolder. Once the basic technique feels natural, moving toward the piecey texture or the undercut is a much smaller leap than it looks like from the outside.
Worth a Look





