Let me be honest about finger waves: they are harder than they look, and they are worth every minute. Those glossy S-shaped ridges are a true art form, one with deep roots in Black hair culture that runs from the Harlem Renaissance through generations of Black salon mastery to the red carpet today. When they are molded right, nothing else looks like them.
These finger waves on short hair and pixie cuts run from a classic sculpted S-wave to undercut and metallic-toned versions, and most are built for Black hair, where the texture holds a wave with unmatched crispness. For each I will cover the molding technique, the products that actually hold, and the overnight care that keeps the waves sharp, because the styling is the whole craft here.
Before You Mold
- Finger waves are a molding technique, not a cut: S-shaped ridges are pressed in with fingers, a comb, and strong-hold gel, then dried.
- They are a celebrated art form in Black hair culture, and tightly textured hair holds the crisp, sculpted ridges beautifully.
- The look lives on product and patience; a strong molding gel, a fine comb, full drying, and an overnight scarf keep waves sharp for days.
The Classic Sculpted S-Wave

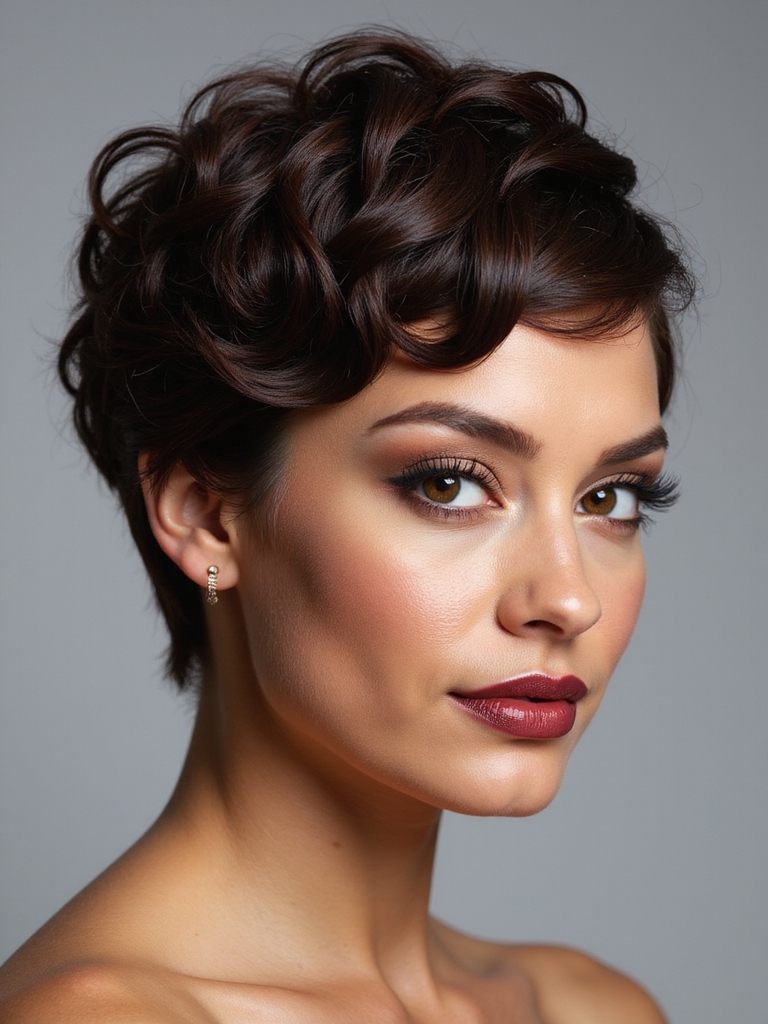
This is the foundation, and the look the whole style is named for. Even S-shaped ridges are molded across the head, each wave pressed into the next, then set glossy and firm so the pattern reads sharp and continuous. On tightly textured hair it holds with a crispness no other texture matches, which is exactly why the women whose grandmothers wore finger waves can still get the sharpest set in the salon today.
It is a true skill, and worth seeing a stylist for your first time. A strong-hold molding gel, a fine comb, and a hooded dryer are the tools, and patience is the technique. Once you watch it done and feel the rhythm of the molding, the simpler versions become doable at home.
Deep Side-Part Waves

Shifting the part deep to one side sends the waves sweeping on a dramatic diagonal across the head. The asymmetry gives the sculpted ridges direction and drama, and it flatters the face by drawing a strong, flattering line from the part downward. It is glamour with real architecture.
To mold it cleanly:
- Set the deep part first with the tail of a fine comb before molding.
- Mold the waves to follow the diagonal, sweeping down and back.
- Lay the edges with a light edge product to finish the line clean.
🅰️Salon-set waves
A stylist who specializes in finger waves gets crisp, long-lasting ridges, ideal for events and for learning the technique.
🅱️Home-molded waves
With the right gel and practice, everyday and soft-ripple versions are doable at home once you have the rhythm.
The Wet-Look Wave

When you want maximum drama, finish the waves wet-look. A high-gloss gel keeps the ridges shining as if freshly set, which reads bold, modern, and unmistakably red-carpet. It is the version that photographs like liquid.
Why Precision Matters Here
The shine is the statement here, so the molding has to be precise, since gloss shows every imperfection. A salon set for an occasion like this runs about $45 to $90 depending on your area, and it is money well spent for camera-ready waves.
Use a high-shine gel or a wave pomade and a fine comb, and lay the edges to match. A satin scarf overnight keeps the gloss from cracking by morning.
Soft Everyday Ripples

Not every finger wave has to be gala-sharp. Softening the ridges into gentle ripples gives you an everyday version that still reads sculpted but takes less precision and less time. It is the wearable, run-the-errands take on the look.
The ridges sit looser here. Small imperfections vanish into the softness. It is the version I send first-timers home to practice while they build their molding hand, and the one I have watched the most clients slowly fall in love with once the ridges start coming out even.
Use a medium-hold gel for flexibility, and let the ripples follow your natural growth pattern. It refreshes easily with a little water and re-molding the next morning.
Mind Buildup and Edges
Heavy styling gel used daily can build up on the scalp and dry the hair, so cleanse thoroughly between sets and keep your hair moisturized underneath. Lay edges with a gentle hand, since repeated hard slicking at the hairline can stress the delicate edges over time.
Bold Waves With Tapered Sides

Pairing molded waves on top with cleanly tapered sides is a sharp, modern combination. The taper keeps the sides close and crisp. All the eye goes to the waves up top. The contrast makes both look more deliberate. It is barber-precise and striking.
It suits women who love a clean, structured look and do not mind regular upkeep on the tapered sides. The waves become the crown of the cut.
Keep the sides freshened every couple of weeks and the waves re-molded as needed. For more cropped shapes, see the pixie styles for Black women.
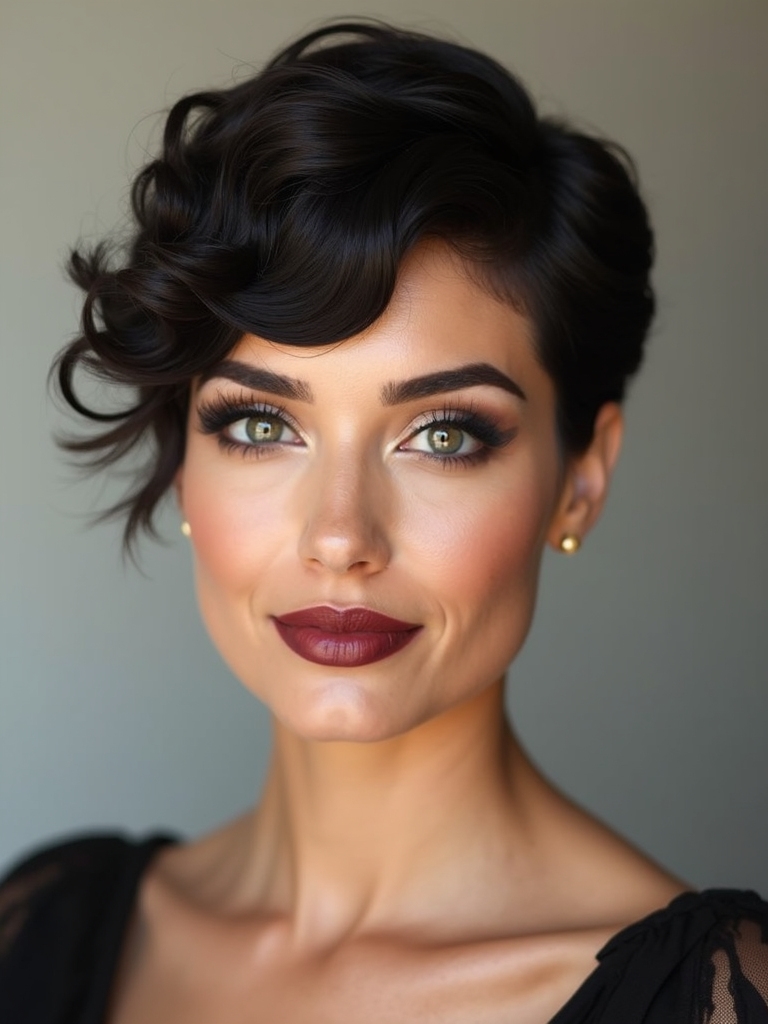
The Finger-Waved Fringe

Concentrating the waves into a sculpted fringe across the forehead frames the face with a single bold ridge of movement. The rest of the pixie can stay simple while the waved fringe does the talking, which makes it a lower-effort way to wear the look. To shape it:
- Mold two or three clean waves into the front fringe section only.
- Keep the back and sides smoothed or lightly tapered for contrast.
- Set the fringe firm, since the front takes the most handling through the day.
One belief that holds people back from finger waves:
❌ Myth: Finger waves are old-fashioned
✅ Reality: Far from it. They are a living art form, constantly reinvented on runways and red carpets, and modern undercut and metallic versions feel completely current.
❌ Myth: You need long hair for waves
✅ Reality: Short hair and pixies are ideal for finger waves; the cropped length makes the sculpted ridges read sharper and more graphic than long hair can.
Vintage Waves With a Modern Undercut

Setting classic waves over a shaved undercut bridges decades in one look. The vintage molded ridges sit on top while a clipped or designed undercut underneath adds a sharp, current edge, so the style nods to history and now at once. It is the boldest fusion here.
A few notes to balance the eras:
- Keep the waves classic and precise so they read intentional against the undercut.
- Add a simple shaved part or design for extra modern detail.
- Plan a clipper touch-up every couple of weeks to keep the undercut crisp.
The Asymmetric Curved Wave

Bending the waves into sweeping curves around an asymmetric shape turns the sculpted look into something fluid and almost liquid. Instead of straight rows, the ridges curve and swirl across the head, following the asymmetry for a bold, flowing effect that feels like art. To mold it:
- Plan the curve direction first, since the swirl has to flow as one piece.
- Mold in long, sweeping motions rather than tight rows.
- Set firm and high-shine so the curves read clean and deliberate.
| Style | Best for | Effort |
|---|---|---|
| Soft everyday ripples | Daily wear, beginners | Lower, forgiving |
| Classic gloss or wet-look | Events, photos, red carpet | Higher, precise |
| Undercut or metallic waves | Bold statements | High, plus color or clipper upkeep |
The High-Gloss Gel Set

The gel set is all about that glassy, mirror-bright finish that makes finger waves so dramatic. A firm-hold gel locks the ridges sleek and shining, holding the sculpted shape for days when it is set and protected properly. It is the most polished, formal version. To get the gloss:
- Choose a firm-hold, flake-free styling gel made for sculpting.
- Mold on damp hair, then dry fully under a hooded dryer to set the hold.
- Protect with a satin scarf overnight so the gloss does not crack.
Defined Waves With a Tousled Crown

Mixing crisp molded waves at the front with a softer, tousled crown gives you a look that is half sculpted, half free. The defined waves frame the face while the crown stays textured and relaxed, so the style reads modern and a little undone rather than fully formal. It is the best of both.
Balancing Sculpted and Soft
It is a forgiving way to wear waves, since the tousled section hides any imperfection. The contrast keeps it interesting.
Mold the front waves firm, then scrunch a little texture product through the crown. The two finishes together feel current and easy to wear day to day.
Micro Finger Waves
Molding smaller, finer waves across a very short pixie creates an intricate, jewel-like pattern. The micro waves pack more ridges into less space, reading delicate and detailed, almost like fine engraving carved across the surface of the head by a very patient hand. It is the most intricate version and a real showcase of skill. To shape it:
- Mold narrow, closely spaced ridges with the tip of a fine comb.
- Work in small sections, since the detail demands patience.
- Best on a very short, even crop where the fine pattern shows clearly.
Layered Pixie With Face-Framing Waves

On a slightly longer, layered pixie, finger waves can be molded just at the face-framing pieces while the rest falls in soft layers. The waved sections frame the face with sculpted definition, and the layers add movement around them, blending the vintage look with a softer modern cut. It is a gentler entry into the style.
A Softer Way to Wear Waves
This suits women growing out a pixie who still want the waved look at the front. The longer length gives the waves more room to sweep.
Mold the front pieces and let the back layers stay soft. For more on growing-stage shapes, the look pairs naturally with a natural-hair pixie cut.
Metallic-Toned Waves

Adding a metallic color, chrome silver, rose gold, or deep copper, takes the gloss to another level. The ridges catch the shine and throw it back. Under light, the waves look almost liquid-metal. It is a bold, high-fashion statement for a confident wearer. A few notes:
- Color first, then mold, so the waves set clean over the finished tone.
- Metallic shades sit on pre-lightened hair, so plan the color appointment ahead.
- Use a color-safe gel and treat lightened hair gently to keep it strong.
Finger Waves on Natural Texture

Finger waves and natural coily texture are a perfect partnership, since tightly coiled hair holds a molded ridge with a crispness that looser textures can only envy. Worked into natural hair with the right gel, the waves define and celebrate the texture rather than smoothing it away. This is finger waves at their most authentic, on the hair the style was perfected on. A few specifics:
- Mold on clean, damp, well-moisturized hair for the cleanest set.
- Use a gel that defines without drying, since coily hair needs moisture.
- Wrap in satin nightly and your waves can hold for several days.
Waves Finished With Accessories

Once the waves are set, a single accessory can dress them all the way up. A jeweled clip tucked at the part, a thin headband framing the ridges, or a small comb adds a finishing touch that turns sculpted waves into an event look. The waves are the art; the accessory is the frame.
Restraint is the trick here, since the molded pattern is already intricate. One well-placed piece reads elegant, while a handful competes with the waves and muddles the effect.
Choose an accessory that complements the part or the sweep of the waves, and place it where it follows the pattern. A little metallic or jeweled detail catches the light alongside the gloss.
Common Mistakes to Avoid
Most finger-wave frustration comes down to a few fixable errors. The biggest is the wrong product: a weak gel will not hold the ridges, while a flaky one leaves white residue in the waves, so a strong-hold, flake-free molding gel is non-negotiable.
The second is not drying fully; waves set while still damp collapse within hours, so dry completely under a hooded dryer or give them real air-dry time before you move. And rushing the molding leaves uneven ridges, since the pattern needs patience to press cleanly from front to back.
The last mistake is skipping overnight protection. Without a satin scarf or bonnet, a single night of friction flattens a set that could have lasted days. Tie the waves down nightly and they stay crisp far longer. If your first attempts are rough, that is normal; this is a skilled art, and a session with a stylist who specializes in it teaches more than any tutorial.
For more short-hair ideas to rotate between sets, see the pixie cuts for Black women and edgy pixie styles.
Finger Wave Questions, Answered
?What product holds finger waves best?
A strong-hold, flake-free molding gel is the key, paired with a fine comb. Weak gels will not hold the ridges and flaky ones leave white residue, so look for a sculpting gel made specifically for molded styles.
?How long do finger waves last?
With full drying and a satin scarf or bonnet each night, a set can hold for several days, sometimes up to a week on natural texture. Skipping overnight protection drops that to a single day.
?Can I do finger waves at home?
Soft and everyday versions, yes, with practice and the right gel. Crisp glossy and micro waves take real skill, so it is worth a salon visit, both for events and to learn the molding rhythm firsthand.
?Do finger waves work on all hair textures?
They can be molded on many textures, but tightly coiled and natural Black hair holds the crisp, sculpted ridges best, which is why the style is so closely tied to Black hair artistry.
?Are finger waves damaging to my hair?
The molding itself is gentle, but heavy daily gel can build up and dry the hair, and hard edge-slicking can stress the hairline. Cleanse between sets, keep the hair moisturized, and lay edges with a light hand.
An Art Form Worth the Patience
Finger waves ask more of you than almost any short style, and they give back more too. They carry a proud history in Black hair culture, they sit at the meeting point of vintage and modern, and on tightly textured hair they hold a crispness that turns a pixie into pure sculpture. The fifteen here run from a soft daily ripple to a metallic showpiece, so there is a version for every skill level and every occasion.
Start soft while you build your molding hand, lean on a strong-hold gel and overnight protection, and do not be discouraged if the first set is uneven. This is a craft, and like any craft, the waves get cleaner every time you press them in. Is there a better feeling than catching your own reflection and seeing that gloss catch the light?


