
Want shorter layers that frame your face and all that movement everyone is after, but you are not willing to lose your length to get it? That is the exact problem the butterfly haircut was built to solve. It keeps your long lengths intact while stacking softer, shorter layers up top, so you get the bounce and frame of a shag without the big chop.
I cut a lot of these, and the women who love them most are the ones growing their hair out who still want it to feel done. Here is what the cut actually is, who it flatters, how it is built, and exactly what to tell your stylist so you walk out with the version in your head.
The Butterfly Cut, at a Glance
| What it does | Best for | Upkeep |
|---|---|---|
| Adds face-framing layers and movement while keeping your overall length | Medium-to-long hair; most face shapes and textures | A short-layer trim every eight to ten weeks; length needs less |
| Two soft tiers blended to read as one | Anyone growing hair out who still wants shape | Light daily styling; grows out with almost no awkward stage |
Two Distinct Layers, One Soft Shape

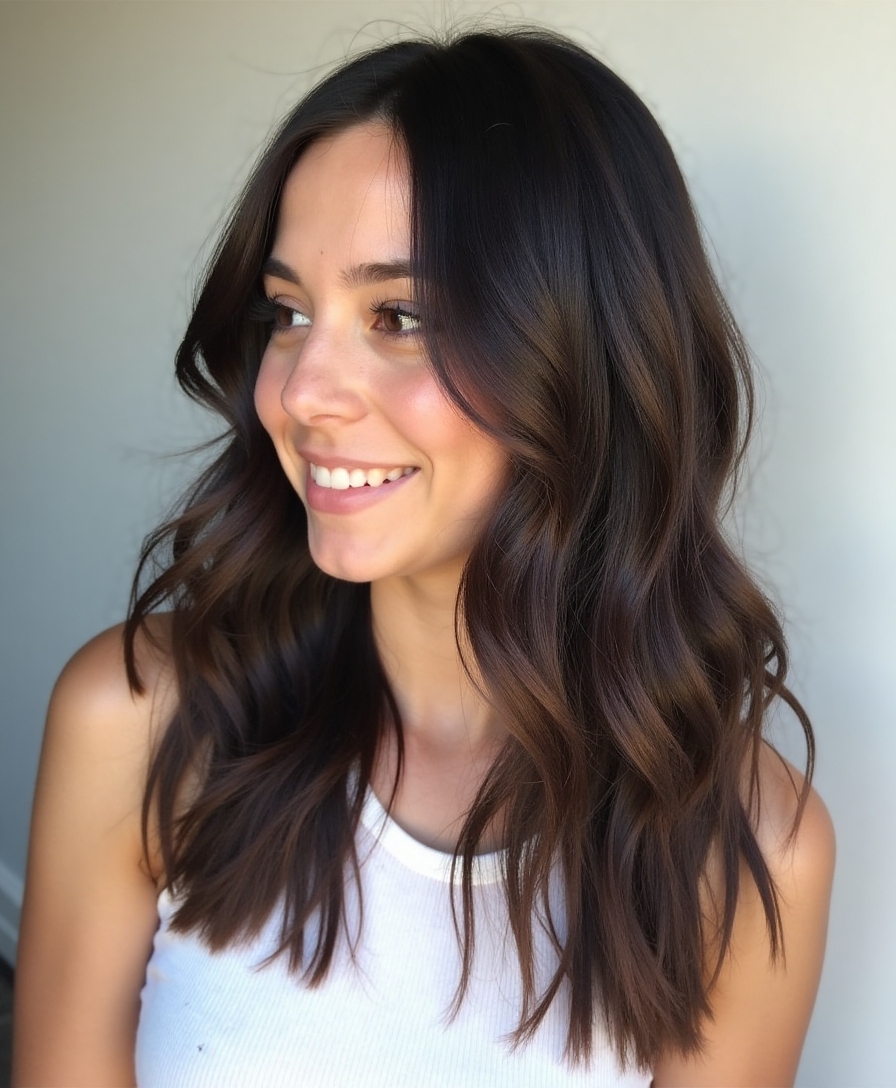
The whole idea of a butterfly cut lives in two tiers: a short, face-framing layer up top and your long length left underneath, blended so they move together rather than looking like two separate haircuts. Curled away from the face, those top pieces flare out like wings, which is where the name comes from.
- Top tier: shorter layers that frame the face and add volume at the crown
- Bottom tier: your existing length, kept long for movement and swing
- The skill is in the blend; done right, you cannot see where one tier ends
Where the Butterfly Cut Comes From

Nothing about the butterfly cut is truly new, and that is part of why it works. It borrows from the long, feathered layers of the seventies and the choppy shag revival, then softens both into something more wearable for everyday hair.
What changed is the blending. Older layered cuts often left a hard line where the short pieces stopped. Modern texturizing tools and point-cutting let a stylist melt the tiers into each other, so the butterfly version reads soft and grown-in instead of stepped and choppy.
Not sure it is the right cut for you? Quick gut check.
🎯You are growing your hair out
This is the cut for you: it adds shape and a face frame while protecting every inch of length.
🎯You want a big, dramatic change
A wolf cut may suit you better; the butterfly is the softer, more grown-up cousin that keeps more length.
🎯Your hair is fine or very curly
It still works well: ask for fewer, softer layers on fine hair, and have curls cut dry so they land right.
Why the Butterfly Cut Caught On

The butterfly cut spread fast because it answered a want I hear in my chair constantly: movement and a face frame, without losing length. Most layered cuts make you choose. This one does not.
It also photographs beautifully and styles quickly, which is half of why it traveled so far online:
- It keeps long-hair versatility: you can still wear it up
- The face-framing pieces flatter almost everyone instantly
- It looks like an expensive blowout with very little effort at home
Tailoring It to Your Face Shape

The single biggest way a butterfly cut gets personalized is where the shortest face-framing layer lands. That one decision is what makes the same cut flatter a round face and a long face differently, so it is worth discussing before any scissors come out.
- Round or fuller faces: start the shortest layer below the chin to lengthen, not widen
- Long or narrow faces: bring framing pieces up to the cheekbone to add width
- Square jaws: soft, curved layers around the jaw take the edge off the corners
ℹ️Good to Know
The ‘butterfly’ name comes from the way the curled-back top layers flare out around the face like wings. It is a styling effect, not a cutting rule, so you can wear the exact same cut straight and sleek with no wings at all.
The Hair Types It Suits

One reason I recommend this cut so freely is that nearly every texture can wear it, as long as the layering is adjusted to how your hair behaves. The cut is the same idea; the execution shifts with your hair type.
- Fine hair: fewer, softer layers so you do not thin out the ends
- Thick hair: more internal texturizing so the top tier does not puff
- Wavy and curly hair: layers cut to your dry curl pattern so they spring up evenly
The Two-Tier Layering, Explained

If you understand one thing before your appointment, make it this: the butterfly cut is two layers, not a gradual cascade. The top layer is cut shorter and kept fairly disconnected; the bottom stays long and barely touched.
Why the blend is everything
The art is connecting them. A stylist blends the bottom of the short tier into the top of the long tier with soft, vertical cutting so your eye reads one flowing shape, not a shelf.
This is also why a butterfly cut grows out so kindly. As the short tier lengthens, it simply melts further into the long layer instead of leaving a hard line you have to grow past.
“The question I get most is whether a butterfly cut will make fine hair look thinner. It will not, if the layers are kept soft and minimal rather than heavily disconnected. On fine hair I cut fewer, longer layers and texturize lightly, which actually builds the illusion of fullness at the crown. Over-layering is the only real risk, and a good stylist will talk you out of it.”
How to Ask Your Stylist for One

Here is where most butterfly cuts go right or wrong. The phrase “butterfly cut” means slightly different things to different stylists, so do not rely on the name alone. Bring specifics, and you remove the guesswork.
In my chair, the clients who get exactly what they wanted are the ones who tell me three things up front:
- Where you want the shortest piece to hit (chin, collarbone, etc.)
- How much length you are protecting underneath: “keep all my length”
- Whether you want curtain face-framing or fuller, rounded layers
How the Butterfly Cut Is Built

Behind the chair, a butterfly cut is methodical, not freehand, which is also why it tends to take around an hour and cost a little more than a basic one-length trim. Most of us build it by sectioning the hair and working the top tier separately from the length, often pulling the hair forward to set the face frame.
A common pro method twists or pins the long layer out of the way first, so the short tier can be cut cleanly without shortening the length you are protecting:
- The long layer is isolated and kept off the cutting line
- The top tier is cut forward, toward the face, to build the frame
- Point-cutting and texturizing soften the ends so nothing looks blunt
| Tell them | So they | Example |
|---|---|---|
| Where the shortest layer hits | Frame your face shape correctly | “Start the short layer at my chin” |
| How much length to protect | Keep your length fully intact | “Keep all of my length underneath” |
| The vibe you want | Choose soft vs. disconnected layers | “Soft and blended, not choppy” |
Tools and Products That Help

A butterfly cut is forgiving to style, but a couple of tools make the tiers really sing. You do not need a kit; you need the right two or three things and five minutes.
What I tell clients to keep on the shelf:
- A round brush (about two inches) to bend the short tier away from the face
- A curling wand around an inch and a quarter for soft, lived-in waves
- A light volumizing mousse or a texture spray; skip heavy creams that flatten the top tier
Styling and Keeping It Up

Day to day, the butterfly cut asks very little, but the short tier is where the maintenance lives. A quick round-brush bend on the face-framing pieces is what separates a styled butterfly cut from one that just looks grown out. Most mornings, that is a five-minute job.
- Focus heat and brushwork on the top tier; the length mostly takes care of itself
- On second-day hair, refresh just the face-framing pieces with a wand
- Trim the short tier every eight to ten weeks; the length can wait far longer
Mistakes Worth Avoiding
Most disappointing butterfly cuts come down to a handful of avoidable choices, and they are easy to head off if you know them going in. The cut is reliable; the missteps are predictable.
The ones I see most often:
- Going too short on the top tier, which loses the soft, blended look
- Cutting wavy hair wet, so the layers shrink up shorter than expected once dry
- Skipping the texturizing, which leaves visible shelves instead of one flowing shape
Bringing the Right Inspiration

Reference photos help enormously, but only if they match your starting point. A butterfly cut on poker-straight, waist-length hair will not translate onto shoulder-length waves, and chasing it leads to disappointment.
Bring two or three photos that share your length and, just as importantly, your texture. If your hair is wavy, find wavy examples; a stylist can tell far more from hair that behaves like yours.
It also helps to bring one photo of what you do not want. Showing the version that feels too choppy or too short tells your stylist where your line is, which is often more useful than the inspiration itself.
Variations on the Cut

The butterfly cut is really a family of cuts, and you can dial it anywhere from barely-there to full drama depending on how short and how disconnected the top tier goes. That range is a big part of why it suits so many people.
- Subtle: just a few face-framing layers, perfect for a first-timer
- Full butterfly: shorter crown layers for maximum lift and movement
- Paired with curtain bangs or a wolf-cut edge for a bolder, shaggier read
Styling It Through the Seasons

One quiet advantage of this cut is that the shape holds year-round while the finish flexes with the weather. The same butterfly cut can read polished in winter and undone in summer with nothing more than a change of product.
- Summer: air-dry with a texture spray and let the layers go soft and beachy
- Winter: blow the top tier smooth and sleek to fight static and flatness
- Humid days: a light anti-frizz cream on the lengths keeps the long tier from puffing
Growing It Out Gracefully

If you are nervous about commitment, this is the part that usually settles it: the butterfly cut has almost no awkward grow-out phase. Because the tiers are blended rather than blunt, there is no hard line to grow past, which is rare for a layered cut and a real selling point.
- The short tier simply lengthens into the long layer over a few months
- Face-framing pieces stay flattering even as they reach your collarbone
- A single trim every couple of months keeps the shape without losing progress
Color That Plays Up the Layers
Color and a butterfly cut are a natural pair, because dimension makes layers read as fuller and more deliberate. Flat, single-block color can actually hide all that careful layering, which is a shame after the work it takes.
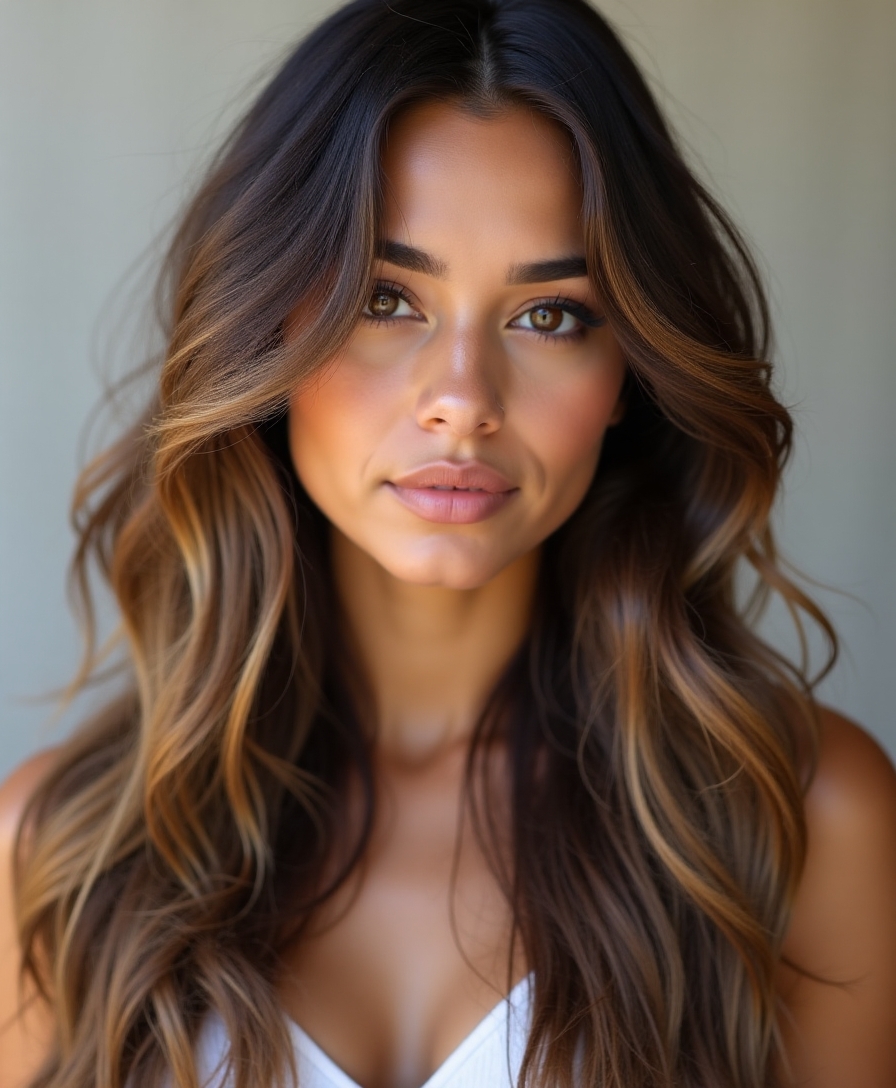
Face-framing highlights, often called money pieces, are the classic match. Brightening just the front pieces draws the eye to the frame and makes the top tier look intentional and lit from within.
A soft balayage through the lengths works too, placing a little lightness where the layers fall so the movement catches the light. Both are low-upkeep, since the regrowth stays soft rather than leaving a hard line.
Tips for Your Texture

To pull it all together: the butterfly cut is about as adaptable as a cut gets, but the finish you get depends on cutting and styling it for your actual texture. Match the approach to your hair, browse a few more layered looks for ideas, and bookmark this to take with you.
- Straight hair: ask for extra internal texture so the tiers do not look flat or shelf-like
- Wavy hair: have it cut dry or with shrinkage in mind so the layers land where you want
- Curly and coily hair: cut to the dry curl pattern, then style each tier with your usual leave-in
Butterfly Cut Questions, Answered
?Will a butterfly cut make me lose length?
No, and that is the whole point of it. The long bottom tier is isolated and barely touched; all the cutting happens in the shorter top layer. Tell your stylist “keep all my length underneath” and you protect every inch while still getting the face frame and movement.
?What is the difference between a butterfly cut and a wolf cut?
They are cousins. A wolf cut is shaggier, choppier, and more disconnected, often shorter overall. A butterfly cut is the softer, more blended, more grown-up version that keeps more length. If you want grit, go wolf; if you want polish with movement, go butterfly.
?How often do I need to trim it?
Roughly every eight to ten weeks, and really only the short top tier, which is where the shape lives. The long length can stretch much longer between trims since it is barely cut, so upkeep is lower than most layered styles.
?Does a butterfly cut work on curly hair?
Yes, as long as it is cut to your dry curl pattern rather than wet. Curls spring up shorter than they look damp, so a stylist who cuts dry can place the layers where they will actually land. Done that way, the tiers add real shape and lift to curls and coils.
A Cut That Lets You Keep Your Length
The reason the butterfly cut has stuck around, long after the trend peaked online, is that it solves a genuine problem instead of just looking good in one photo. It gives you the frame and the movement of a layered cut while letting you keep the length you have spent months or years growing, and it does it without a painful grow-out down the road.
If that is the trade you have been looking for, save this guide and bring the three specifics to your next appointment: where the short layer hits, how much length to protect, and how soft you want the blend. That is the whole conversation, and it is the difference between a butterfly cut you love and one you tolerate.


