


Want salon-level glamour without putting your own hair through heat, color, and daily styling? A bob weave is how many of my clients get there. A sew-in gives you a full, polished bob in an afternoon, and a deep side part is what takes it from nice to expensive-looking.
Worn well, a side part bob weave protects the hair underneath while you try a shape you might never commit to as a side part bob in your own length. Below are the looks worth asking for, from old Hollywood waves to a curly install, plus how to keep both the weave and your natural hair healthy.
- A side part bob weave gives you a full, glamorous bob in one appointment while protecting the natural hair underneath.
- The part does the heavy lifting: a deep side part adds lift, drama, and that polished, expensive finish.
- Budget roughly $150 to $300+ for an install plus hair, and plan a reinstall every 6 to 8 weeks to protect your edges.
Old Hollywood Waves on a Bob Weave
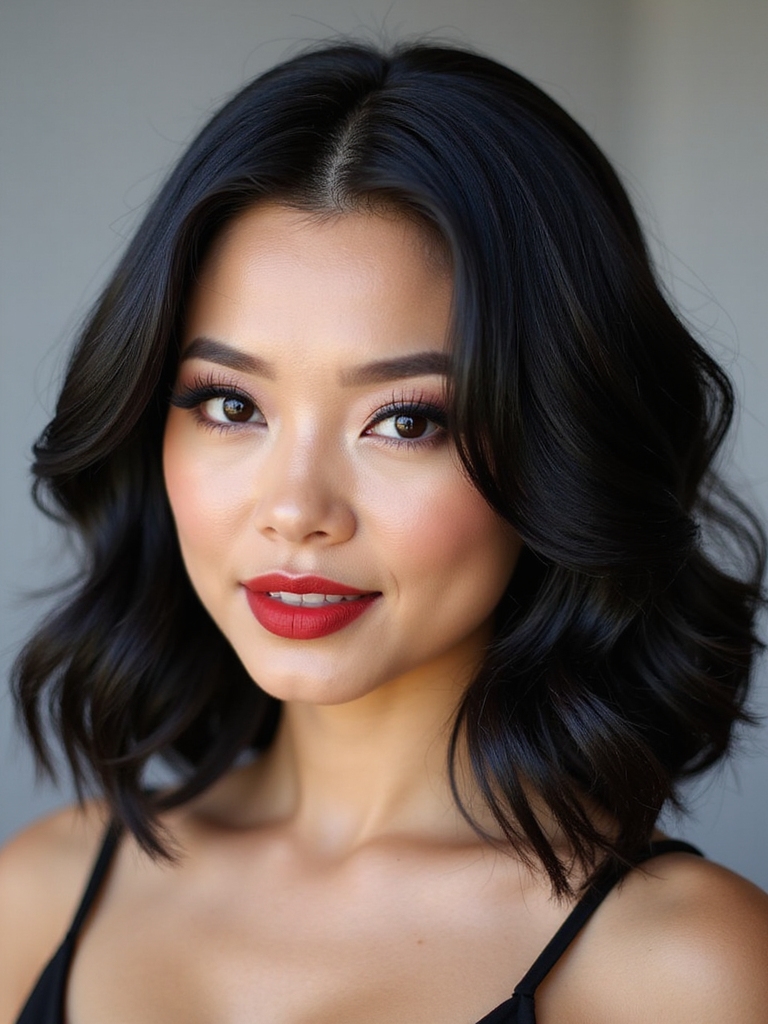
Nothing makes a bob weave look red-carpet ready faster than old Hollywood waves. The deep side part sets up the classic asymmetry, and uniform S-waves pressed in from root to tip give that sculpted, vintage shine. A weave holds the wave beautifully, and for far longer than most natural hair will. Here is how to get the look:
- Set a deep side part, then pin-curl or wand the hair into uniform S-waves.
- Brush the waves out softly with a boar-bristle brush for a connected, molten finish.
- Lock it with a flexible-hold hairspray and a touch of shine spray.

A Sleek Glass Bob Weave Tucked Behind the Ear

The glass bob is all about shine, and a weave is the easy way to fake glass-smooth perfection. Straightened flat with a deep side part and one side tucked behind the ear, it looks polished and quietly expensive. The asymmetry of the tuck shows off the jaw and one ear.
This look lives on shine. The hair quality decides it. A quality human-hair weave takes a flat iron and a drop of serum and turns mirror-smooth, while a cheaper synthetic can look dull no matter what you do to it, which is the one place it pays to spend a little more.
- Flat-iron in small sections for a true glass finish.
- Tuck one side behind the ear, with a small clip underneath to hold it.
- Add a single drop of shine serum, mid-length to ends only.
💡Stylist Tip
On a weave, set Hollywood waves the night before and wrap them in a silk scarf overnight. The hair holds the shape, so you wake up to waves that only need a quick brush-through, no full re-style required.
A Tousled, Beachy Side Part Bob Weave
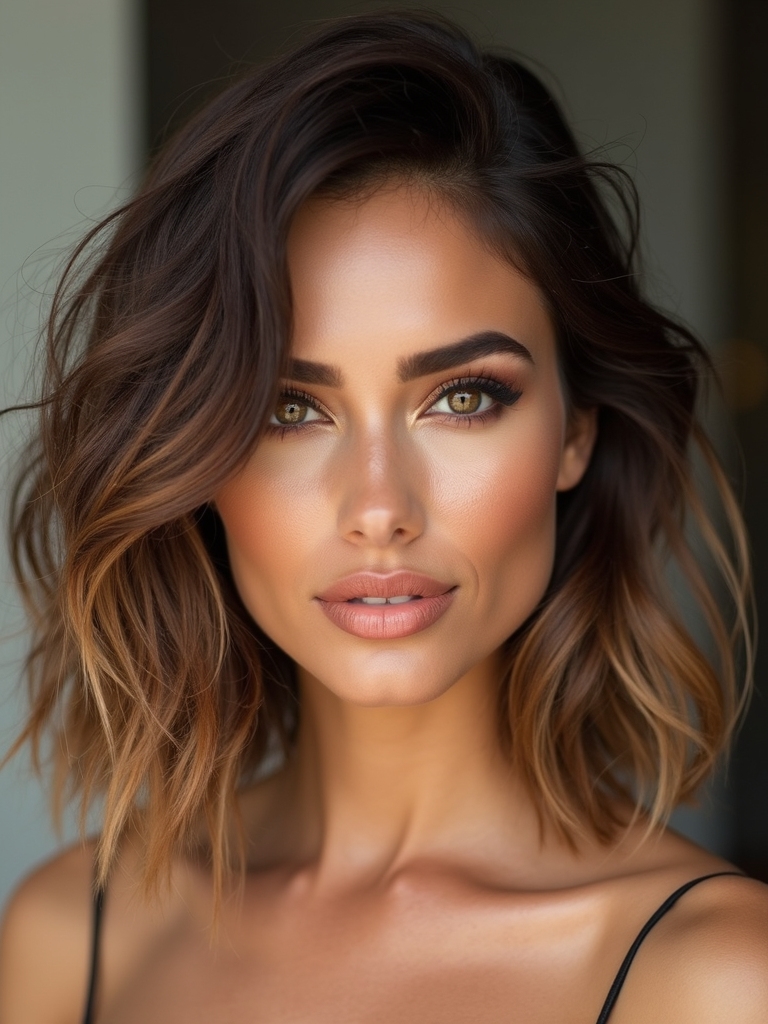
Not every bob weave has to look formal. A tousled, beachy finish softens the whole thing into something relaxed and wearable every day. Worked around a side part, the loose texture looks undone in the best way. Here is how to keep it soft:
- Choose a body-wave or loose-wave texture for the install.
- Scrunch in a salt or texture spray and break up the waves with your fingers.
- Skip the brush once it is styled, so the pieces stay separated and casual.
An Asymmetrical Side Part Lob Weave

Lengthen a bob weave to the collarbone and cut one side longer than the other, and you have an asymmetrical lob with real drama. The deep side part feeds more hair to the long side, exaggerating the angle for a bold, editorial shape.
Try the shape before you commit
A weave is the low-risk way to try asymmetry, since you are not cutting your own hair to do it, which means you can wear an aggressive angle for a few weeks and walk it right back at the next appointment if it turns out to be too much. Nothing is lost either way.
Style the long side smooth and sweeping to play up the angle. The asymmetrical bob guide covers the cut if you want to commit with your natural hair later.
A quick glossary of weave terms before you book:
📖Sew-in
A weave where wefts of hair are sewn onto cornrowed natural hair; the most common bob-weave method.
📖Closure or frontal
A piece of lace that covers the part or hairline so the install looks like it grows from your scalp.
📖Leave-out
A small section of your own hair left out to blend over the weave, often around the part.
A Bob Weave With Ends Curled Under

Curling the ends under is the classic, polished way to wear a bob weave. The hair turns in toward the neck in a smooth C-shape, which gives the bob a rounded, full-bodied finish that suits work and events alike. It rarely looks fussy.
The most forgiving weave finish
It is one of the most forgiving styles for a weave, because the inward curl tucks the ends away and keeps everything looking neat. A large round brush and a blow-dryer do it, or a quick pass with a wide-barrel iron.
Keep a little volume at the root through the side part so the shape does not fall flat against your head.
A Bob Weave With Feathered Face-Framing Pieces

Feathered face-framing pieces soften a bob weave around the cheeks and make the install look more natural. The stylist cuts a few lighter, tapered pieces at the front, often blended with your leave-out, so the weave frames your face the way your own hair would.
This is the detail that takes a weave from obvious to believable. Those soft front pieces break up the uniform, full look of a sew-in and let it move with you, especially around a deep side part.
“After years of installs, the regret I see most often is thinned edges from a sew-in braided too tight. A weave should never hurt going in. Ask your stylist to keep the tension gentle around your hairline, give your edges a break between installs, and moisturize the natural hair underneath so it stays healthy under the protective style.”
A Blunt-Cut Bob Weave With a Sharp Side Part

A blunt cut gives a bob weave a crisp, graphic edge that looks intentional and modern. Cut to one clean length with a sharp, deep side part, it swings as a single heavy piece and catches the light along the blunt perimeter.
The look depends on two things: a precise cut and quality hair. Have your stylist trim the weave after it is installed, since wearing it straight from the pack leaves the ends uneven, and a blunt line shows every flaw.
A Soft Layered Bob Weave With Side-Swept Bangs

Adding soft layers and side-swept bangs to a bob weave gives it gentle movement and a face-framing finish. The layers keep the install from looking like a solid block, and the bangs, swept into the side part, soften the forehead. Here is how to ask for it:
- Request soft, internal layers cut into the weave after the install.
- Have side-swept bangs blended from your leave-out so they look natural.
- Style everything in one direction off the side part. See the wavy bob for more soft-movement ideas.
🅰️Human-hair weave
Takes heat, color, and a flat iron like your own hair, and lasts through several reinstalls. Pricier up front, often **$100 to $300+** for bundles and a closure.
🅱️Synthetic weave
Much cheaper and pre-styled, holding curl or wave without heat. It cannot take a hot tool, though, and tends to look less natural up close.
A Wet-Look Side Part Bob Weave

The wet look is bold, high-shine, and surprisingly easy on a weave. Slicked back from a sharp side part with a strong gel, the hair looks freshly wet and glossy, a real statement for a night out. It holds for hours without moving.
Because a weave can take heavy product without your scalp suffering, the wet look is lower-risk here than on natural hair. Just keep the gel on the weave and off your own hairline to protect your edges.
- Use a strong-hold gel or styling wax worked through straightened hair.
- Comb it back cleanly from a deep side part.
- Set it with a blast of cool air, or let it dry down for more shine.
A Body-Wave Side Part Bob Weave

A body-wave weave is the most popular texture for a reason: it gives a side part bob soft, bouncy waves with almost no styling. The wave comes built into the hair, so you wash, condition, and let it dry into shape. It is the closest thing to a wash-and-go a weave offers. Here is how to keep the bounce:
- Choose a body-wave bundle in a bob length for built-in movement.
- Co-wash gently and scrunch in a leave-in to revive the waves.
- Refresh with a little water and mousse between washes to revive the bounce.
An Inverted Side Part Bob Weave With Crown Lift

An inverted bob weave is shorter and stacked at the back, longer toward the face, which builds height at the crown and a sharp angle along the jaw. The deep side part adds even more lift up top, so the whole shape looks full and architectural.
It is a striking, high-fashion choice for anyone who wants drama and structure, and the stacked back keeps thick hair from spreading wide at the bottom the way a single-length bob sometimes can. Because the back is cut short, this one really benefits from a clean trim after install to define the graduation.
- Ask for a stacked, graduated back and longer front pieces.
- Build crown height with the side part and a round brush.
- Trim the weave after install to keep the inverted angle sharp.
A Bob Weave With Flipped-Out Ends

For something playful and a little retro, flip the ends of a bob weave outward. They kick up and away from the neck for a bouncy, sixties-tinged finish. It feels fun and young. On a side part bob weave it looks lively and a touch nostalgic. Here is the trick to it:
- Curl the ends outward with a round brush or flat iron.
- Keep the rest of the hair smooth so the flip stands out.
- A little texture spray on the ends helps the flip hold all day.
A Curly Side Part Bob Weave

A curly weave with a side part celebrates natural curl texture in a full, healthy-looking bob. Curly and kinky-textured bundles let you wear your hair big and coily while your own hair rests, protected underneath, and the deep part gives the curls extra lift at the crown. Here is how to keep the curls happy:
- Match the curl pattern of the weave to your own for the most natural blend.
- Hydrate daily with a water-and-leave-in mist; weave curls dry out fast.
- Detangle gently with fingers or a wide-tooth comb, from the ends up. The curly bob has more on shaping curls.
A Bob Weave With a Shadow Root and Highlights

Color is where a weave really earns its keep, since you get dimension without lightening your own hair at all. A shadow root, darker at the scalp blending into lighter ends, plus a few soft highlights gives a bob weave a natural, sun-touched depth.
Dimension without the bleach
Pre-colored bundles make this easy, so you can buy the exact shadow-root or balayage effect you want and skip the chemical process on your own hair. The deep side part shows off the color placement right along the part line.
If you want this on your natural hair down the line, the a-line bob guide pairs well with dimensional color.
A Short Pixie-Bob Weave With a Side Part

The pixie-bob is the shortest, boldest weave here, cropped close at the nape and short through the back with longer, side-parted pieces on top. It is a daring, high-impact look that shows off the face and neck.
A no-risk test drive for going short
A weave is a brilliant way to try a near-pixie length with zero risk, since you keep your own length safe underneath and styled away. If you have wanted to go short but feared the grow-out, this is the test drive.
It needs a precise post-install trim and a confident side part to work. Come with a clear photo and a stylist who cuts weaves well.
Styling Tips
However you wear a side part bob weave, a few habits keep it looking fresh. My clients who get the longest life out of an install are the ones who wrap it at night in a silk or satin scarf, or sleep on a satin pillowcase. That stops friction, frizz, and tangling, so the style holds for weeks instead of days.
Keep heavy product off the roots and on the lengths, wash gently every week or two with a sulfate-free shampoo, and dry the braids underneath fully so nothing turns musty. Most installs look their best for six to eight weeks, and taking it out on time matters as much as the install, since that is what gives your edges and natural hair their rest. If you want a faster, lower-commitment route, a quick weave bob installs in less time.
More Than a Shortcut
A side part bob weave is more than a shortcut to a good hair day. It lets you wear a bold shape, a fearless color, or a length you would never cut into your own hair, all while the hair underneath rests and grows. The deep side part is the small detail that ties every version together, adding the lift and asymmetry that make a weave look expensive.
Whether you reach for old Hollywood waves, a curly install, or a sharp blunt cut, the healthiest weave is the one installed gently and taken out on time. Wear it for the glamour, and treat the hair underneath as the priority, and you get the best of both.


