I started keeping a basket of headbands by my front door the winter I got tired of hat hair, and it quietly fixed my mornings. A headband does what a hat can’t: it keeps your hair back, frames your face, and looks deliberate instead of like you are hiding a bad day, even when you are. Half my cold-weather looks now start with one.
Headbands are the most underrated winter styling tool there is. They dress up a flat day, swap in for a hat the second you are indoors, and turn a two-minute bun or pony into something that looks done. These winter headband hairstyles run through every kind of band, satin to velvet to chunky knit, and which hair each one suits best.
Winter Headbands, in Short
- A headband is the fastest way to look done in winter; it hides flat, hat-crushed roots and frames your face in one move.
- Match the band to the mood: satin and velvet read polished, chunky knit reads cozy, thin metallic suits sleek and short hair.
- Headbands work on every texture and length, and they are the easiest hat alternative for indoors.
- Anchor with two crossed bobby pins at each side so the band does not slide back on fine or freshly washed hair.
Sleek Satin Headband With a Low Bun

A satin band and a sleek low bun is the most polished headband look there is. The satin adds a soft sheen that reads expensive, and the low bun keeps everything clean and tucked at the nape. Smooth your hair back with a little serum, coil a low knot, and slide the band on just behind your hairline.
A satin band also sits gentler on your edges than a hard, gripping one, so it is kinder for everyday wear. This is the look I pull on for client consultations when I want to seem pulled-together in under five minutes. The low bun hairstyles guide has more bun bases to build it on.
- Satin’s soft sheen looks polished and a little expensive.
- Gentler on your edges than a tight elastic or hard band.
- The pulled-together work look in about two minutes.
Chunky Knit Headband and Tousled Waves

When it is truly cold and you want cozy over polished, a chunky knit band and tousled waves is the move. The knit actually keeps your ears warm the way a hat would, and loose waves underneath look soft and undone against all that texture.
Wave your hair roughly, scrunch in a little texture spray, and pull the knitted band on. A wider knit band covers more and keeps you warmer than a thin one. It is the warmest headband look here and the most casual, which makes it right for a weekend spent mostly outdoors.
- A chunky knit band keeps your ears warm like a hat does.
- Tousled waves look soft against the chunky texture.
- The coziest, most casual band look of the bunch.
Easy on Your Edges
A hard plastic band worn tight every day can wear on your hairline over time. For daily wear, pick padded, fabric, or satin-lined bands, and save the hard, gripping ones for a few hours rather than all day.
Faux Leather Headband for Sleek Straight Hair

A faux leather band is the edgy, modern option, and it is made for sleek straight hair. The smooth band against smooth, glossy hair is a sharp, high-fashion pairing that needs nothing else to look intentional. Straighten your hair, run shine serum through the lengths, and slide the leather band on for an instant cool-girl finish. It takes one motion.
- Faux leather plus sleek straight hair looks sharp and modern.
- Add shine serum so the hair matches the band’s polish.
- A cool-girl finish with no other styling required.
Twist-Front Headband With a Loose Ponytail

A twist-front band adds a soft, knotted detail across the front, and paired with a loose ponytail it is the easy-but-pretty everyday look. The twist hides flat, hat-crushed roots along your hairline, and the low pony keeps it casual. Slide the band on, gather a loose pony at the nape, and tug a few face-framing pieces free.
- The twisted front hides flat, hat-crushed roots.
- A loose low pony keeps the whole look casual.
- Pretty enough for a coffee date, quick enough for a rush morning.
Keep a headband from sliding back on fine or freshly washed hair:
1Set it just behind your hairline
Slide the band on from front to back so it sits behind, not on, your hairline
2Cross two bobby pins under each side
Pin an X under the band at each temple; hidden, and it will not budge all day
3Soften the placement
Tug a few face-framing pieces loose so it looks intentional, not forced
Braided Crown With a Narrow Headband

A narrow band layered over a braided crown is the romantic, detailed headband look. The thin band sits like a small tiara over the braid, adding sparkle or color without competing with it. It is dressier than most band styles, which makes it right for a winter event.
Braid a crown along your hairline, pin the tail underneath, and slide the narrow band on top to frame it. The two together look intricate for the effort they actually take. A narrow metallic or jeweled band is the prettiest choice here.
It keeps hair off your face and warm at the crown, all at once. The winter hair braid ideas roundup has more braids to build it on.
Headband and Messy Top Knot, the Beanie Swap

When you walk in from the cold and pull off your beanie, a wide band and a messy top knot is the fastest swap there is. The band hides the hat dent and the messy knot turns the flatness into texture, so a bad hat-hair moment becomes a styled one.
Pile your hair into a loose, high knot, slide a broad band on to cover the crushed front, and you are transformed in about thirty seconds. A wide knit or velvet band hides the most flatness. This is my go-to indoor rescue on a day the beanie wins.
- Swap your beanie for a band the moment you are indoors.
- The messy knot turns hat flatness into useful texture.
- A wide band hides the crushed crown completely.
A couple of headband myths worth clearing up:
❌ Myth: Headbands look juvenile
✅ Reality: The right material lands grown-up; satin, velvet, and leather all read polished rather than girlish
❌ Myth: Headbands only work on long hair
✅ Reality: A thin band polishes short hair, and a wide one styles curls and waves at any length
Wide Velvet Headband With Face-Framing Layers

A wide velvet band is the luxe, almost regal headband. Plush and a little dramatic, it turns the simplest hairstyle into something that feels special, which is what flat winter hair needs most. Worn with a few face-framing layers left loose at the front, it frames you while the band does the styling. A jewel-toned velvet band is a winter statement on its own.
Slide it on over soft, loose hair and you look dressed up with almost nothing else done. It suits every hair type and is especially good for second-day hair that needs a lift, so it earns its place on the days you skipped washing. When a client in my chair has a holiday party that night, this is what I send her home in, and it makes the whole look read festive in seconds.
- Plush velvet turns a simple style into something special.
- Face-framing layers soften it while the band does the work.
- A jewel-toned band is a winter statement by itself.
Wrapped Scarf Headband and Side Braid

A silk scarf tied as a band is the boho-meets-polished look, and it doubles as protection, since silk does not pull moisture from your hair the way wool can. Fold a scarf into a band, tie it at the nape or the top, and pair it with a loose side braid for a relaxed, pretty finish.
A silk scarf also shields your edges and adds a pop of print or color. It is endlessly customizable, since you can tie it a dozen ways, and it suits every length and texture. It is my favorite hat alternative for a day that is equal parts cozy and put-together.
- A silk scarf protects your hair while it styles it.
- Pairs with a loose side braid for a relaxed finish.
- Endlessly customizable; tie it a dozen different ways.
Start from what the day asks of your hair, then match the band:
🎯Cozy and warm
A chunky knit or wide ear-covering band
🎯Polished or dressy
A satin, velvet, or jeweled band
🎯Sleek and short
A thin metallic or faux leather band
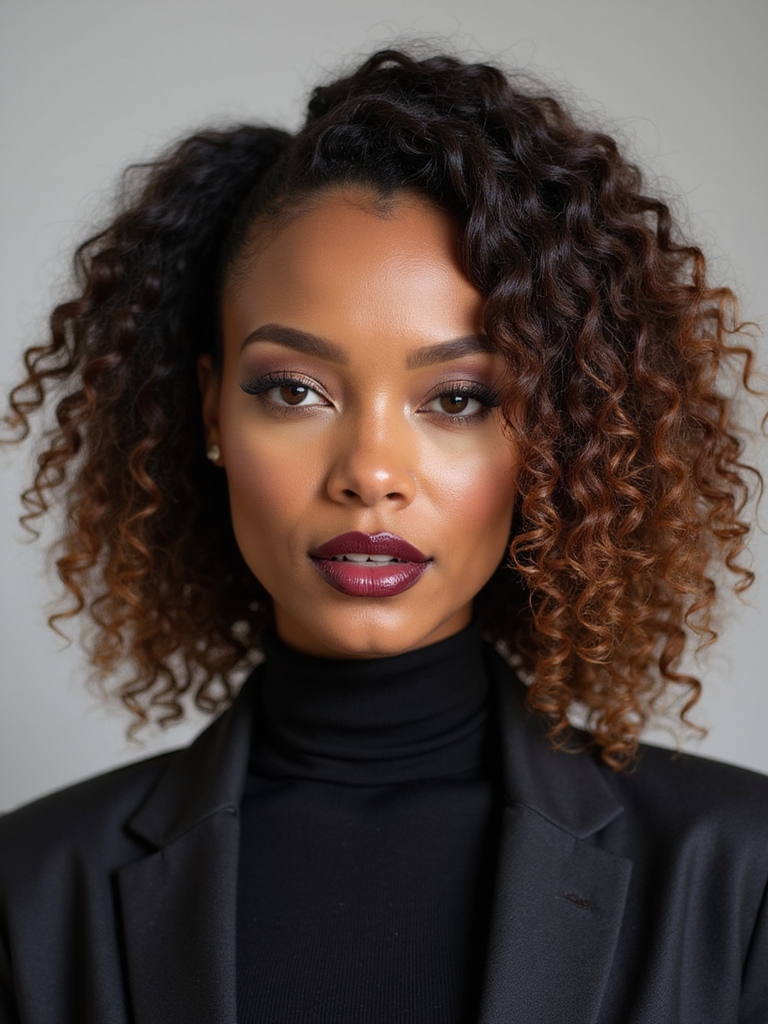
Headband Over Curly Hair for Defined Volume

Headbands and curly hair are a natural match. A band pushes your curls up and back for height and shape, framing your face while keeping curls out of your eyes. Slide a band on over dry, defined curls and let the volume gather above it. It is the fastest shape-without-restyling fix for curly hair I know.
The thing to watch with curls is placement: set the band a little back from your hairline so you do not flatten the curl pattern in front. A satin-lined band protects the curls it touches from friction, which matters on textured and color-treated hair. It is the fastest way to style curly hair on a day you skipped the refresh. The winter hairstyles for Black women guide goes deeper on protecting curls in the cold.
Half-Up Twist Secured by a Decorative Headband

A decorative band can do double duty, holding a half-up twist in place while adding the sparkle. Twist the top sections back, and instead of pinning, anchor them under a jeweled or embellished band so the band becomes the fastener and the decoration at once.
Less Fussing, More Sparkle
It is a clever way to skip the pins; the band holds the half-up and dresses it up in one move. The jeweled detail catches what little light winter gives you, which is the whole point on a gray day.
It keeps your length down and your face framed, dressy enough for an event without much fuss. A jeweled or pearl band makes it feel like an occasion.
Headband With a Low Side-Swept Braid

A band anchoring a low, side-swept braid is the soft, romantic look for relaxed winter days. The band holds your hair back and adds a detail at the crown, while the braid sweeps over one shoulder for an undone, pretty finish.
Slide the band on, sweep your hair to one side, and braid loosely down. The band keeps flyaways and hat-flattened front pieces in check, and the side braid keeps the whole thing casual. It is the look for a cold day when you want to feel a little put-together without trying hard.
Boho Knotted Headband and Beachy Waves

A knotted boho band worn low across the forehead with beachy waves is the festival-in-winter look: relaxed, pretty, a little bohemian. The knotted band sits lower than most, framing your face and adding a casual, undone vibe.
Wave your hair softly, slide the knotted band on low, and let the waves fall around it. It is the most relaxed band look here, right for a slow winter day. A knotted fabric band is the kind that suits this lower placement.
It works on wavy and straight hair, and it is forgiving for hair you have not washed in a day or two. The undone waves and low band quietly hide a lot. For more in this vein, the aesthetic winter hairstyles roundup leans the same soft, relaxed way.
Headband With Slicked Roots and Volume at the Ends

This one plays with contrast: slicked, smooth roots held by a band, with volume and texture left in the ends. The band keeps the front controlled while the lengths stay full and wavy, a balance that looks modern and intentional.
Smooth gel or serum through your roots, slide the band on to hold them flat, and leave the ends tousled and full. A thin, smooth band suits this best, since the sleekness up top is the whole point. It is the editorial-feeling band look that is secretly easy to pull off.
- Slicked roots plus full ends is a modern, deliberate contrast.
- The band holds the front sleek while the ends stay voluminous.
- A thin, smooth band suits the sleek-up-top look.
Ear-Covering Headband With Loose Curls

An ear-covering band is the most practical winter option of all. Wider and pulled down to cover your ears, it keeps you warm the way a hat would while leaving your curls or waves out below it. It is the closest a band gets to true hat warmth.
Pull a wide band down over your ears and let loose curls or waves fall beneath. It keeps you warm on a cold walk while looking far cuter than a hat, and your curls stay visible and defined. It is the band for the coldest days, the ones where warmth actually has to win.
On the kind of wind-bitten morning when a hat is the only sensible choice but you cannot face the flat, static-charged mess it leaves behind, this is the band that splits the difference and keeps both your ears and your hair happy.
Thin Metallic Headband for Polished Short Hair

A thin metallic band is the sleek, minimal finish for short hair, the place a chunky band would only overwhelm a pixie or bob. The slim metallic line adds polish and holds back grown-out pieces without any bulk. Slide it on over smooth short hair for an instant, refined look that takes seconds.
- A slim metallic band suits short hair without overwhelming it.
- Holds back grown-out pieces and adds instant polish.
- The minimal, refined finish for a pixie or bob.
Maintenance & Care
After years of handing clients a band mid-blowout when their hair fell flat, I keep a whole drawer of them at my station, and they are the cheapest fix in the room. Most run $8 to $25, and even a good satin-lined or velvet one rarely tops $30, which is less than a single blowout. A few small things make them work better through winter.
First, anchoring: a band slides back on fine or freshly washed hair, so cross two bobby pins in an X under it at each side to lock it in. Nobody will see them and it will not budge all day. Second, your edges: hard plastic bands worn tight every day can stress your hairline over months, so choose padded, satin-lined, or fabric bands for daily wear and save the hard, gripping ones for short stretches.
And treat your band as the hat-hair fix it is. Keep one in your bag to swap for your beanie the second you are indoors. For texture, a satin-lined or silk band protects your hair from friction while it styles, which matters most on curly and color-treated hair.
A headband asks almost nothing of you and gives back a finished look on the days your hair gives you nothing, which, in winter, is most of them. If a hat is unavoidable, the winter hat hairstyles guide covers what to do underneath it.
The Easiest Win in Winter Hair
The throughline across all of these is simple. A headband is the highest-impact, lowest-effort tool in winter hair, the rare accessory that hides hat hair, frames your face, dresses up a flat day, and keeps you a degree warmer, all in the few seconds it takes to slide one on. The right band turns the season’s worst hair days into your easiest ones.
So build a small collection: a satin one for work, a chunky knit for the cold, a velvet or jeweled one for nights out, and keep one in your bag for the indoor swap. What do you grab on a morning when nothing is working? If the honest answer is a hat and quiet defeat, a headband is about to change that.