There is a myth that some people just cannot keep low bun hairstyles in, that their hair is too fine, too thick, too slippery, or too short. After years of building low buns that hold all day, I can tell you it is almost never the hair.
A slide-out by lunch is a technique problem, and once you fix it, anyone’s hair can hold a sleek, secure bun. The low bun is the most elegant, hardworking style there is, right for work, a wedding, the gym, or a normal Tuesday, but only if it stays put. So this is a how-to as much as a style guide: the tools, prep, technique, products, and fixes that keep a low bun secure all day, on every texture.
Why Your Low Bun Slides Out
- A sliding bun is almost always a technique problem, not a hair problem, so the fix is in how you build it, not what you were born with.
- Build on second-day hair or add grip with product; clean, slippery hair is the number one reason a bun works loose.
- Anchor the bun into a backcombed or textured base with proper U-shaped pins, not just thin bobby pins, so it has something to hold.
- Adjust the technique to your texture: fine hair needs grip, thick hair needs splitting, and curly or coily hair needs less tension, not more.
The Tools That Make a Low Bun Hold

Most slide-outs come down to the wrong hardware, not a lack of skill. A handful of thin bobby pins is simply not enough to hold the weight of gathered hair, which is the single most common mistake I see.
The tool that changes everything is the open, U-shaped hair pin. Unlike a bobby pin, which pinches flat and lets heavy hair slip free, a U-pin slides into the base and grips from two directions, anchoring the bun against your head. A few of those do more than a whole drawer of bobby pins.
Round out the kit with a fine-tooth comb for smoothing, a soft elastic that matches your hair color, and a light-hold spray. None of it is expensive; a pack of proper U-pins runs a few dollars and lasts for years.
Prepping Hair for a Low Bun

The single biggest secret to a bun that holds has nothing to do with the bun itself; it is the prep. Freshly washed hair is smooth and slippery, with no grip, which is exactly why a just-shampooed bun slides out by noon. A little texture is your friend here.
- Build on second-day hair, which grips far better than a fresh wash.
- If your hair is clean, work in dry shampoo or texture spray for grip.
- Smooth a little cream or oil over the surface for sleekness, not the roots.
ℹ️Where the Bun Should Actually Sit
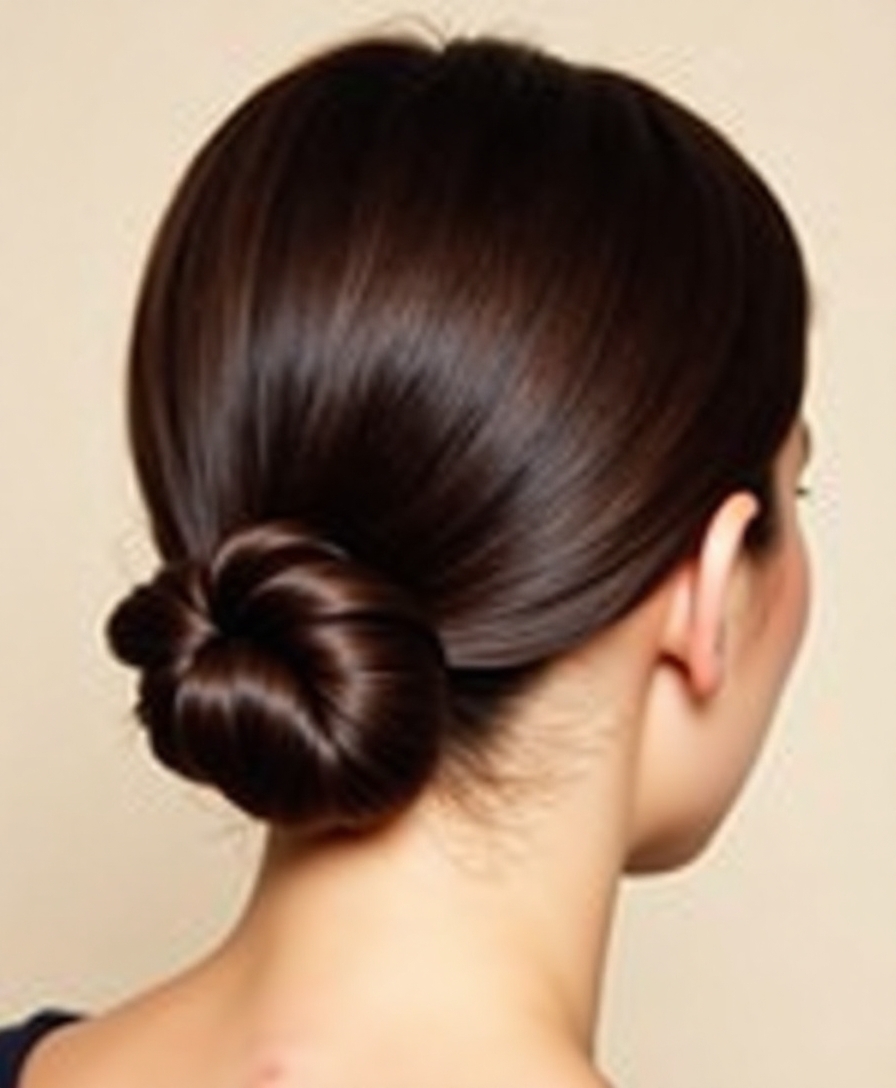
Most people set a low bun too low, right on the neck, where there is no bone to brace it. Place it instead at the occipital bone, the small natural shelf at the lower back of your skull, and the bun has a solid surface to rest and pin against. That placement alone stops a surprising amount of sag.
The Classic Low Bun, Step by Step

Once your tools and prep are right, the build itself is simple, and three steps cover it. Smooth, secure, anchor: get those in order and the bun holds.
Smooth, Secure, Anchor
First, brush all the hair back to the nape and tie a low ponytail with a soft elastic, smoothing every bump as you go. Second, lightly backcomb the tail to give the bun a textured core to grip. Third, twist the tail into a coil, wrap it around the base, and pin it down into that backcombed core with U-pins, working against the direction it wants to fall.
The order matters more than the speed. A bun anchored into a textured base with proper pins will outlast one that was twisted up fast and stabbed with two bobby pins, every single time.
The Best Products for a Low Bun

Product is not about more hold, it is about smart hold and a smooth finish. The right few items give your hair grip where it needs it and sleekness where it shows, without turning crunchy or stiff.
Keep it simple and you will actually reach for them. A texture spray or dry shampoo for grip at the base, a smoothing cream or a touch of gel for the surface, and a flexible-hold spray to finish cover almost every low bun you will ever build.
- A texture spray or dry shampoo to add the grip that holds the bun.
- A smoothing cream, serum, or light gel for a sleek, polished surface.
- A flexible-hold hairspray to lock it without the crunch of a stiff one.
Low bun myths, true or false?
1My hair is too fine to hold a bun.
False. Fine hair holds beautifully once you add grip with texture spray and a backcombed base; the bun was sliding because clean, smooth hair had nothing to grab.
2A bun should be pulled as tight as possible to last.
False. Too-tight buns strain your edges and actually slip sooner. A bun anchored into a textured base holds longer with far less tension.
3You need long hair for a low bun.
False. Short and mid-length hair make a perfect small bun, and a hair donut or a few extra pins bulk it out if you want more.
The Low Bun for Different Textures

The reason one technique fails for some people is that a low bun should be built differently for different textures. There is no single right way; there is the right way for your hair.
Adjust the Technique to Your Hair
Fine, slippery hair needs all the grip it can get, so lean hard on texture spray and a backcombed base; the clients in my chair who swore their hair was too fine were almost always skipping that step. Thick, heavy hair holds better if you split it into two sections and wrap each, so no single point carries all the weight. Wavy hair sits somewhere in the comfortable middle.
Curly and coily hair should be handled gently, with less tension rather than more: gather it loosely, skip the tight slick-back that strains the roots, and let the natural volume be part of the look rather than forcing it flat. A pick or a little water and cream helps gather it without breakage. Our bun styles guide has more by texture.
Avoiding Common Low Bun Mistakes

Most low bun failures come down to the same handful of mistakes, and once you know them, they are easy to sidestep. Nearly all of them are about skipping a step that feels optional but is not, like the prep or the backcombed base, in a rush to just get the hair up.
- Building on slippery, freshly washed hair with no grip.
- Relying on a few bobby pins instead of anchoring U-pins.
- Skipping the backcombed core, so the pins have nothing to grab.
- Pulling it so tight it strains your edges and aches by afternoon.
Protect Your Edges and Curls
A low bun should never hurt. If it strains your hairline or aches by afternoon, it is too tight, and over time that tension can thin the edges. This matters most on curly and coily hair, which needs a looser gather, not a hard slick-back. Build the hold into the base and the pins, not into how tightly you pull.
Quick Fixes for a Sliding Bun

Even a well-built bun can loosen during a long day, and the fix is rarely starting over. Most of the time a slide is just one pin that has worked free or a tail that has loosened, and thirty seconds sets it right.
Keep a couple of spare U-pins and a travel hairspray in your bag, and you can rescue almost any sagging bun between meetings. The trick is to re-anchor rather than re-tighten, sliding a fresh pin back into the base rather than yanking the whole thing higher.
- Slide a fresh U-pin into the loosest side to re-anchor it.
- Mist the base and smooth flyaways with a little spray on your fingers.
- Re-tuck a loose tail end under and pin it, rather than redoing the bun.
Pro Low Bun Techniques

A few tricks from behind the chair separate a bun that just holds from one that looks like a stylist did it. None of them are hard; they are just the small steps most people skip at home.
- Wrap a thin section of hair around the elastic to hide it completely.
- Use a hair donut or a wrapped sock to bulk out a bun on fine or short hair.
- Pin in a hidden X under the bun, crossing two pins, to lock the weight down.
- Mist a brush with hairspray and smooth the surface for a glassy finish.
📋The Never-Slides Checklist
- ✓Second-day hair, or grip added with texture spray or dry shampoo.
- ✓A backcombed core for the pins to anchor into.
- ✓Open U-shaped pins, not just thin bobby pins.
- ✓A flexible-hold spray and a couple of spares in your bag.
Elegant Low Bun Variations

Once the secure base is second nature, the low bun becomes a canvas for dressier versions. The same anchored foundation carries a whole range of looks, from everyday to black-tie, with only small changes.
A sleek, glassy low bun reads modern and editorial for an event. A low chignon, with the tail tucked and rolled rather than wrapped, is the classic bridal choice. Pulling a few soft pieces loose at the front turns the same bun romantic and relaxed for a daytime wedding.
Add a braid wrapped around the base, or a knot instead of a coil, and the everyday low bun dresses all the way up. The security stays the same; only the finish changes, which is the beauty of mastering the base first. Our wedding-guest looks cover the dressier end.
The Workout-Proof Low Bun

A low bun is a great workout style, since it keeps hair off your neck without the bounce of a high pony, but the gym tests it harder than a desk does. Building it to survive a sweaty session takes just a couple of extra steps.
- Build it lower and tighter to the head so it cannot bounce loose.
- Add a no-slip headband to catch the front pieces and the sweat.
- Use extra U-pins and a stronger hold, since sweat loosens grip.
The Overnight Low Bun

A low bun pulls double duty overnight, keeping your hair smooth and tangle-free while you sleep and leaving you soft, loose waves in the morning. It is the easiest heatless wave there is, and it costs you nothing but the time you were sleeping anyway.
The trick is to keep it loose and soft, since a tight overnight bun creases. Twist damp or dry hair into a loose low bun, secure it with a soft scrunchie rather than pins that would dig in, and sleep on satin to keep it smooth. Unravel it in the morning for soft, easy bends.
- Keep it loose and soft, secured with a scrunchie, not hard pins.
- Twist damp hair for more defined waves, dry hair for soft bends.
- Sleep on satin so the bun stays smooth and crease-free.
Flyaways and Baby Hairs
The finish around the hairline is what takes a low bun from home to polished, and there are two separate things going on there. Flyaways are the stray, broken pieces that lift away from a smooth bun, while baby hairs are the fine, naturally short hairs along your hairline.
Smooth, or Lay Them With Intention
For flyaways, the gentlest fix is a light mist of hairspray or a touch of serum on a clean spoolie or toothbrush, smoothed over the surface so the strays lie down without the whole bun going stiff.
Baby hairs are a choice, not a flaw, and I tell every client so. You can smooth them back into the bun, or, as has long been done so beautifully in textured-hair styling, lay them into soft, deliberate swoops with an edge brush and a little gel. Laid edges are a genuine art form and a beautiful finishing touch; left natural is just as valid. Either way, they are yours to style, not something to apologize for.
Seasonal Low Bun Adjustments

The same low bun needs small tweaks to survive different weather, because humidity, heat, and dry winter air each work against it differently. A few seasonal adjustments keep it holding year-round.
In summer humidity, lean on anti-frizz products and a firmer hold, since damp air swells the hair and lifts flyaways. In dry winter, static is the enemy, so a little oil or a dryer sheet smoothed over the surface keeps the bun sleek instead of fuzzy. The base technique stays the same; only the finishing products shift.
- Summer: anti-humidity spray and a firmer hold against frizz.
- Winter: a drop of oil or a dryer sheet to beat static and fuzz.
- Year-round: adjust the finish, not the secure base underneath.
Low Bun Accessories

Accessories are the fastest way to take a plain low bun somewhere new, dressing it up or adding personality with a single piece. Because the bun itself is so simple and secure, it is the ideal base to build on.
- A decorative comb or pearl pins for an instant event-ready finish.
- A silk scarf tied around the base for color and a vintage feel.
- A simple gold cuff or claw around the bun for an everyday upgrade.
Time-Saving Low Bun Hacks

Once you have the technique down, a secure low bun should take three minutes, not ten. A few shortcuts get you a polished, holding bun on the busiest morning without sacrificing the security that matters.
- Build on second-day hair to skip the prep step entirely.
- Use a claw clip to twist and hold a quick bun, then lock it with one U-pin.
- Keep a pre-stocked pin pouch by the door so you are never hunting for hardware.
Low Bun Questions, Answered
?Why does my low bun always slide out by the afternoon?
Diagnose which link is failing. If the whole bun drops as a unit, the pins are wrong, so swap to U-pins. If the coil loosens but the pins stay, your hair was too slippery, so add grip. If it aches first, then slides, you pulled it too tight and it fought back. Fix the specific failure rather than just redoing it tighter.
?What is the difference between a low bun and a chignon?
A chignon is a type of low bun where the tail is folded and tucked into a smooth roll at the nape, rather than twisted and wrapped into a round coil. A classic low bun is the everyday version; a chignon is its dressier, more structured cousin, often used for weddings.
?Is a tight low bun bad for my hair?
A bun that strains your hairline or aches is too tight, and repeated daily that tension can thin the edges over time. The fix is to build the hold into a textured base and good pins rather than into how hard you pull, which matters most for curly and coily hair.
?How do I keep flyaways down without making the bun stiff?
Mist a clean spoolie or an old toothbrush with hairspray, or add a touch of serum, and smooth it over the surface. That tackles just the strays without coating the whole bun in stiff product.
?Should I wear a sleek low bun or a messy one?
It comes down to the occasion. A sleek, anchored low bun reads polished for work, weddings, and events, while a soft, undone version suits a relaxed day. The secure base is the same for both; you just pull a few pieces loose for the messy look. Our [[messy bun ideas|messy-bun-hairstyles]] cover the undone end.
A Low Bun That Always Holds
The slide-out bun is not your hair’s fault, and it is not a skill you either have or do not. It is a handful of small techniques that anyone can learn in a single try, and once they click, they become automatic. Master them, and the sleek, secure low bun turns into the most reliable style you own.
Tonight or tomorrow, build one the right way: prep for grip, backcomb the core, and anchor with U-pins instead of bobby pins. Once you feel a bun that does not budge all day, you will never go back to crossing your fingers and hoping it holds.