


Emo hair in the mid-2000s was heavy, black, and swept hard across one eye, cut with little regard for how it grew out. The emo shag haircut brings that same fringe-forward attitude back right now, but built on shag layering instead of one flat block, so it actually moves and grows out instead of just sitting there.
Fifteen versions follow, covering fringe style, color, and hair type, each with the honest trade-off it asks for rather than a one-size pitch.
What the Fringe Actually Decides
The fringe is the one non-negotiable part of an emo shag. Everything else, the color, the length, the texture, can flex to fit your hair and your commitment level, but a shag without a heavy, face-framing fringe is just a shag.
You’ll notice the honest trade-off is daily styling time, not a huge price tag. This is a texture-forward cut that rewards a few minutes with product each morning more than it rewards a big salon budget.
Choppy, Razor-Kissed Layers

This is close to the blueprint version. Layers are cut short and choppy through the crown, then razored toward the ends so they break into separated, piecey sections instead of one solid shape.
The contrast is the whole point: short, textured layers up top against longer, swoopy length around the face. That gap is what gives the cut its restless energy.
- Forgiving to grow out, since choppy layers blur the in-between stages.
- A solid first step for anyone testing the look before going further.
- The razored ends need conditioning more often than a blunt cut would.

Swoopy Side Bangs at the Center of It

The long, swoopy side bang swept across one eye is the single most recognizable piece of this whole style, and on a shag it frames the face with real attitude. Get this part right and everything else follows.
You’ll notice it takes a fringe long enough to reach the cheekbone or jaw to get the full sweep. Blow it across the forehead, directing it to one side, then set it with a light pomade so it holds without going stiff.
ℹ️Not a New Cut, an Old One Refined
This look borrows its fringe directly from mid-2000s emo and scene hair, but built on modern shag layering instead of one flat, ironed-straight block, which is why it moves and grows out so much better than the original did.
Razor-Cut Precision for Piecey Texture

Leaning harder into the razor gives the shag a fine, feathered, piecey texture that scissors alone can’t quite match. The wispy ends catch light and move constantly, which is the restless quality the whole style chases.
Razoring suits medium to thick, healthy hair best; on fine or already-dry hair it can fray the ends instead of shaping them. Ask specifically for a stylist comfortable with a razor, since a dull blade tears rather than cuts.
A Micro Fringe Against Messy Length
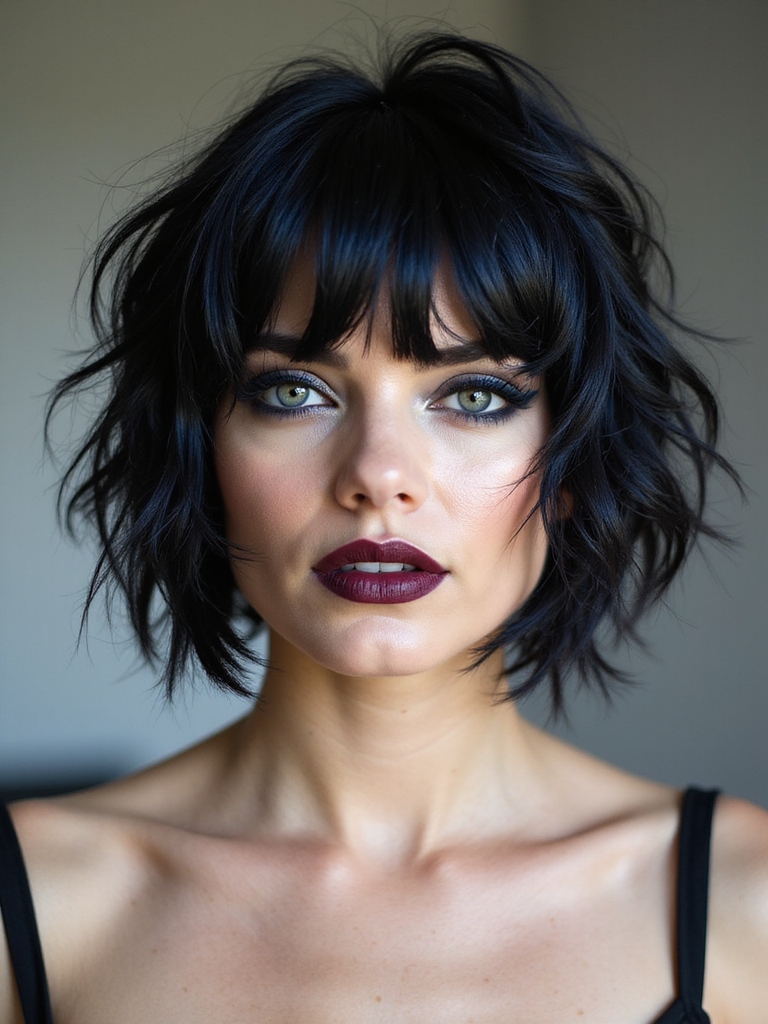
Not every version hides behind a sweep. This one pairs a blunt micro fringe, cut high and straight across the forehead, against a messy, textured shag behind it.
The contrast is the point: a sharp, graphic bang against soft, undone length. There’s nowhere for a fringe this short to hide, so it draws every eye straight to the face.
- Works best on an even forehead, since there’s no length to soften the line.
- Expect a shorter trim cycle on the fringe than any other version here.
- Bold features hold up well against this much contrast.
Jet-Black With a Glossy Edge

Color carries half the identity of this whole look, and jet-black is the classic choice. A deep, inky black, sometimes with a blue-black sheen, gives the shag a glossy darkness that defines the aesthetic.
Before You Commit to This Dark
The layers themselves look sharper against a solid, dark base than they would against a lighter color.
Black is the hardest color to walk back once it’s in, since it has to be stripped rather than simply toned over. A glossy, blue-black finish feels more deliberate than a flat, matte black ever does.
A couple of color terms worth knowing before booking:
📖Blue-black
A near-black shade with a cool, blue-toned reflect, rather than a flat, neutral black.
📖Color-melt
A gradual, blended transition between two shades, used to soften a two-tone split if a hard line feels like too much.
Neon Streaks Hidden Under the Layers

For color without full commitment, neon panels tucked underneath the top layers hide bright streaks that flash electric blue, green, or pink only when the hair moves.
Getting the Base Right First
The shag’s layering is practically built for this kind of hide-and-reveal color placement.
Pre-lightening the panels matters more than people expect, since neon tone needs a properly pale base underneath to show its true color instead of a muddy one. Bring reference photos showing exactly how much brightness you want visible.
A Wolf Cut Fused With Emo Layering
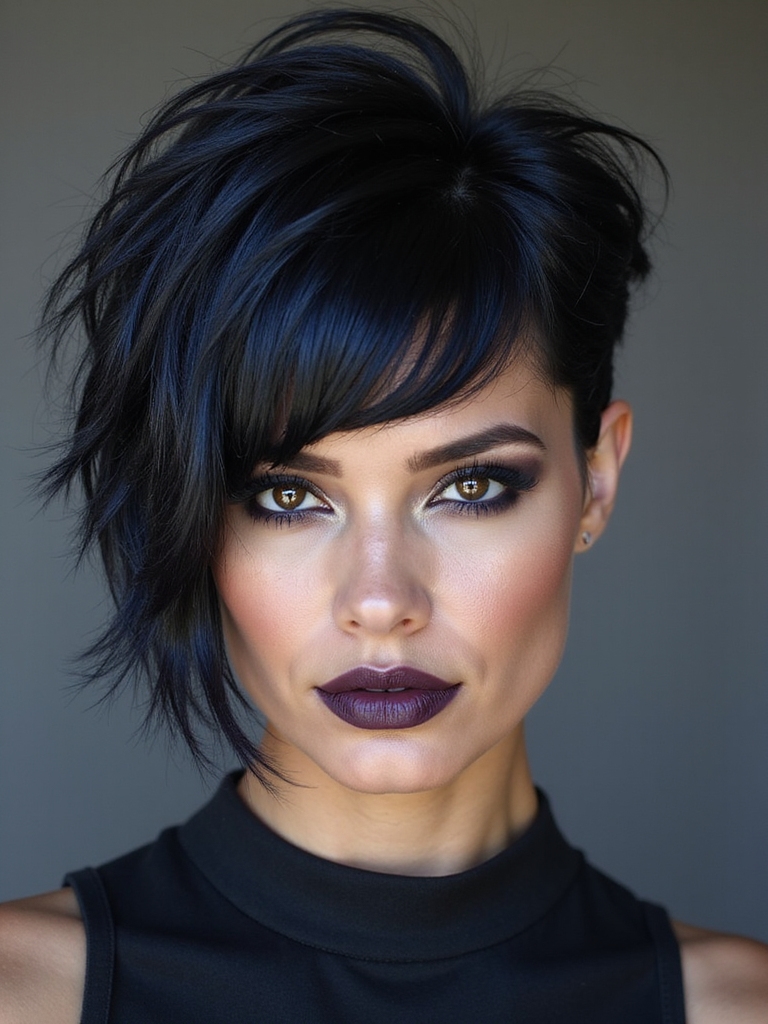
Fusing a wolf cut with this style gives maximum layered volume alongside the signature heavy fringe, combining a spiky, textured crown with face-framing drama in one cut.
- Ask for heavy, wolf-style crown layers paired with a long fringe.
- Keep volume concentrated at the top, with feathery, separated pieces through the ends.
- This is the loudest, most voluminous version on this list.
An Asymmetrical Cut to the Cheekbone

Cutting the fringe and surrounding layers noticeably longer on one side gives the shag an off-kilter, deliberately unbalanced edge.
The longer side grazes the cheekbone and pulls the eye on a diagonal, which flatters a rounder face shape especially and adds some drama to any shape.
It needs a reshape sooner than a symmetrical version, since the uneven angle softens with growth faster than an even one would. The asymmetry only looks intentional if a stylist keeps that edge sharp.
🅰️A Symmetrical Fringe
Reads as intentional and controlled. Easier to maintain since both sides grow out evenly.
🅱️An Asymmetrical Fringe
Reads as bolder and more editorial. Needs a reshape sooner as the angle softens with growth.
Soft Shag Shaping for Curls and Waves
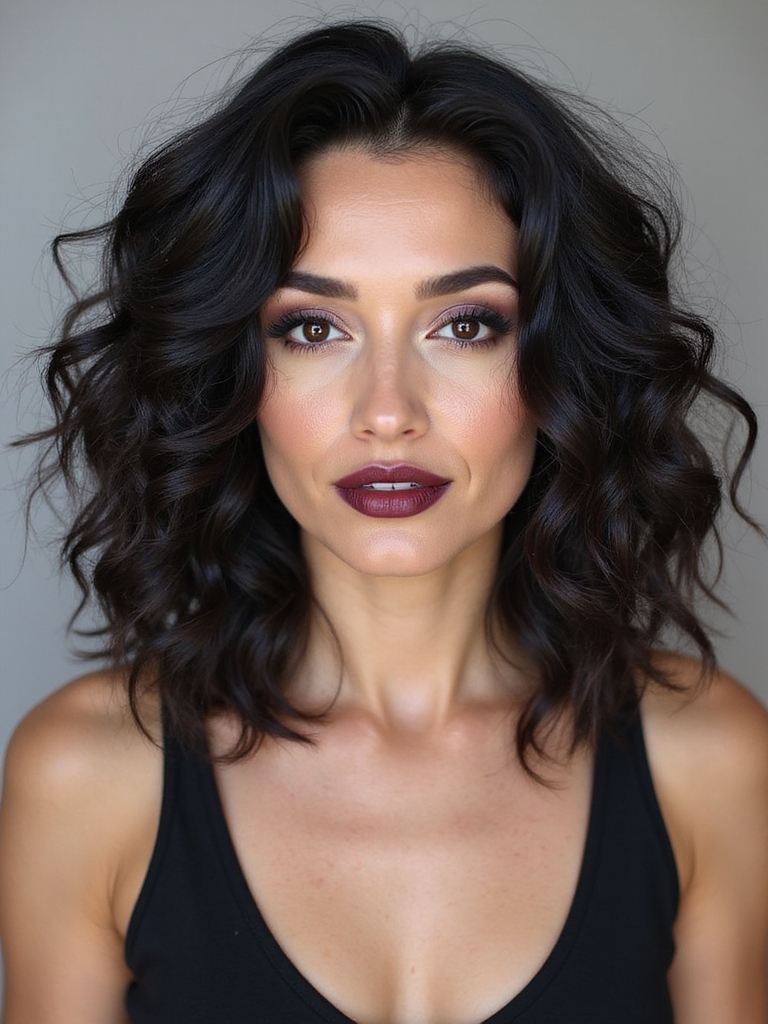
This style was never only for straight hair, and a shag on curls or waves looks striking when it’s cut for the actual pattern rather than forced straight first.
- Cut dry, on natural texture, so the layers land where the curl actually sits once it springs up.
- Cut wet, curls shrink shorter than expected and the whole shape shifts.
- The fringe becomes a soft curtain of curl framing the face instead of one flat sweep.
A Cropped Mullet Take on the Emo Shag

Shortening the whole cut into mullet territory, with a cropped, textured top and a longer, wispy nape, pushes this style about as far as it goes.
- Keep a textured, choppy crown paired with a longer, piecey tail at the nape.
- Pair it with a heavy fringe to keep the emo identity, not just the mullet shape.
- This is the version for someone fully committed to the statement, not easing in.
“Clients ask me most often whether the mullet version is too much. It isn’t, if the fringe stays heavy enough to keep the emo identity front and center. Drop the fringe and it just looks like a plain mullet instead.”
A Long Emo Shag Without Losing the Drama

For anyone not ready to lose length, heavy internal layering through a longer cut keeps the drama and the fringe while leaving plenty of hair to work with. For a look at the style this borrows from, see our 70s shag haircut, long guide.
It’s the most wearable, easiest-to-live-with version here. The layers alone add movement and restless energy, no drastic chop required.
A Two-Tone Split Front to Back

Splitting the shag into two contrasting colors, classic black-and-blonde or black against something bright, is the boldest color move on this list.
Keeping the Split Clean
The layers and fringe show off that split clearly, since the length changes constantly move the color boundary in and out of view.
Choose a clean, deliberate dividing line, usually straight down the center part, and keep the contrast high. A muddy, blended split loses the entire graphic effect that makes this version worth doing.
Debulked Layers for Thick Hair

Thick hair can absolutely wear this cut, but it needs debulking first so the layers move instead of sitting like a heavy triangle on top.
- Ask specifically for interior debulking, not just surface layers, to actually release movement.
- Expect a razor or thinning shears through the mid-lengths rather than the ends alone.
- Skipping this step is the single most common reason a thick-haired shag falls flat.
Layering Built for Lift on Fine Hair

Fine hair and this cut turn out to be a strong match, since strategic layering creates the illusion of more density and lift than fine hair has on its own. For more on lightweight layering, see our soft shag haircut guide.
- Ask for soft, lift-building layers, and avoid aggressive thinning that leaves nothing to work with.
- Add volume at the root with a texture spray rather than a heavy styling product.
- Keep the fringe a touch lighter so it doesn’t collapse flat by midday.
Getting the Daily Styling Right

The cut is only half of this look. Daily styling is where it actually comes alive, aiming for matte, gritty texture with deliberate separation rather than anything smooth or rounded.
A texturizing spray or matte paste worked through dry hair builds the piecey, restless finish the whole style depends on.
- Blow the fringe forward and across, then set the sweep with a light pomade.
- Keep product light overall. Heavy hold drags the layers down and kills the movement.
- A little texture goes further on this cut than a lot of product ever will.
Maintenance & Care
This is a texture-forward cut more than an expensive one. Expect a shaping trim to keep the layers from losing their edge as they grow, plus a quick fringe check-in between full cuts if you’ve gone short up front. Budget for the time this asks of you daily more than for what any single appointment costs.
A basic reshape typically runs $45 to $75, well under what a full color service like the two-tone or neon versions above would add on top. For more everyday shag options at any budget, see best medium shag hairstyles. What actually separates a good result from a bad one is finding a stylist who cuts for movement specifically, not just length.
Emo Shag Questions Worth Asking First
?Does an emo shag work on hair that’s never been layered before?
Yes, though expect the first cut to remove more length than a simple trim would, since the shag depends on layers built from the crown down, not just shape around the edges. A stylist working from photos of your current length can judge how much has to come off to build the layering properly.
?How is this different from a regular wolf cut or shag?
The fringe. A standard shag or wolf cut can wear all kinds of bangs or none at all, but this version specifically needs a heavy, face-framing fringe swept or cut dramatically. Take the fringe away and it looks like a plain layered shag instead.
?Can the color be added later without redoing the cut?
Usually, yes. Jet-black, a two-tone split, or hidden neon panels can all be added to an existing shag without touching the layers, though a colorist may want to see how the light catches the layers first to place any panels well.
?What’s the easiest way to test this look before committing fully?
Start with the long layered version and a soft side-swept fringe rather than a razored, high-contrast micro fringe. It’s the most reversible entry point, and it still delivers the core fringe-forward attitude the whole style is built around.
The Fringe Is the Whole Point
Whether you go full mullet-and-black or ease in with long layers and a soft sweep, this cut rewards a little commitment to texture more than it rewards a big budget. Start with the fringe, since it carries the whole look, and build the rest of the cut around it. Anyone weighing shorter options can also compare shoulder-length shag haircut styles for a middle ground.
If you’re still deciding how far to take it, the long layered version is worth trying first before committing to anything shorter or more razored.
Related Reads





