


A plain pixie can start to feel a touch too neat within a few months of wear. A pixie shag haircut solves that specific problem: it keeps the cropped, low-fuss length of a pixie but borrows the choppy layers and feathered fringe of a shag, turning a tidy crop into something with real texture and edge.
Fifteen versions follow, along with the styling and consultation details that decide whether the finished result looks deliberate or just abbreviated.
Pixie Shag, Quick Guide
| Hair type | What the shag layers do | Styling note |
|---|---|---|
| Fine | Add lift and the illusion of density | Root powder plus a light round-brush pass |
| Thick | Remove interior weight so the crop moves | Ask for internal thinning, not all-over |
| Curly or coily | Let coils spring without piling into a triangle | Cut fully dry, defined with cream |
Classic Pixie Shag With Feathered Bangs

Feathered bangs paired with a choppy shag crop is the combination that started the whole trend, a short cut layered with real shag texture and finished with a soft, movable fringe.
- Feathered bangs frame the eyes and soften the crop’s overall line.
- Choppy layers are the detail that separates a pixie shag from a plain crop.
- A solid entry point for anyone drawn to texture but still hesitant about anything more extreme.

Choppy Micro Layers for Maximum Texture
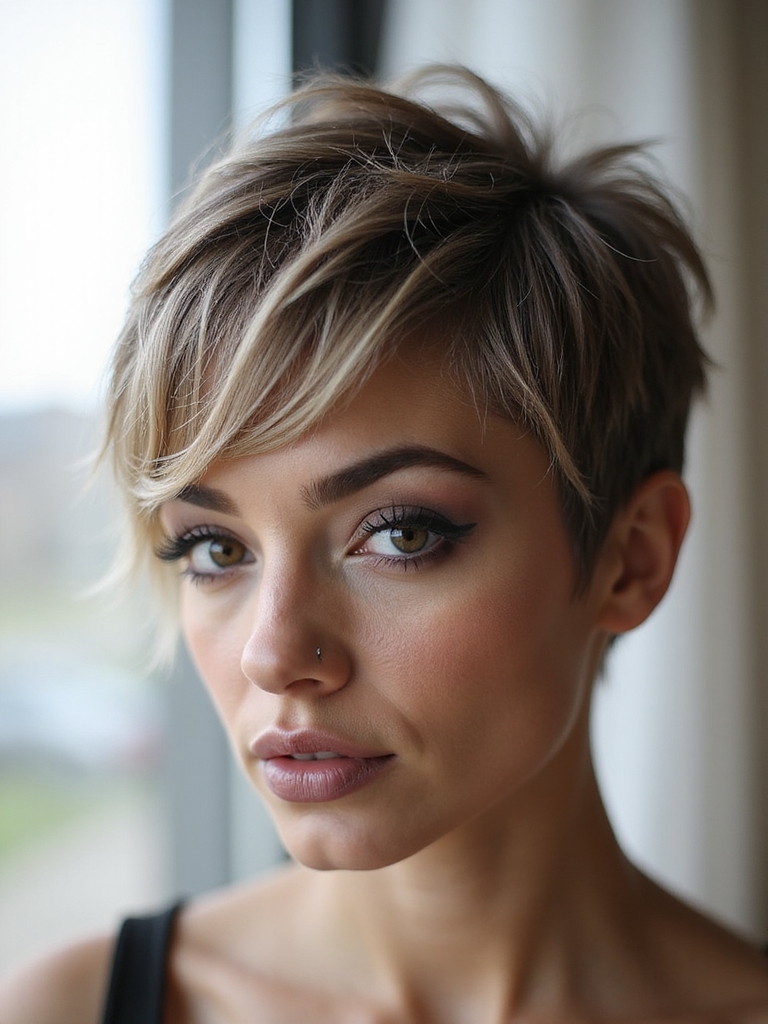
A pixie shag built on choppy micro layers carries more texture than any other version covered here, with fine, precise layering that reads edgy and full of movement.
Where the Texture Actually Lives
Micro layering is delicate work: thin slices cut throughout the crop so the hair falls in separated, dynamic pieces rather than one solid mass.
A small amount of matte paste worked through dry ends defines the individual layers. Heavy formulas drag micro layers flat fast, erasing the exact texture the cut was built to show off.
🅰️Want the safest first step
Start with feathered bangs and moderate layering; it reads textured without tipping into edgy.
🅱️Want to commit fully
Go straight for choppy micro layers and a razored finish for maximum immediate impact.
Soft Piecey Fringe to Frame the Eyes

A soft, piecey fringe keeps the front of a pixie shag light and separated, drawing attention toward the eyes rather than sitting as a flat block across the forehead. It’s a small detail that changes how the whole face reads, softening a strong brow line without adding any real length to the cut.
- Softens a high forehead without reading as a heavy, blunt line.
- Blends into the surrounding shag layers instead of sitting apart from them.
- Grows out gradually, with no obvious awkward stage to wait through.
Curly Pixie Shag for Natural Coils
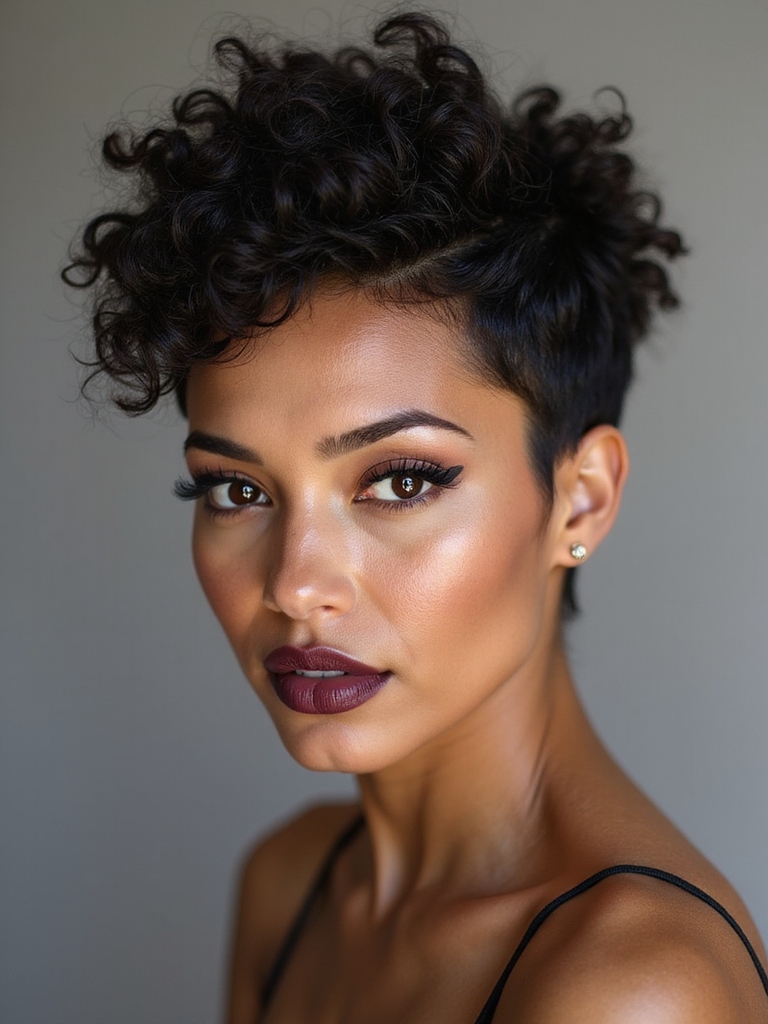
A curly pixie shag brings the technique to curly and coily hair, with the layers giving each coil room to spring into full, sculpted texture rather than compressing under its own weight.
Cutting happens fully dry, in the hair’s resting state, so a stylist can place layers based on where coils actually land and account for shrinkage, which can pull visible length up considerably. A little leave-in keeps the definition soft through the day.
Two assumptions worth clearing up before booking this version.
❌ Myth: Fine hair can’t handle this much layering.
✅ Reality: The opposite tends to be true. Fine hair often shows off micro layering best, since there’s no extra weight fighting the separation.
❌ Myth: More layers always means more upkeep.
✅ Reality: Not necessarily. Once the layers are placed correctly, styling actually takes less time than smoothing a blunter crop.
Wavy Volume With Airy Ends

A wavy pixie shag leans on natural wave pattern to build soft, full texture, with airy ends keeping the whole shape from turning heavy. The wave handles most of the styling job that other short cuts need a curling iron for, which makes this one of the lowest-effort versions on the list.
- The existing wave pattern does most of the volume-building work on its own.
- Airy, texturized ends keep the crop feeling light rather than dense.
- A scrunch of product on damp hair covers most of the daily routine.
Razor-Cut Edges for an Edgy Finish
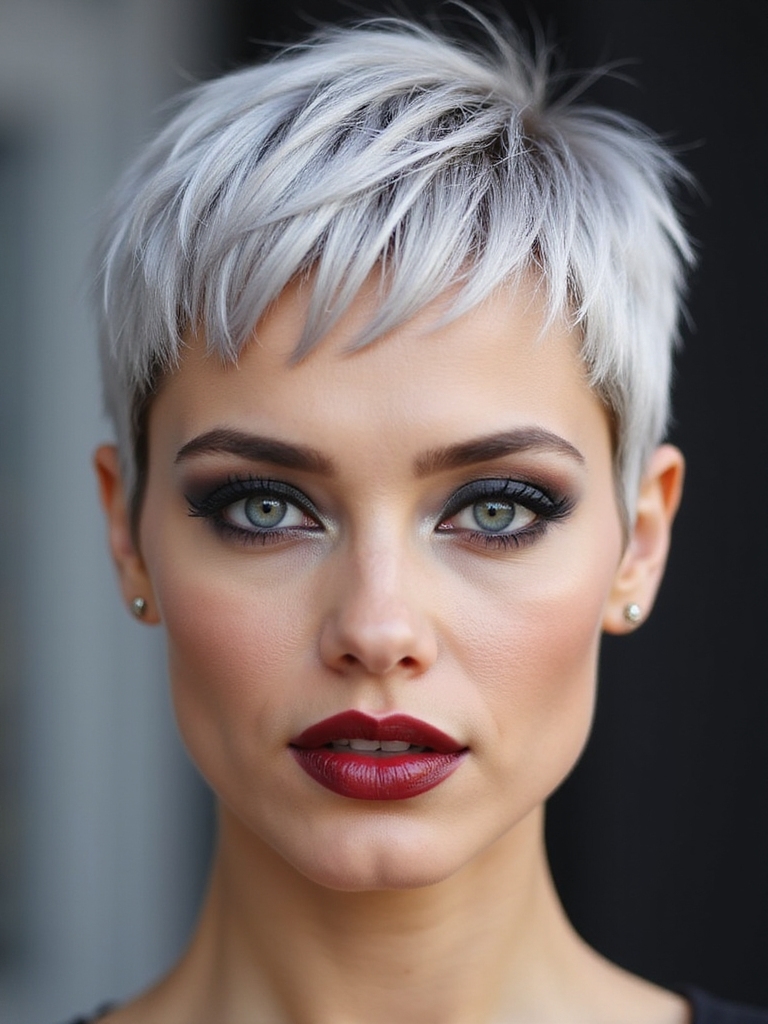
Razor-cut edges give a pixie shag its sharpest, most rebellious finish, with weightless, piecey ends that fall loose rather than sitting in a blunt line.
When to Skip the Razor
The technique comes with a real caveat worth raising before committing to it: a razor suits straighter to wavy textures best, since very dry or coily hair can fray and frizz noticeably under the blade.
Once styled, it needs almost nothing beyond a light mist of texture spray to separate the razored pieces. Heavy cream collapses the exact airiness the razor was used to create.
Side-Swept Bangs for Subtle Movement
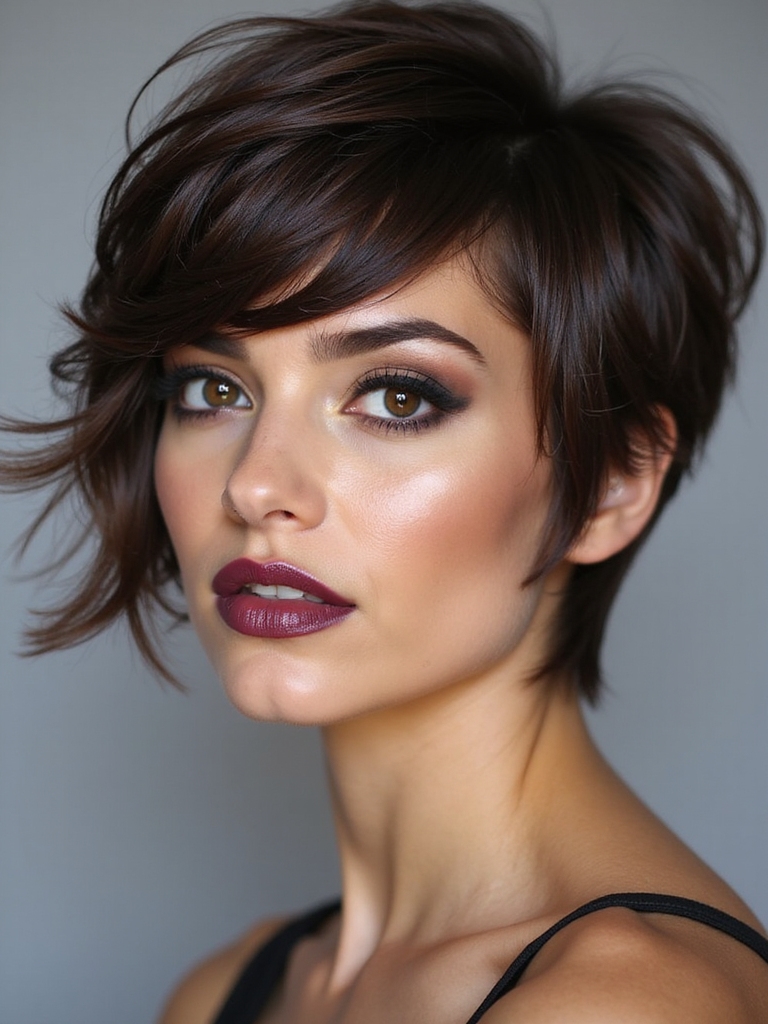
A pixie shag with side-swept bangs angles the fringe diagonally for a softer, less bold take on the cut than a straight-across version. It’s the fringe choice that reads more like an accessory to the crop than a statement competing with it.
- The diagonal sweep frames the face with noticeably less impact than a blunt fringe.
- Suits a broad range of face shapes and grows out without much drama.
- The gentlest, most wearable entry point into a pixie shag’s fringe options.
Shaggy Pixie Mullet for Retro-Cool Vibes

A shaggy pixie mullet pairs the short crop with a longer nape section for a bold, retro-leaning shape, with shag layering keeping the mullet element soft rather than costume-like. It’s the version most likely to draw a comment the same week it’s cut.
- A longer nape section adds the retro, mullet-inspired drama.
- Layering throughout keeps the contrast reading intentional, not accidental.
- The boldest fringe pairing on this list is a piecey, feathered top.
Volumized Crown for Lift on Fine Hair

A volumized crown builds lift right at the top of the head, adding body that fine hair often lacks once it’s cut this short.
- Crown height keeps the shape from reading flat by the middle of the day.
- A little texture powder worked into the roots holds the lift through most activities.
- Particularly useful for finer textures that worry a short cut will sit limp.
Tousled Shag With Face-Framing Layers
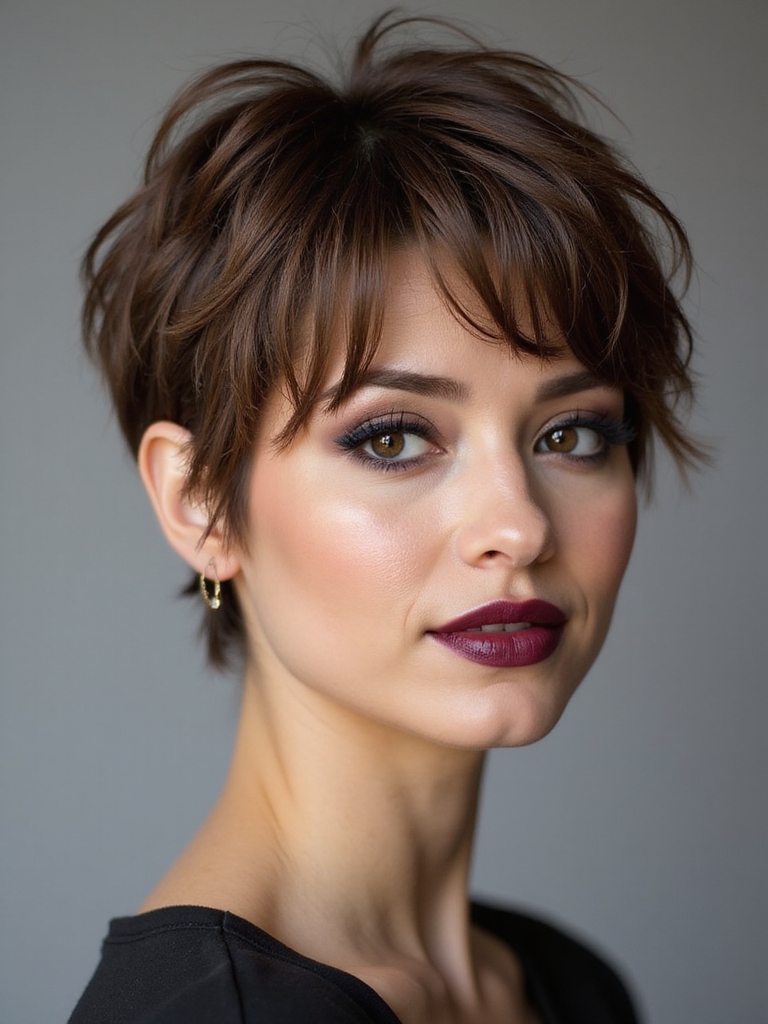
A tousled pixie shag with face-framing layers keeps everything soft and undone, with rumpled texture and slightly longer front pieces doing the flattering work around the cheeks and jaw.
It reads as the most relaxed, low-effort version of the cut, closer to something finger-styled in two minutes than anything requiring real technique each morning.
- Longer front pieces soften the face without a dedicated fringe.
- The most low-maintenance, everyday version on this list.
- A light texture spray and a finger-tousle covers most of the routine.
Undercut Details for Hidden Drama

An undercut adds hidden drama to a pixie shag, with a shaved or closely clipped section sitting underneath the length or at the sides, visible only when it’s meant to be.
Beyond the visual edge, an undercut removes real bulk from thick hair, which keeps a short crop light instead of puffing out at the sides under its own density.
The buzzed section needs a refresh on a noticeably tighter cycle to stay crisp, often $15 to $25 at a barbershop between full salon visits, since regrowth shows there faster than anywhere else on the head.
Bold Color Blocking to Amplify Texture

Bold color blocking amplifies the texture of a pixie shag, with contrasting shades pulling the eye directly toward the layering and movement rather than the shape alone.
Placement decides whether it actually works: color concentrated where the layering is busiest reads far more intentional than an even, all-over application.
- A color panel placed at the fringe or crown highlights texture more than uniform color does.
- The cut’s natural sections make placement simpler than it would be on a smoother style.
- Subtler versions, like a single money piece, apply the same logic with less commitment.
A few cutting terms worth knowing before the appointment.
📖Point-cutting
A technique where the scissor tips slice into the very ends on an angle, so the finished line softens and picks up extra texture instead of sitting blunt.
📖Internal thinning
Removing weight from underneath the visible layer, so bulk decreases without shortening the outer length.
📖Disconnection
A sharp break between two sections of length, like a cropped top and a longer nape, with no blended transition.
Low-Maintenance Styling With Dry Texture Spray
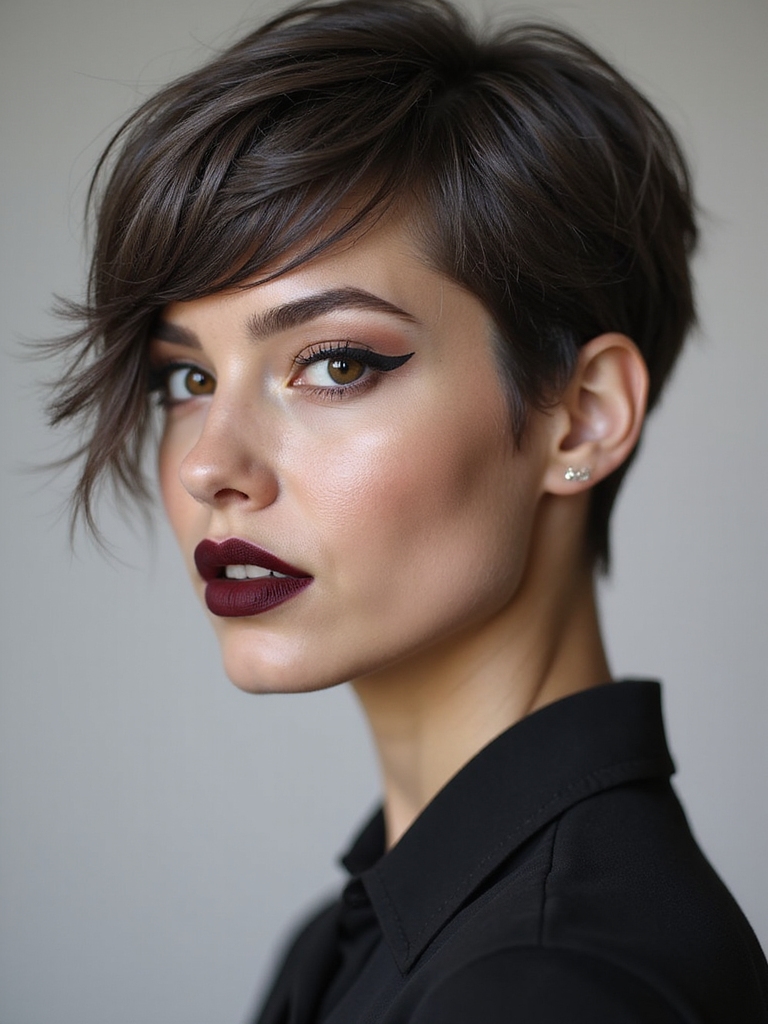
A pixie shag is short enough to style in minutes, and a dry texture spray handles most of the actual work, adding grip and separation without weighing the crop down.
- Mist through dry or damp layers, then tousle with fingers; that’s close to the entire routine.
- A small amount of matte paste defines individual pieces on days that need more hold.
- Dry shampoo at the roots on a flat day brings lift back without a full restyle.
Soft Shag Layers While Growing Out a Pixie

Soft shag layers are a practical way to grow a pixie out without an obvious awkward stage, adding movement to the in-between length instead of letting it sit flat and shapeless.
- Layering through the growing section keeps it looking styled rather than accidental.
- Bridges the gap between a crop and a longer cut with real texture.
- Turns the grow-out period into something closer to an actual haircut than a waiting game.
💡Reviving Second-Day Texture
By week three between cuts, the layers usually need a little more coaxing than a fresh cut does. A slightly heavier hand with texture spray, focused at the roots rather than the ends, tends to solve it without reaching for a curling iron.
Salon Consultation Tips for Your Cut

A pixie shag is short and bold enough that a clear consultation matters more than it would for a longer cut, since there’s simply less hair available to fix if something goes sideways.
Getting Specific About the Shortest Layer
Bringing photos of the texture and fringe that appeal, plus a couple that don’t, gives a stylist real boundaries to work within rather than a vague direction.
Asking specifically where the shortest layer will sit matters most on a crop this short, since that single point tends to shape how the whole silhouette reads. Being honest about actual morning styling time also keeps the cut realistic rather than aspirational.
Common Mistakes to Avoid
The most common misstep is asking for a pixie shag without naming a specific layering intensity, which leaves too much open to interpretation. A stylist working from a vague sense of “some texture, not too much” has to guess, and that guess doesn’t always match the reference photo saved on a phone.
The second is skipping the density conversation entirely. What works beautifully on fine hair can look sparse on thick hair without real adjustment, and the reverse holds just as true, so describing how hair actually behaves day to day matters more than the specific photo brought in.
Pixie Shag Questions Answered
?What’s the actual difference between a pixie shag and a regular pixie?
A regular pixie usually stays close to one length with a clean, tidy finish. A pixie shag adds choppy, textured layering and typically a feathered or piecey fringe, trading that clean finish for movement and visible texture throughout.
?Does a pixie shag work for thick hair, or does it get too bulky?
It works well with the right layering. Internal thinning removes bulk from underneath without shortening the visible length, which keeps a pixie shag from puffing out at the sides the way an under-layered cut on thick hair often does.
?How long does it actually take to grow a pixie shag out to shoulder length?
Most hair grows about half an inch a month, so reaching shoulder length from a pixie shag typically takes a year to a year and a half, depending on the starting length. Regular shag-style trims during that stretch keep the in-between stages from looking shapeless.
A Crop With Real Character
A pixie shag proves short hair doesn’t have to read as plain or predictable. Choppy layers, a piecey fringe, and an undone finish turn a simple crop into something with real edge, and the technique adapts to nearly any texture that walks through the door.
Worth doing: pick the version that matches both the hair type and the amount of daily effort that feels realistic, bring specific reference photos, and finish with a light hand rather than a heavy one. A few inches of hair can carry more attitude than most people expect.


