


A skunk stripe gets written off fast, dismissed as a look that ages badly. The modern pairing changes that math: a shaggy wolf cut sliced into layers, then split with a bold streak of contrasting color that moves instead of sitting flat against one-length hair.
The looks below range from soft contrast to full split-dye drama, along with what the upkeep actually involves and how to keep bleached sections from turning brittle.
The Contrast Questions Worth Answering First
What exactly is a skunk-wolf cut? A layered wolf cut paired with high-contrast, two-tone color, usually one lighter or brighter section set against a darker base.
Is it a big commitment? The color is the real commitment, not the cut. Bold contrast needs a toner refresh close to once a month, and any bleached section needs bond-building care.
Does it work on every face and texture? Nearly, since the contrast level is fully adjustable. A soft, blended version stays subtle; a chunky, high-contrast panel makes a full statement.
High-Contrast Layers That Make Color Move

A bold color stripe on one-length hair tends to sit flat and stiff, almost like a costume piece. Cut into a wolf shape instead, the same stripe slices through choppy layers and swings with them, which is most of why this pairing looks modern instead of gimmicky.
- Layers break a solid color block into moving pieces rather than one flat panel
- Skin undertone matters here: cool undertones generally read best with icy or ash contrast, warm undertones with caramel or copper
- A colorist maps the cut before touching any bleach, since the placement follows where the layers actually fall

Choosing a Contrast Level Before the Chair

The first real decision has nothing to do with the cut. It’s how much contrast to commit to. High contrast, think platinum against near-black, reads the boldest and asks for the most upkeep. Medium contrast softens that line by a few shades. Soft contrast, something like caramel against deep brown, grows out the most gracefully of the three.
- High contrast: boldest statement, shortest gap between color refreshes
- Medium contrast: noticeable without demanding constant upkeep
- Soft contrast: the most forgiving option as it grows out
The build sequence I see work best, start to finish:
1Cut the wolf shape first
Layers get cut dry so the finished movement is visible before any color goes in
2Map the contrast placement
Sections are chosen based on face shape and how the layers fall, not applied randomly
3Process the lighter sections
Bleach or lift happens in stages, with bond-builder worked in to limit damage
Face-Framing Panels as the Entry Point

Placing the lighter color right around the face is the most flattering way to wear this trend, since those panels sit exactly where light already hits the complexion. On a wolf cut, the panels fall into the existing face-framing layers instead of needing their own separate shape.
- Panels typically start around cheekbone height to frame and lift the face
- Works as a bolder extension of a standard money-piece
- Panel width usually runs one to two inches for a subtle version, wider for more drama
A True Split-Dye for Maximum Drama

For the boldest possible statement, a genuine split dye divides hair straight down the center into two distinct colors. It’s the most dramatic version of this trend and a real commitment, both to the look itself and to the upkeep behind it. The wolf cut’s layering is what keeps even a stark center split from reading harsh, blending the two halves through texture instead of one hard line.
- Two fully contrasting halves, divided at a center part
- Layers soften what would otherwise be a severe line
- The highest-upkeep version of the group by a wide margin
Chunky Highlights Versus a Money Piece
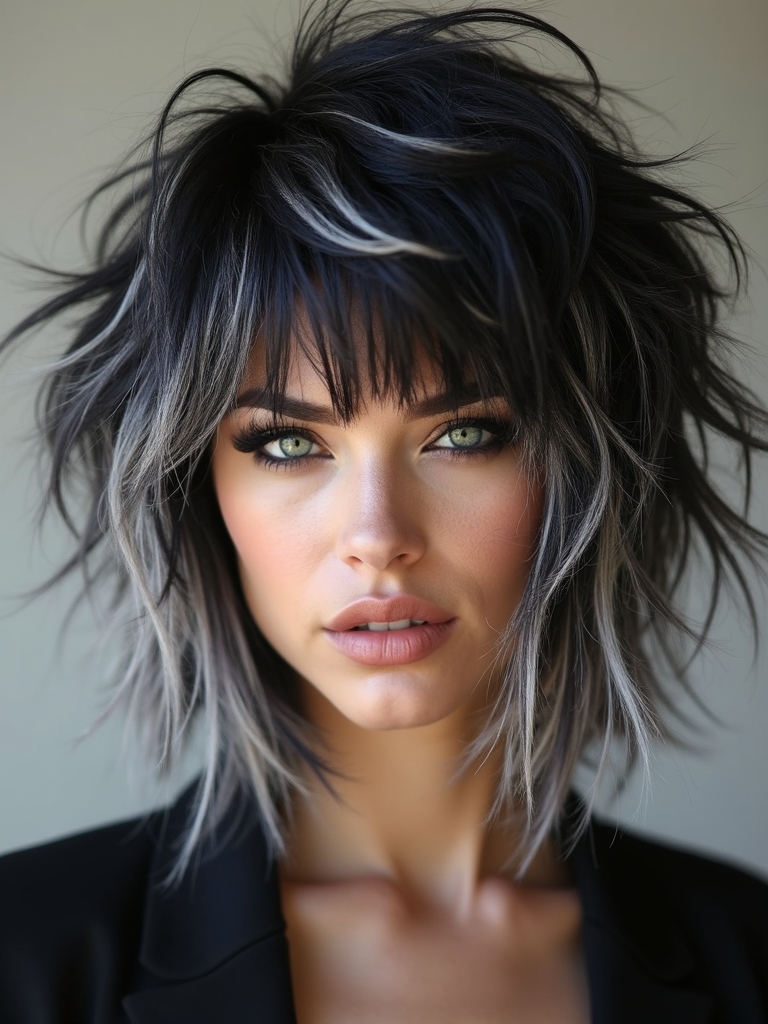
Two gentler paths into this look: chunky highlights and a money piece, and they’re not interchangeable. Chunky highlights run bold, thick ribbons of lighter color through sections all over the head for contrast that shows from every angle. For a broader look at dyed wolf cuts, both approaches sit within that same spectrum.
A money piece, by comparison, concentrates all of that brightness at the front, framing the face while leaving the rest of the base color untouched. It asks for far less upkeep, since only the front needs regular attention. On a wolf cut, both options work well; the deciding factor usually comes down to how much visible contrast feels right.
Curly Texture With Skunk Color and Bounce

Curly hair and this kind of contrast color make a striking pair, since the curl pattern gives the color somewhere to spiral and catch light as it moves. Each coil shows both tones at once, landing far more dimensional than the same color would on straight hair.
What Curl Changes About the Process
The cut still happens dry, shaped to the natural curl pattern, with the lighter color mapped to wherever curls fall closest to the face. Bleach tends to hit curly texture harder than straight hair, so a bond-builder and consistent gentle aftercare stop being optional here.
A curly wolf cut built this way keeps its shape and its color looking intentional through multiple wash cycles, not just the first week.
👍What This Combination Gets Right
- +Curl shrinkage hides small color-mapping errors that would show instantly on straight hair
- +Porosity along the curl usually means lighter sections lift a shade faster than the roots do
- +A single well-placed panel can wrap through several curls at once, covering more visual area per section
👎What It Costs in Upkeep
- –Uneven porosity along one strand can pull two different shades from the same bleach application
- –Wash-and-go routines redeposit product on the lightened section more than on darker curls
- –Diffusing brings out both the curl pattern and the color at once, so a rushed blow-dry shows in both
Wavy Texture Softening the Contrast
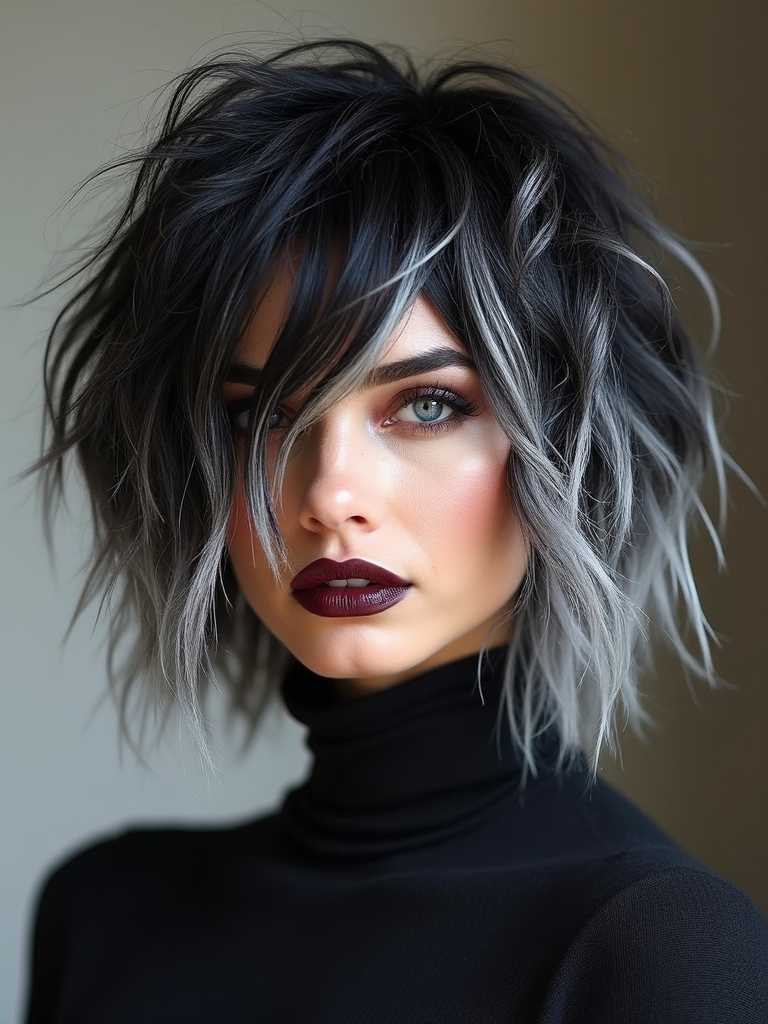
Wavy hair wears this pairing with a relaxed, beach-worn ease. The wave pattern breaks the color into soft, blended movement instead of one crisp line, which makes it the most low-key way to carry real contrast.
Styling It for Natural Movement
Even a fairly bold color pairing reads gentler once it’s sitting on a wave than it would on straight hair, and grow-out lines tend to blend rather than announce themselves.
Air-drying with a texturizing salt spray brings out both the wave and the color together. A small amount of oil worked through afterward counters the dryness bleach tends to leave behind.
Sleek and Straight With Sharp Panels

On sleek, straight hair, contrast panels look crisp and almost graphic, with clean, defined lines between colors. This reads the most editorial of the bunch, and also the least forgiving, since straight hair shows every uneven color edge instantly.
A precise colorist matters more here than for any other texture. Straight hair simply won’t hide sloppy sectioning the way curl or wave can.
- Blow-dry smooth so contrast panels lie in sharp, clean lines
- A shine serum makes both colors look glossier and more deliberate
- Section width stays consistent top to bottom here, unlike the tapered panels used on curl or wave
Short Wolf Cuts With Bold Stripes

On a very short wolf cut, bold color stripes have nowhere to hide, which is exactly the point. Cropped, choppy layers put the contrast on close display.
It’s a high-impact combination that also asks for frequent touch-ups, since short hair shows root growth and color fading noticeably faster than medium or long lengths.
- Stripes here run closer to the scalp than on any longer version, so precision at the root matters most
- Choppy short layers break the color into visible movement
- A root touch-up often lands between full color refreshes to keep the line clean
Two assumptions worth clearing up about this trend:
❌ Myth: It has to be black and white to count as a skunk-wolf.
✅ Reality: Any two contrasting tones work; the name describes the placement pattern, not a specific color combination.
❌ Myth: Once it’s cut this short, there’s nowhere to hide a bad color job.
✅ Reality: A skilled colorist can still soften a rough line with strategic toning, though prevention beats correction here.
Medium Length as the Versatile Middle Ground

Medium length turns out to be the sweet spot for this whole trend: enough hair to let the contrast actually move, but enough body left to feather and lift at the same time.
- Feathered layers let color swing and catch light instead of sitting still
- The brightest sections typically go at the crown and face for lift
- A medium wolf cut tends to flatter the widest range of face shapes of any length here
Long Layers With Peekaboo Color Underneath
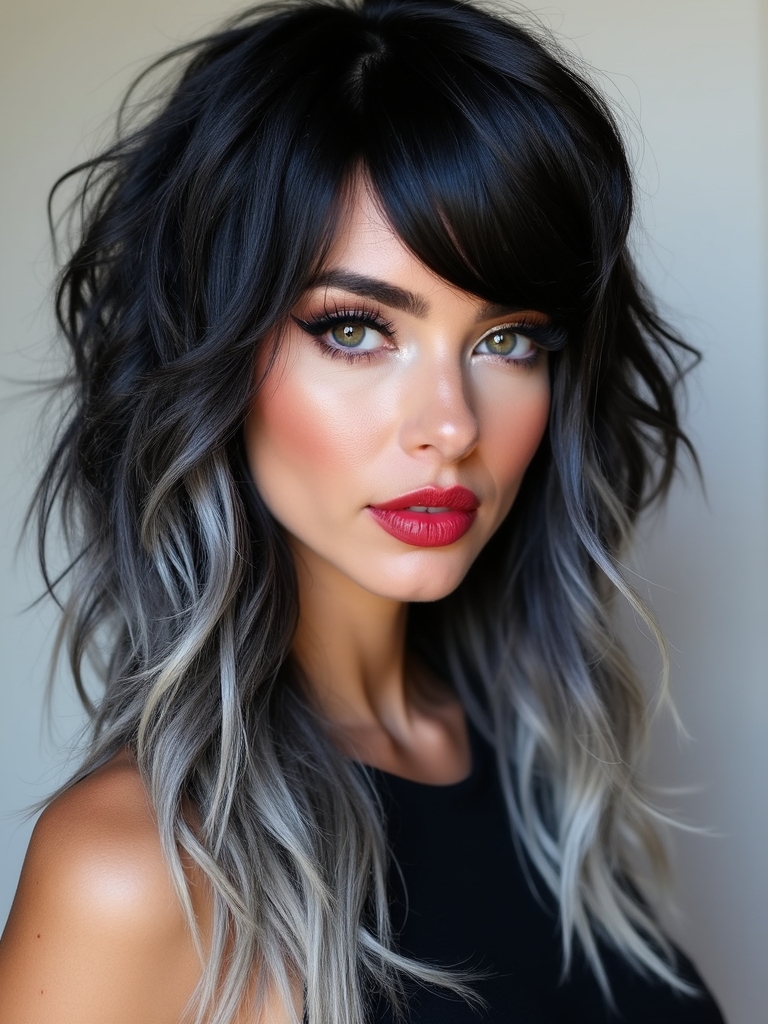
For anyone drawn to contrast but needing something workplace-appropriate, hidden peekaboo color solves that tension directly. The brighter section sits tucked under the top layers, only showing when hair moves, flips, or gets tied up.
A Color You Control on Demand
On a long, layered wolf cut, those hidden sections flash through as the layers shift, delivering a pop of color that stays entirely optional. Worn down and smooth, nothing shows; worn up or tousled, it surprises.
It’s the lowest-commitment way to try real contrast color, and the easiest version to hide entirely when the occasion calls for it.
Strategic Highlights Placed for Face Shape

Where the lighter color actually lands should follow face shape the same way a flattering cut does; placement is what separates a trend from something built specifically for one person. I map it the same way I map a face-framing layer, starting the panel exactly where the cut already draws the eye.
Vertical panels running down the sides tend to slim a rounder face; softer placement around the cheekbones balances stronger, squarer angles; horizontal pops of brightness add width for a longer face. On most faces that placement starts about an inch behind the hairline, not right at the part.
What the Color Actually Costs to Maintain

Two-tone color is a real commitment. Know that going in. It helps to understand exactly what that commitment involves before booking. The lighter sections, especially bleached ones, need the most attention, and contrast softens gradually with every wash as toner fades.
- A first appointment typically runs $180 to $300 depending on how much lightening the contrast needs
- Toner refreshes after that run closer to $40 to $70 each, spaced close to once a month
- A weekly bond or protein treatment keeps bleached sections from turning brittle
Styling Products That Keep Contrast Defined
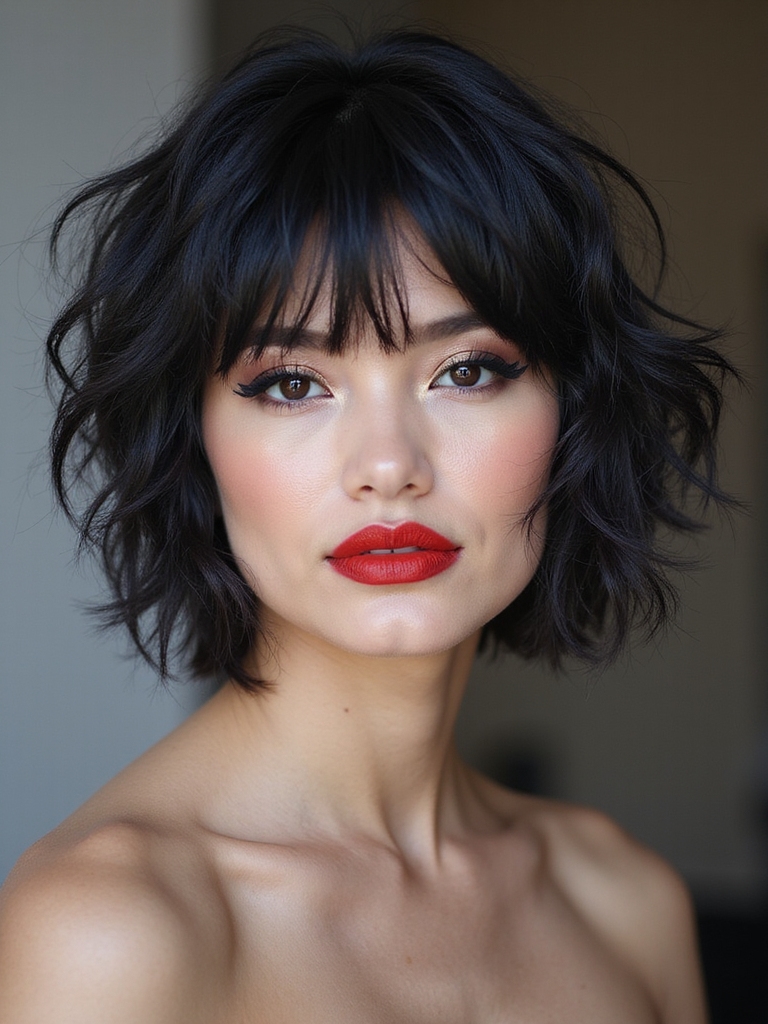
The right product choices make contrast color look sharp rather than muddy. In the chair, pairing a salt spray with a matte paste is what actually keeps each color showing up as its own distinct piece, since a wolf cut leans entirely on texture to make that happen.
Why Shine Matters as Much as Texture
A shine serum earns a permanent spot in this routine too, since glossy hair shows off two-tone color far better than anything dull or dehydrated does.
Heat protection matters before any hot tool touches bleached sections specifically, since that hair is measurably more fragile than the rest of the head.
| Version | Chair Time | Refresh Cadence |
|---|---|---|
| Money piece / peekaboo | About 1-2 hours | Every 8-10 weeks |
| Chunky highlights / panels | About 2-3 hours | Close to once a month |
| Full split-dye | 3+ hours | Every 3-4 weeks |
Prep and Care to Discuss at the Consultation

This is a bigger commitment than a standard cut. The consultation matters more because of it. I’d rather spend twenty extra minutes on photos and honest expectations than fix a color mistake three weeks later. A real check on whether hair can handle the bleach involved belongs in that first appointment too.
- Bring photos and discuss contrast level openly rather than describing it vaguely
- Ask directly whether hair health supports the bleach the lighter sections need
- Never let a stylist rush multiple lightening sessions into one sitting to save time
Washing Around Bleached Sections Without Fading Them Fast
Water temperature matters more here than most people expect. Hot water opens the cuticle and pulls toner out fast, so a cool rinse on wash day alone can add a week or two to how long the contrast stays clean.
Purple or blue-toning shampoo, used once or twice a week rather than every wash, keeps brassiness down between salon refreshes without over-toning the section flat and gray. Skipping it entirely is what usually sends someone back to the colorist early.
Questions Before Booking This Color
?Does the bleached section need a different shampoo routine than the rest of the head?
Generally yes. A purple or blue-toning shampoo on just the lightened section, used once or twice a week, keeps brassiness down without over-toning hair that was never bleached in the first place. Washing the whole head with toning shampoo can leave the darker base looking dull or slightly ashy over time.
?Can this look work without any bleach involved?
Sometimes: on naturally lighter or already-processed hair a colorist can create contrast with demi-permanent color alone. Anyone going from a truly dark base to a bright contrast section will need lightening at some point in the process.
?How long does a first-time color session for this look typically take?
Longer than a standard color service, often stretching past three hours once cutting, sectioning, lightening, and toning are all factored in. Split-dye and chunky highlight versions tend to run longest.
?Will this style show visible root growth faster than a regular one-tone color?
It depends heavily on placement. Face-framing panels and peekaboo sections tend to hide regrowth reasonably well; a true center split shows a growing line the fastest of any version here.
?Is this color combination hard to reverse if someone changes their mind?
Reversing it usually means either growing it out gradually or having a colorist blend the two tones back toward one shade, which can take more than one appointment depending on how much lightened hair is involved.
A Trend That Scales to How Bold You Want to Go
This combination turns out to be far more flexible than its bold reputation suggests. Contrast level, placement, and upkeep are all fully adjustable, which means it scales from a barely-there caramel money piece all the way to a full platinum split.
Starting soft and going bolder at a later appointment beats overcommitting on day one. Bring reference photos to a colorist who understands both the cutting and the chemistry involved, then commit to the gentle at-home care that keeps it looking sharp.
More Ideas Here





