

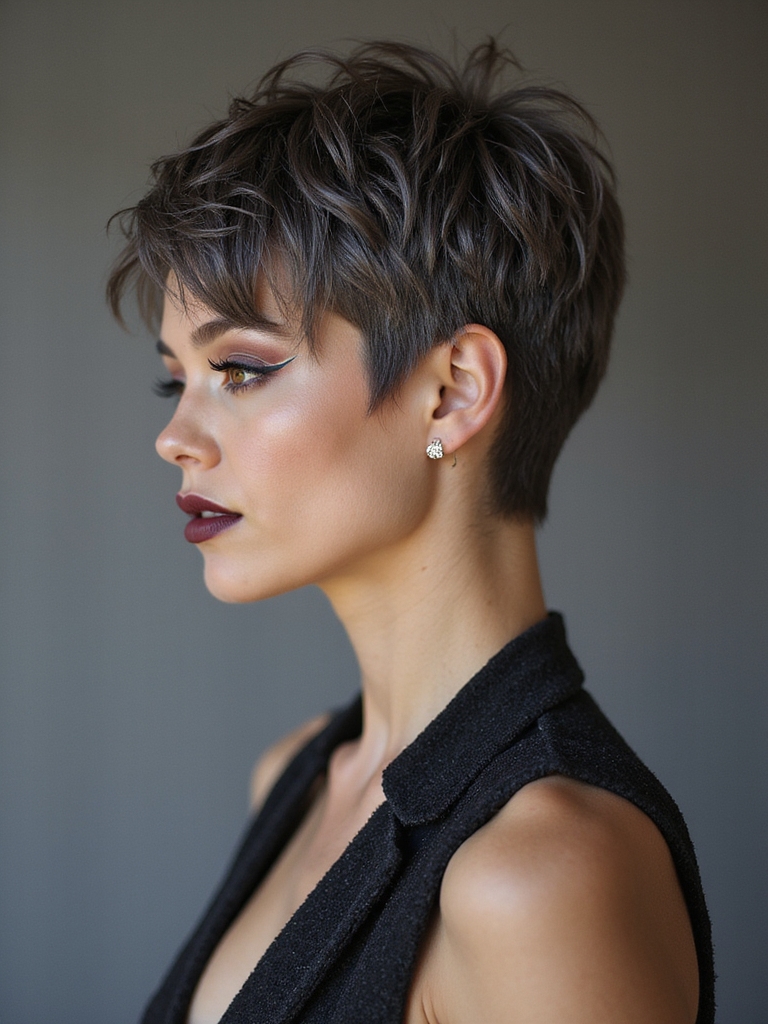
A client sat down last month holding a photo of a musician mid-headbang, hair flying in every direction, and said, “I want that, but wearable.” Three inches came off. What was left wasn’t tidy — it was a shag pixie: short layers cut choppy and loose so the ends fall wherever they want, with just enough structure underneath to keep it reading as a haircut and not an accident.
That contradiction is the whole appeal: a short cut that looks undone without looking neglected. Fifteen versions follow, from a soft wispy-banged classic to a platinum shadow-root take, each with the upkeep a photo alone won’t tell you.
What This Cut Actually Involves
- A shag pixie crops hair short and cuts it into choppy, uneven layers, so the finish reads undone rather than blunt.
- It flatters straight, wavy, curly, and coily textures alike once the layering is tailored to how the hair actually falls.
- Plan on a shape-up close to once a month; day-to-day styling itself takes minutes once you learn the finger-and-paste routine.
Wispy Bangs on a Classic Crop

This is the version most people picture when someone says “shag pixie.” Short, choppy layers cover the whole head, finished with a soft, wispy fringe that breaks up the forehead.
Why the Fringe Softens It
A blunt pixie fringe can read severe fast; feathery, see-through bangs do the opposite, adding a romantic note that flatters close to every face shape. It’s the cut I point first-timers toward, since it eases you into short hair without the shock of one hard, graphic line.
Styling stays simple: a small amount of matte paste worked through the ends with fingertips, and you’re done. The layering does the shaping, so there’s no blow-dry routine to master.

A Textured Crop Built for Fine Hair

Fine hair and heavy layering usually don’t mix, but a textured crop is the exception. Choppy layers break thin strands into separate pieces, so the cut reads fuller than the hair actually is, and the short length keeps ends from going limp by afternoon.
The Cutting Technique That Makes It Work
Stacked, textured layers build lift at the crown while the perimeter stays close to solid, so density isn’t lost at the edges. Scissors do the work here, not a razor: razored ends thin out fine hair fast, leaving it wispy.
Product stays minimal: a dime of volumizing mousse worked into damp roots, then a rough scrunch while it dries. For hair that’s been going flat by noon for years, this is often the first cut that actually holds shape through the day.
Tousled on Top, Buzzed Underneath

An undercut strips the bulk from underneath and leaves loose, tousled layers riding on top. It’s the lightest, most low-profile way to wear this cut, especially if hair runs thick or you overheat easily under a full head of hair.
- Best suited to thick hair or anyone chasing a lighter, edgier crop
- A clipper pass close to every three weeks keeps the undercut line crisp
- Style the top with a matte paste, worked in and tousled forward with fingertips
Think Before You Buzz
Growing out an undercut evenly takes patience, often close to a year before it fully blends. If the commitment feels risky, a stylist can disconnect the layers rather than shave underneath, which gives similar lightness without the bald patch to grow through.
Cheekbone-Skimming Layers for a Round Face

A round face and a short pixie can feel like a risky combination, but layers cut to skim the cheekbones change the math. They draw a long vertical line down the face, adding the angle and length that balance out roundness.
The same principle carries into a choppy pixie cut at nearly any length: keep the face-framing pieces longer, and build height at the crown.
- Face-framing layers should hit at or just below the cheekbone line
- Extra height at the crown lengthens the face further
- A short, rounded perimeter works against you here: it widens the cheeks
Natural Coils, Cut Dry and Shaggy

Curl pattern and this cut were made for each other. Shag layering lets each coil sit as its own defined, springy piece, so a curly pixie stays light and separated.
Every consultation for this look happens on dry hair. Layers land where the coils actually settle once they spring up. Refresh between cuts with water and a leave-in, scrunched in, and let the pattern take over from there.
💡One Detail by Curl Type
Tighter coil patterns often need slightly more length than a looser curl to avoid a triangular silhouette once dry. Worth mentioning at the chair if your curl runs on the tighter end; the extra length usually goes at the crown.
Feathered Fringe With Lift at the Crown

Pair a soft, feathered fringe with height at the crown and this becomes one of the prettiest, most wearable takes on the cut. The bangs frame the eyes while the crown lift keeps the shape from going flat by midafternoon.
Build the height by drying roots up and back with a round brush, then break the fringe into pieces with fingertips and a touch of paste once dry. Curly or coily hair changes this equation. Cut wet, a fringe like this almost always ends up shorter than planned once it springs up, so ask specifically for a dry cut.
Piecey Ends for Maximum Edge

Push the texture as far as it goes and you land here: sharply cut, piece-y ends that separate and stick out on purpose, reading as the most rock-and-roll version of the cut on this list.
- Works best on straight to wavy textures, which hold sharp, separated pieces more reliably than tight curl
- A small amount of matte clay or wax defines individual ends without weighing them down
- Ask for heavy point-cutting and a bit of disconnection between length sections
Debulked and Airy for Thick Hair

Thick hair can feel heavy in a short cut. The fix is removing weight from underneath: debulking layers pull bulk from the interior while the surface stays full, so the result lands airy and soft.
The distinction matters at the chair: ask for internal weight removal, not surface thinning with the tips of the shears, which tends to create flyaways.
- Internal debulking keeps the outline soft without turning fuzzy
- An undercut is worth asking about if even lighter is the goal
- Expect the stylist to mention “weight lines” during the cut, since that’s where the bulk actually gets removed
A Blunt Micro Fringe Over Shaggy Layers

This pairing doesn’t play it safe. A blunt, graphic micro fringe sits several inches above the brow line while shaggy, undone layers underneath keep the rest of the shape soft: sharp up top, loose everywhere else.
The Upkeep Nobody Mentions
That crisp fringe line blurs fast, and most people are back in the chair for a bang trim roughly every ten days to keep the line looking sharp. It’s the highest-maintenance detail on this whole list, by a wide margin.
Worth it for the right person: it photographs well, lands somewhere between French-girl polish and punk edge, and gives an otherwise soft shag an unmistakably bold focal point.
📋Before You Commit to a Micro Fringe
- ✓Can you get to a stylist, or trust yourself with scissors, every ten to fourteen days?
- ✓Does your hairline sit low enough to support a fringe this short without looking sparse?
- ✓Are you fine with zero grow-out grace period? This line either looks sharp or looks off.
Uneven Lengths, On Purpose

Tilt the whole shape off balance and you get this: one side cut longer or angled differently from the other, built as a bold, architectural statement. It’s a statement piece. Shag layering keeps an asymmetrical pixie from looking stiff.
This is a look for someone who wants their hair to be the conversation starter. It needs precise, deliberate cutting and a reshape close to every eight weeks, before those clean angles soften and blur into each other.
Shaggy Movement for the Grown-Out Stage

There’s an awkward middle stretch in growing out a pixie, and shag layering is the best tool for surviving it. Choppy layers turn that in-between length into a shape with real intention behind it.
Styling Through the In-Between
Ask your stylist to add movement and layering to whatever length you’re currently sitting at. It buys weeks, sometimes a couple of months, before a full restyle becomes necessary.
This is the version worth recommending to anyone tempted to give up on a grow-out halfway through: texture makes the messy stage look like a decision.
Platinum Lengths With a Shadow Root

Color pushes this cut somewhere bolder, and platinum with a blended shadow root is the standout version. Icy lengths catch every choppy layer while the darker root softens the grow-out line and adds depth to a very short shape.
- The shadow root stretches root-touch-up visits out closer to the two-month mark, well past the three-week cycle solid platinum needs
- Budget close to $200 for the bleach-and-tone work behind this color
- Ask specifically for a bond-builder in the formula; platinum on short, already-cut ends is fragile
The Two-Minute Styling Routine
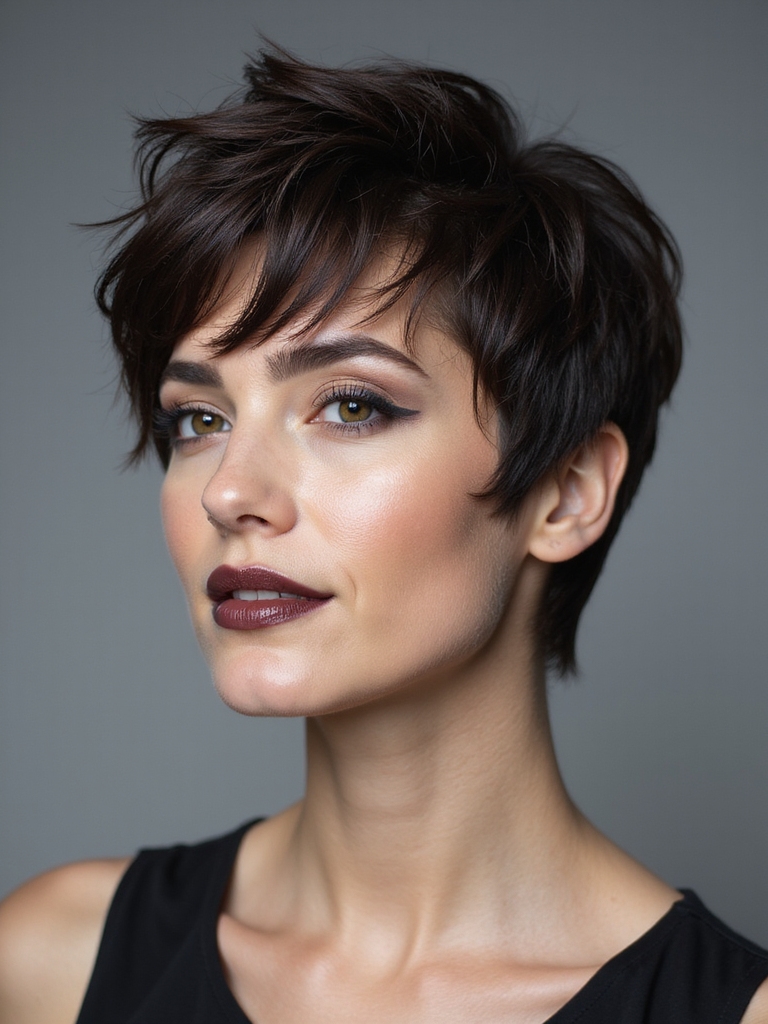
Day to day, this is one of the easier short cuts to live with, and a handful of small habits keep it looking sharp with almost no time investment. The texture is forgiving enough to work with bedhead most mornings.
The Actual Morning Routine
Most mornings, a pea-sized amount of matte paste raked through with fingertips is the entire routine. On a flat day, a quick pass of dry shampoo at the roots brings volume back.
There’s one rule that trips people up. Less is more. Too much product turns fine texture greasy fast, so start with less than feels like enough and build only if the shape actually needs it.
“Applying paste to hair that’s still a little damp, rather than fully dry, spreads it more evenly and skips the visible clumps a lot of clients fight with.”
Building Texture Without Heat

No heat needed. That’s a big part of why this cut has stayed so popular; a couple of simple, heatless habits build all the piece-y movement the shape is built around.
- Mist damp hair with a texture or sea-salt spray, then scrunch and let it air-dry
- Twist small sections while they’re still damp for extra separation once dry
- Reach for matte paste, clay, or salt spray, and skip heavier oils that weigh texture down
What to Bring to the Consultation

The gap between loving this cut and regretting it almost always traces back to the consultation. One photo leaves too much open to interpretation. Bring several, from a few different angles, so the stylist isn’t guessing at the parts a single image can’t show.
Point specifically to the length and fringe you want, then be honest about how much time you’ll realistically spend styling it each morning; that detail changes which version actually fits your life.
- Bring at least three reference photos from different angles
- Say out loud how much styling time and skill you actually have
- Ask directly how often the specific version you’re choosing will need a trim
Where This Cut Goes Sideways
The most common misstep is going too short too fast. This is a big jump from longer hair, and taking it all off in a single sitting can be a genuine shock. There’s no rule against splitting it into two appointments so each length has time to settle before the next cut.
The rest of the list is familiar: over-styling until the texture goes flat and greasy, skipping the regular shape-ups that keep choppy layers looking deliberate, and sitting in a chair that doesn’t specialize in short hair. A cut like this leans more on technique than product, which makes the stylist a better place to spend the budget than the cheapest appointment on the list.
A Softer Way to Wear Short Hair
If a straight pixie has always felt too stark, this is the softer answer: all that choppy layering breaks up the crop while keeping what makes it short and bold in the first place.
The real question is whether you’re ready to trade half your styling time for a cut people ask about. If the answer’s yes, save the versions that stopped your scroll and bring them to a consultation.
Don’t Miss These





