


Picture two people with the exact same curls walking out of two different salons for layered curly haircuts. One leaves with hair that springs, separates, and catches the light. The other leaves with a shapeless puff that frizzes before she reaches the car. Same hair. The whole difference is in how the curls were cut.
The right cut is what defines a curl. It pulls out the weight that blurs the pattern and shapes the hair around how curls actually fall. The fifteen cuts below sort by length, curl type, and the look you’re after, from a soft curly shag to a sharp coily pixie, with guidance on which one fits a given pattern and how to ask for it without ending up with that puff.
Defining Curls, Quickly
What does it take to define every curl? A cut shaped to your specific pattern, done dry, with enough layering to remove the weight that blurs definition. Product alone cannot define a curl that the cut has weighed down.
Which curl types do these cuts suit? All of them, from loose Type 2 waves to tight Type 4 coils. The work is matching the layering style and the length to your pattern, which is what the looks below sort out.
How is this different from a regular layered cut? Curly layering follows the curl, not the comb. It is cut dry, in your natural pattern, so the layers fall between the curls and define them rather than slicing through and frizzing them.
The Curly Shag With Light Layers

The curly shag is the gateway curly cut, a favorite for people who are nervous about layers. Light, choppy layers run all over for airy movement, giving curls fullness without a dramatic change in length. It is forgiving, modern, and grows out gracefully.
What makes it work on curls is the lightness. The layers are feathered and shallow, so they break up the weight while leaving the curl pattern intact. The hair moves and separates with real bounce.
Wear it undone. Scrunch a curl cream through damp hair, air-dry, and the shag only looks better the less you fuss with it. For the longer take, shag curly hair runs through more options.

Long Cascading Layers for Length Lovers
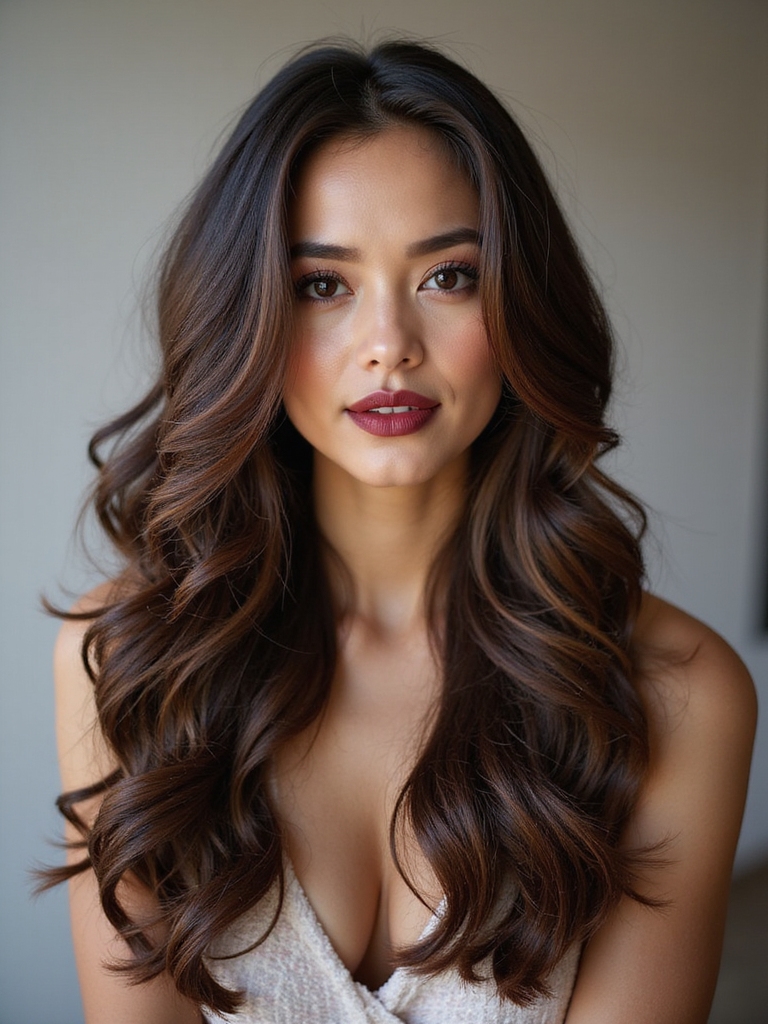
If you have spent years growing your curls and refuse to lose the length, long cascading layers are the answer. A few layers cut deep into the length pull weight out from the inside, so long curls cascade and swing with real bounce through the lengths. You keep every inch and gain all the movement.
- Best past the shoulders, where there is length for the layers to work with.
- Ask for the layers started below the ears so the top stays full.
- For very long curls, see long shaggy curly hair.
Knowing your curl type makes asking for the right cut far easier:
📖Type 2 (wavy)
Loose S-shaped waves; wants the lightest, longest layering to keep it from frizzing.
📖Type 3 (curly)
Defined loops from soft curls to tight corkscrews; loves round and curl-by-curl layering.
📖Type 4 (coily)
Tight coils and zigzags with major shrinkage; always cut dry, in the natural pattern.
Round Shaping for Balanced Volume

Round shaping cuts the hair to follow the curve of the head, building a balanced volume that does not flatten on top or balloon at the sides. It is the classic, full curly silhouette, and getting it right comes down to a dry cut that follows your real pattern.
This shape suits curls that want structure without going short. It frames the face and keeps the fullness even all the way around your head.
- Cut dry so the round shape follows your curl.
- Best on medium-density curls and corkscrews.
- A diffuser keeps the roundness from dropping flat.
Face-Framing Layers That Flatter Every Curl

Face-framing layers are the smallest change with the biggest payoff, and the first change I make when a client wants a refresh without committing to much. The shortest pieces sit at the cheekbone and lengthen as they sweep back, opening up the whole face.
Ask About Day Three
The first thing I ask a new curly client is never about the photo. It is what their curls do on day three. That answer tells me how the framing will actually fall once the wash-day style relaxes into real life.
Cut dry, the framing pieces spring to exactly the right spot. Refresh them with water and a little cream on the days between washes.
Two beliefs that send people out of the salon with the wrong cut:
❌ Myth: Layers make curly hair frizzier.
✅ Reality: The right layers reduce the bulk that causes frizz. Blunt over-layering frizzes, but smart layering defines.
❌ Myth: Curly hair should be cut wet for accuracy.
✅ Reality: Dry cutting is far more accurate for curls, since the stylist sees where each curl actually lands.
Curly Wolf Cut for Edgy Texture

The curly wolf cut is where the shag and the mullet meet, a retro shape that has found new popularity with a much younger crowd than the one that wore it originally. Disconnected, choppy layers crowd the top and crown, then drop into wispy, ragged lengths that hold on to every bit of your curl’s natural spring.
What sets it apart from a plain curly shag is the disconnection. The top layers are cut deliberately shorter and more separated, so the volume sits high and the silhouette takes on that rock-and-roll attitude. Request volume comes up constantly for this exact shape lately, almost always from someone in their twenties ready to wear some edge.
Upkeep is refreshingly light. Working a bit of texture cream into damp curls and tousling with your fingers is the whole routine, and because the layers are disconnected, you can stretch the time between trims longer than most layered cuts before it loses its shape.
Curl-by-Curl Layering for Defined Ringlets

Curl-by-curl layering is exactly what it sounds like. The stylist cuts each curl individually, in its natural pattern, so every ringlet is shaped where it truly falls. It is the gold standard for defined, separated curls, and the technique behind most of the great curly cuts you have quietly admired on other people.
- Done dry, one curl at a time, never in a wet ponytail.
- Best for defined 3A to 3C curls and ringlets.
- Worth seeking out a true curl specialist to do it right.
👍Why Curl-by-Curl Works
- +Every ringlet shaped where it actually falls
- +No surprise shrinkage after it dries
- +Definition that holds for weeks
👎The Catch
- –Takes longer in the chair, so it costs more
- –Needs a true curl specialist, not just any stylist
- –Harder to find in smaller towns
Layered Lob for Shoulder-Grazing Curls

The layered curly lob lands at the shoulders, the sweet spot between low-maintenance and statement. Layers build shape through the length so the curls graduate into a silhouette, and the shoulder length keeps it easy to wear and quick to style.
The Low-Commitment Curly Cut
Most people who can’t decide between low-key and statement land here, since it flatters nearly every face and curl type and barely asks anything of you in the morning.
Air-dry with a curl cream for a soft, easy finish. For the chin-length version, curly bob is the next step shorter.
Spiral-Friendly Layers to Reduce Bulk

Tight spirals and corkscrews need layers that thin the bulk without cutting through the curl. Spiral-friendly layering removes interior weight so the spirals have room to spring, holding their definition while losing the heaviness that flattens the top of the head.
- Have the layers cut between the spirals, never straight across.
- Best for dense 3B to 3C spirals carrying too much weight.
- Cut dry, so each spiral keeps its full shape.
💡Lock the Spiral
Rake a curl gel through soaking-wet spirals, scrunch upward, and let it dry to a firm cast. Once dry, scrunch the cast out with a drop of oil and the ringlets bounce back soft and defined.
Curly Fringe With Soft Layer Blending

A curly fringe blended into the layers frames the face with a soft, curly bang that melts directly into the surrounding shape. On curls, a fringe shrinks as it dries, so it is cut longer than it will finish and shaped to spring up into a soft curtain or a rounded shape.
Among fringe options, this one asks the least of you over time. Curl hides the grow-out, and there is no blunt line to keep up. One rule, though. Always leave it a touch longer than feels right while you are still in the chair, because that fringe is going to spring up and shrink the moment it dries and you cannot add length back once it is cut.
Layered Pixie for Tight Coils

A layered pixie on tight coils is a liberating cut: short, light, and shaped entirely around the natural coil. Layers carved into the shape give the coils definition and a rounded silhouette, and the short length puts the focus squarely on your texture and your face.
Coily hair shrinks dramatically, so this cut has to be done dry, in the natural pattern, with the stylist shaping the coils exactly as they sit. Cut wet, a coily pixie can end up far shorter than anyone planned. A skilled stylist works with the shrinkage and the natural shape of the hair.
Upkeep is mostly moisture and a good night routine. A light cream smoothed over a leave-in conditioner keeps the coils defined, and a satin bonnet protects the shape overnight. For more short textured shapes, pixie cut for curly hair has options.
Mid-Length Layers for Easy Wash-and-Go
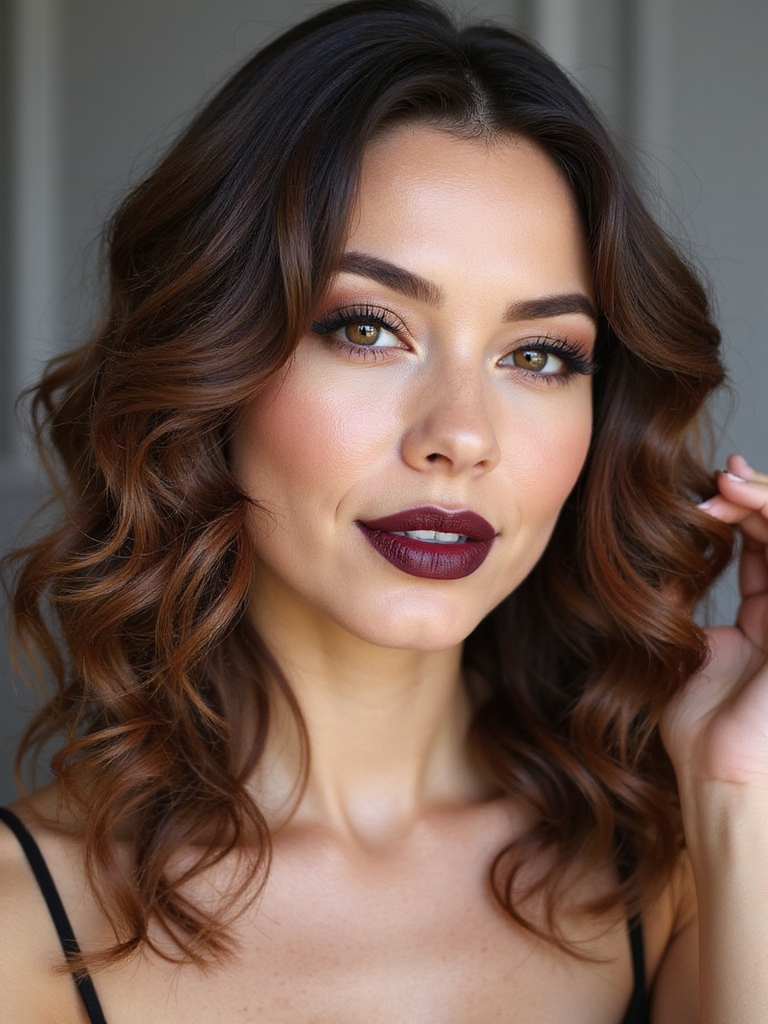
Mid-length layers hit the practical sweet spot for an everyday wash-and-go. Sitting between the chin and the collarbone with layers for shape, this length is long enough to define and short enough to dry fast and behave with minimal product.
It is a favorite for busy people who want defined curls without a long routine. Wash, product, scrunch, go.
- Layers keep the mid-length from turning into a heavy bob.
- Best for 2C to 3B curls that want a fuss-free routine.
- A leave-in plus gel on soaking-wet hair is the whole morning.
Volume-Boosting Layers for Fine Curls

Fine curly hair is its own puzzle: plenty of curls, but each strand is delicate, so the hair goes flat and looks thin without the right cut. Volume-boosting layers add lift and the look of density, building body where fine curls collapse.
When a fine-haired client tells me curls make her hair look thin, I know the cut is the culprit every time. The fix is light, strategic layering, kept high and soft so it lifts the hair while protecting the little weight fine curls need to hold together.
Diffuse upside down to push volume into the roots, and keep products light so they do not drag the curls down. A mousse beats a heavy cream here every single time.
Carved Layers for 3A to 3C Definition

Carved layers are the most technical option here, cut vertically into specific sections to define the curl pattern across 3A to 3C hair. The stylist carves out interior weight exactly where the curls clump or fall flat, leaving your length untouched.
This is detailed, pattern-specific work, and it is where a curl specialist earns the fee. The carving follows your individual curl map, so no two carved cuts come out the same.
It defines the curl without shortening the hair, which makes it ideal for anyone who loves their length but fights bulk and patchy definition. Always done dry, curl section by curl section.
Crown Layers to Lift Flat Roots

Crown layers solve the specific problem of flat, heavy roots at the top of the head, where curly hair so often sinks by midday. A few shorter layers cut at the crown lift the curls right where they collapse, bringing height and balance to the whole shape.
- Best for fine or loose curls that go flat on top by midday.
- Clip the crown roots while drying to set the lift.
- Keep the layers short enough to lift, long enough to blend in.
Dry-Cut Layering Techniques for Precision

Every cut here depends on one technique: dry cutting. Shaping curly hair dry, in its natural pattern, lets the stylist see exactly where each curl falls, so the layers define instead of frizz and nothing dries shorter than planned. It is the single most important question to ask before you book a curly cut.
- Ask directly: do you cut curls dry, in their natural pattern?
- A dry curl cut takes longer in the chair and costs more than a wet one.
- If a salon insists on wet-cutting your curls, keep looking. See short curly haircuts.
Maintenance & Care
Defined curls are made in the cut and kept with moisture. Curly and coily hair runs dry, so a weekly deep conditioner, a wash-day leave-in, and a satin pillowcase handle most of the upkeep. Refresh second-day curls with water and a little cream instead of restyling from scratch.
On trims, curly cuts are patient. A well-layered curly cut holds its shape for ten to twelve weeks, so most people only need a trim three or four times a year, and a curl-specialist dry cut runs about $70 to $150 depending on where you live. Arrive with clean, detangled curls in their natural pattern, so the stylist shapes the hair you actually wear day to day.
Layered Curly Haircut Questions
?How do I know my curl type?
Look at your hair clean and completely product-free as it air-dries on its own. Loose S-waves are Type 2, defined loops and corkscrews are Type 3, and tight coils or zigzags with heavy shrinkage are Type 4. Most heads actually carry a mix of two adjacent types rather than just one, so cut for whichever pattern dominates the most surface area.
?Will layers make my curls frizz?
Not when they are cut right. The layers that frizz are blunt, heavy, and cut wet. Light layering done dry, in your pattern, actually reduces frizz by removing the bulk that fights your curl.
?Can fine curly hair handle layers?
Yes, and it usually needs them. Soft layering concentrated near the crown builds noticeable body without stripping away length. The caution is restraint: too much layering removes the small amount of weight fine hair relies on to hold together.
?How much does a curl-specialist cut cost?
Expect roughly $70 to $150 for a dry curl cut, more in big cities and for very long or detailed work. It costs more than a standard wet cut because it takes longer and demands real curl expertise.
The Cut Defines the Curl
Whatever your length or pattern, the lesson holds: a curl is only as defined as the cut underneath it. Match the layering to your curl type, insist on a dry cut, and the definition you have been chasing with product turns out to have been a haircut problem all along.
So before you buy another bottle of gel, ask yourself one question: when was your last cut shaped to your actual curls, in their natural pattern? If you cannot remember, that is where to start.
Hand-Picked for You





