
Here is the contradiction that makes this cut work: a shaggy pixie mullet looks like the gutsiest thing in the room, yet it is one of the lowest-effort cuts I send people home with. The short, choppy crown does the styling for you, and the longer nape carries all the attitude without asking for a blow-dry.
It is a true hybrid, a pixie up front and a mullet at the back, and the way you balance those two halves decides whether it reads punk, retro, or quietly editorial. Below are the versions worth knowing, plus the honest notes on color, styling, cost, and the few choices that tip it into costume.
The Short Version
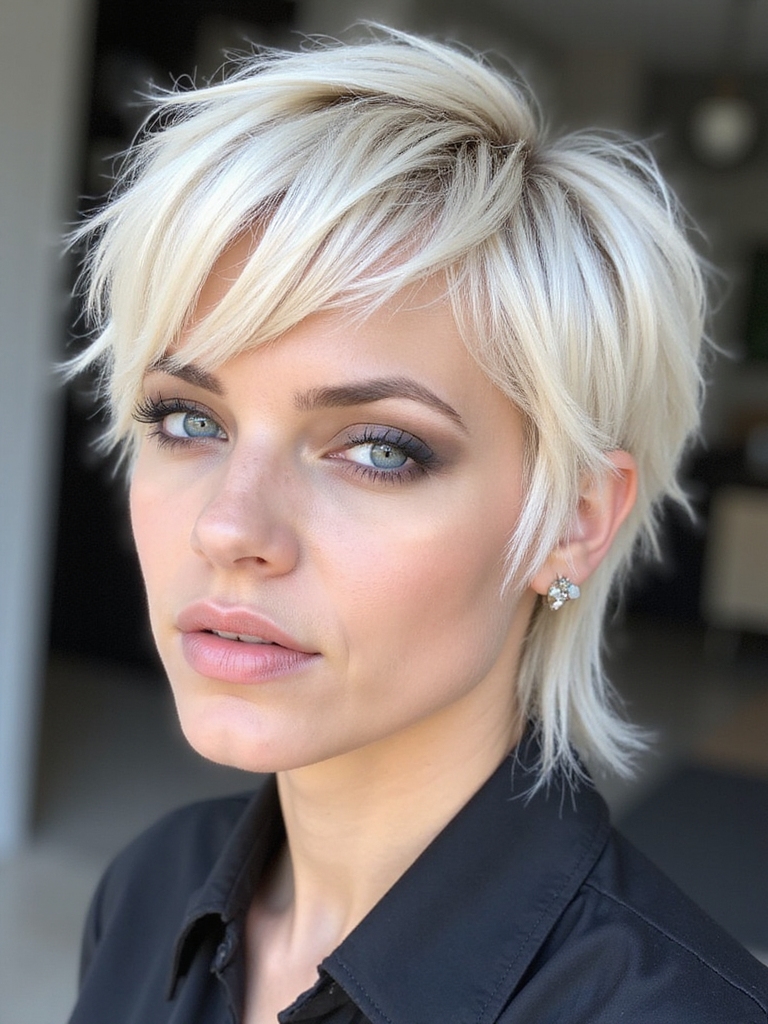
The shaggy pixie mullet marries a cropped, textured pixie crown to a longer, layered nape. That split is the whole look: short and easy on top, with just enough length in back to carry the edge. The shorter you take the crown, the bolder it reads.
It flatters most faces once the fringe and face-framing are tailored, and it wears well across curl patterns. Plan on a shape-up every four to six weeks, roughly $35 to $70, to keep the cut reading sharp rather than overgrown.
The Soft, Wearable Pixie Mullet

If the word mullet makes you flinch, start here. The soft version keeps the crown feathered rather than cropped to the skin, and the nape only a touch longer, so the hybrid reads more like a long pixie with attitude than a full-blown mullet. It is the take I hand to people testing the idea.
The feathering blends the two halves so there is no harsh line between them, which is exactly what keeps it office-friendly.
- The gentlest entry point, easy to dial bolder later
- Reads grown and wearable, not costume
- Forgiving as it grows, since the blend softens any awkward stage
The Punk Micro Mullet

At the opposite end is the micro mullet, cropped close at the crown and sides with a choppy, broken-up fringe and a short tail. This is the punk heart of the style, all attitude and almost no upkeep beyond a swipe of paste.
Pure Attitude, Minimal Upkeep
It is genuinely freeing to wear, but it hides nothing. There is no length to fall back on if you change your mind, so I save this recommendation for the clients who walk in already sure.
Styled, it wants a matte clay roughed through with your fingers and nothing else, which is the whole appeal for a no-fuss morning.
The Curly Pixie Mullet

Curls and this cut are natural partners, because the layering simply amplifies the volume and shape your hair already makes. On curly and coily hair the pixie mullet turns airy and bold at the same time, and it often needs the least styling of any take here.
The non-negotiable is cutting curly and coily hair dry, in its natural state, so the stylist places every layer to your real pattern and shrinkage.
- Coily and 4-type textures wear it as a low-manipulation, wash-and-go style
- Define with a leave-in and curl cream, scrunch, and air-dry
- Skip the brush, which breaks up the very pattern you want on show
The Retro Flip-Out

Flipping the nape ends outward instead of letting them fall flat sends the whole look in a retro, seventies direction. It is playful and a little nostalgic, and it softens the punk edge into something sweeter.
When You Want a Little Polish
The catch is that this is the one version that asks for a tool. You need a flat iron or a round brush to set the flip, plus a little hairspray to hold it, so it is the least wash-and-go take of the bunch.
If you love the shape but not the daily styling, save the flip for occasions and wear it tousled the rest of the week.
💡Stylist Tip
If you are nervous about the commitment, ask your stylist to cut the soft, feathered version first and book your follow-up for four weeks out. At that trim you can decide whether to crop the crown shorter or lengthen the nape, having lived with the shape for a month rather than gambling on it in one sitting.
Feathered Layers for Fine Hair

Fine hair and this cut are quiet allies. Short hair carries less weight pulling it flat, and feathered layers through the crown build the lift that fine hair almost never holds at longer lengths. I have watched fine-haired clients see real volume for the first time in years walking out with this shape.
Lift Without Over-Thinning
The trick is restraint. Layers go in at the crown for height, the nape stays a touch fuller rather than thinned to wisps, and a volumizing mousse before drying locks the lift in.
What I steer fine hair away from is a razor finish, which can fray already-delicate ends.
The Tousled Crown With Baby Bangs
Add a short, piecey baby bang to the crown and the whole cut sharpens into something deliberate and a little editorial. The high, broken-up fringe draws the eye up and pairs beautifully with the tousled texture above it.
- Best on balanced and longer face shapes, since baby bangs expose the whole forehead
- Commit to a fringe trim every two to three weeks, as even a little growth shifts the proportion
- Keep the bang piecey, not blunt, so it blends with the shag rather than fighting it
ℹ️Worth Knowing
The pixie mullet is a true disconnect cut: the short crown and longer nape grow at the same rate but read very differently as they get longer. That is why the trim cycle matters more here than on a one-length cut, and why skipping it is what makes the shape look unintentional.
The Wolf-Cut Pixie Mullet
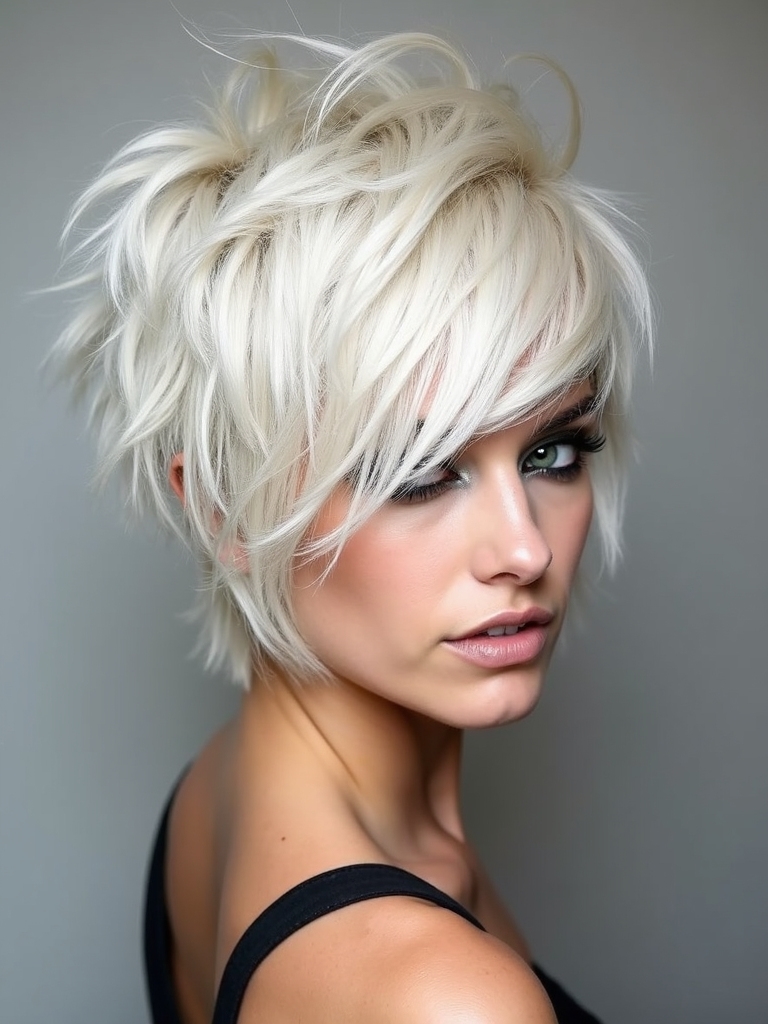
Borrow the heavy, shaggy layering of a wolf cut and you get the most voluminous version of the pixie mullet. The crown stays cropped, but the layers are choppier and fuller throughout, so the whole shape feels bigger and wilder.
This is the take for anyone who wants maximum movement and does not mind a cut that makes a statement on its own.
- Maximum volume and texture of anything in this lineup
- Best on hair with some body, which holds the heavy layering
- A texture spray is all it needs to look intentionally undone
The Razor-Cut Pixie Mullet

A razor carves the perimeter into fine, feathery points that move in one direction, giving this version its airiest, most directional flow. The ends look weightless and the whole cut takes on a soft, undone grit that scissors cannot quite match.
One caution I repeat to every client: a razor belongs only on healthy, medium-to-coarse hair. On delicate or brittle strands the blade tends to split the ends and trigger breakage.
If your hair is delicate but you love the feathered effect, ask for the same look built with point-cutting scissors instead.
👍Why people fall for it
- +Looks bold while asking almost nothing of your morning
- +Wears well across curl patterns and most face shapes
- +Grows out more gracefully than a blunt crop
👎What to weigh first
- –A few takes (flip-out, undercut, micro-fringe) carry extra upkeep beyond the basic trim
- –Very short crowns expose you with nowhere to hide a bad day
- –Gets the eighties-cliche reaction from some people, fair or not
Face-Framing for Round and Heart Faces

The face-framing pieces are where this cut gets personal, and in my chair they are the first thing I adjust to flatter someone’s features. A couple of inches of length and a different placement change the whole face.
- Round faces: keep height at the crown and let wispy pieces skim the cheekbones to add length, not width
- Heart faces: leave longer, softer pieces toward the jaw to balance a wider forehead with a narrow chin
- Square jaws: break the face-framing into soft, irregular lengths rather than a single blunt line
The Undercut Pixie Mullet
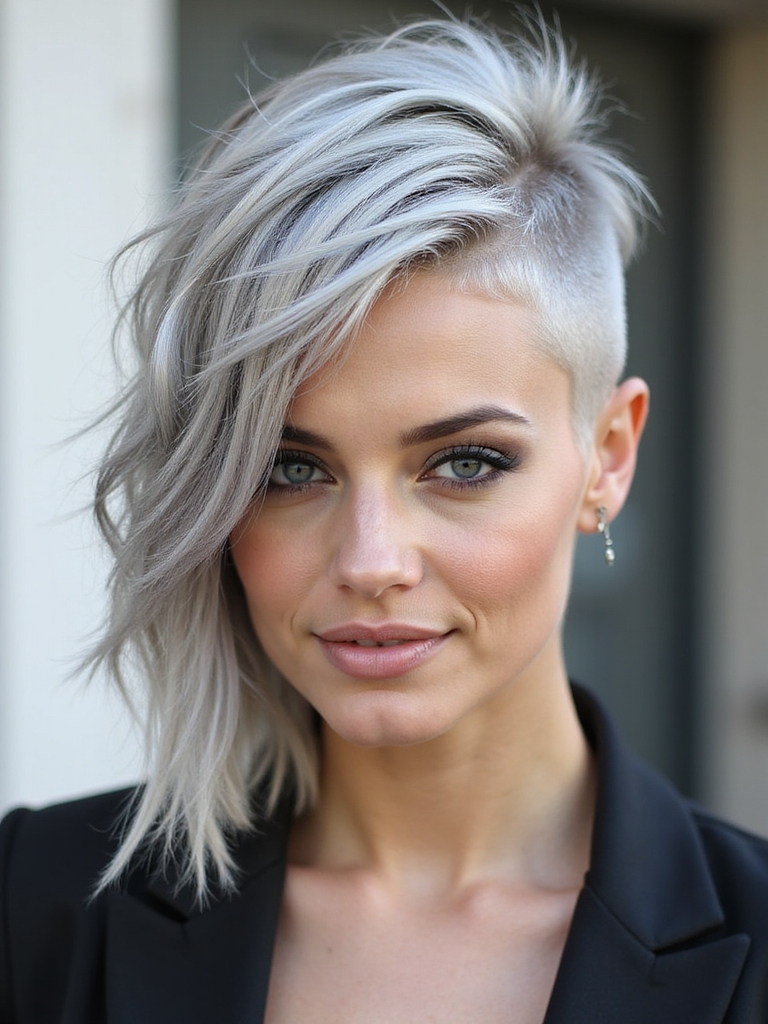
An undercut does two jobs at once on this cut: it sharpens the edge and it strips weight from thick, hard-to-control hair so the crown moves freely. The shaved section usually hides at the nape or behind the ears, shown only when you want it.
It is a gift for dense hair that otherwise puffs out, and it lets the longer nape lie flat instead of bulking up.
Just budget for the upkeep: an undercut needs a quick buzz every two to three weeks, often $15 to $25 at a barber between salon visits, to stay crisp.
The Micro-Fringe Finish

A blunt micro-fringe cropped high on the forehead is the most editorial way to finish this cut. It is fashion-forward and unmistakably confident, the kind of detail that turns the hybrid into a full statement.
Be clear-eyed about it, though. A micro-fringe exposes the entire forehead and flatters balanced and longer faces far more than round ones, and like the baby bang it needs a trim every couple of weeks to hold its proportion.
Money Pieces and Bold Color

Color is where this cut goes from sharp to unforgettable, and the short canvas makes a little go a long way. Contrasting money pieces, brighter panels framing the face, pull focus to the crown and play up the edge of the cut.
Practically, short hair is cheaper to color than long lengths but grows out faster, so a softly placed, grown-in color saves you a salon trip every few weeks. A bold money piece or fashion shade typically runs $80 to $200 depending on where you live.
If you want the drama without the commitment, ask for a demi-permanent gloss, which fades softly instead of leaving a hard line. It is the option I reach for most with clients who love the look but worry about regret.
Keeping the Edgy Shape Sharp

The trade for all that easy styling is simple: the cut lives on the contrast between crown and nape, and that contrast blurs as everything grows at once. The line between a sharp pixie mullet and a shapeless one is only a couple of weeks of growth.
Book a shape-up every four to six weeks, sooner if your crown is cropped very short, and tell your stylist you want the crown-to-nape contrast maintained rather than grown out. Day to day, though, it asks for nothing more than a swipe of product.
Heatless, No-Iron Styling

One of the real luxuries of this cut is how well it wears without heat. The texture is built into the layers, so all most takes need is product on air-dried hair, no iron required. Rough-dry with your fingers, work a little matte paste or texture spray through, and you are done.
For a bit more shape overnight, twist a few damp sections at the crown before bed and unravel them in the morning. It coaxes out extra movement with zero heat damage, which keeps short hair healthy through frequent cuts.
The Details That Keep It Out of Costume Territory

The difference between a pixie mullet that looks modern and one that looks like a costume comes down to a few choices, and I talk every client through them before we start. The first is the blend: the crown and nape should transition with layering, never meet at a hard, obvious line.
Three Choices That Make or Break It
The second is proportion. A nape that is too long for the cropped crown is what reads dated, so keep the tail in conversation with the rest of the cut rather than letting it run away.
The last is finish. Matte product keeps the texture looking intentional, while too much shine flattens the pieces and tips the whole thing toward the eighties cliche people fear.
Pixie Mullet Questions, Answered
?Is a shaggy pixie mullet the same as a shaggy mullet?
They are close cousins. A [[shaggy mullet|shaggy-mullet]] keeps more length and volume overall, while the pixie mullet crops the crown short like a pixie and keeps only the nape long. The pixie version reads sharper and more editorial; the shaggy mullet reads softer and more grown.
?Will a pixie mullet suit me if I have never had short hair?
It can, and the soft, feathered version is the gentle way in. It keeps more length through the crown and blends the nape so the hybrid feels like a long pixie rather than a dramatic mullet, which makes the leap from long hair far less jarring.
?How do I keep it from looking like a costume?
Honestly, it is mostly finish and upkeep rather than the cut itself. Reach for a matte product so the texture looks intentional instead of greasy, keep your regular trims so the nape never outruns the crown, and tune out the eighties jokes. A well-blended [[shaggy pixie|shaggy-pixie]] mullet looks nothing like the costume people picture.
Edgy on the Surface, Easy Underneath
That is the quiet trick of the shaggy pixie mullet. It wears like the boldest cut in the room while asking for a minute of paste and a regular trim, nothing more. The crown does the work, the nape carries the edge, and the blend between them is what keeps it modern.
Whether you lean punk, retro, or soft and editorial comes down to how you balance those two halves, and that is a conversation worth having in the chair before any cutting starts. Bring a photo, be honest about your routine, and let the cut prove how easy bold can be.


