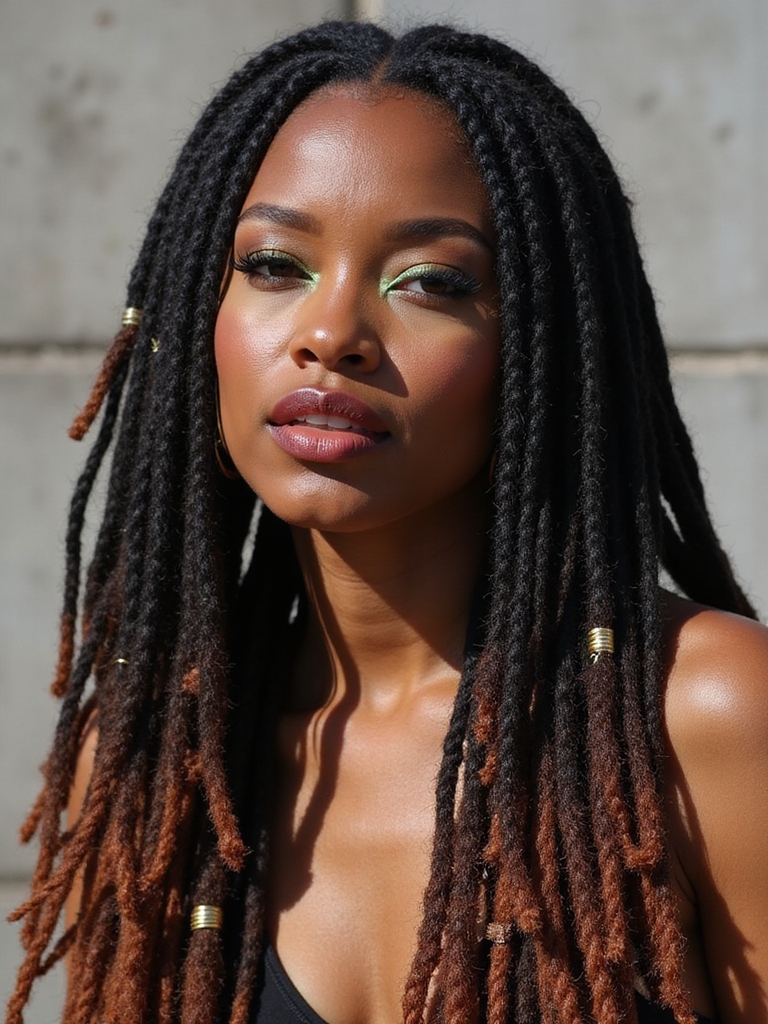
Most ponytail hairstyles get treated as an afterthought, when they can just as easily be a style chosen on purpose. The better versions buy a finished look in under a minute on a rushed morning, and with a few extra steps carry straight into a dressed-up evening. Most people just tie the same flat version daily and assume that’s the ceiling.
Eighteen ponytail hairstyles follow, sorted by how much real effort and length each one actually needs.
Before You Tie One
- Height changes the whole read: high looks sporty and youthful, nape-low looks polished and grown-up.
- A small wrapped section of hair hides the elastic and makes almost any pony look more finished.
- Fine or short hair gains real length and grip from a clip-in piece more than from product on its own.
- Tying in the exact same spot daily stresses the hairline; moving the part and height around helps.
- A sleek finish needs strong hold and a smoothing brush; a textured one needs closer to the opposite.
The Sleek Low Ponytail

Sitting at the nape, this version looks pulled-together without looking overdone, all polish and no volume.
A smoothing cream worked through damp-to-dry hair, then gathered low and set with a strong-hold gel and a boar-bristle brush, gets the surface glassy and smooth.
A small section wrapped around the elastic hides the band completely, and a single drop of shine product on the length, kept away from the roots, finishes it without looking greasy.

A Textured High Ponytail With Real Volume

A high pony comes across youthful and lifted, but tied completely flat it just looks like gym hair; volume is what actually sells the look.
- Tip the head forward and gather hair high at the crown so the neck looks longer.
- Mist the mid-lengths with a texture spray and tug small sections loose at the crown before fully tightening the elastic.
- Smooth only the very front with palms so the face stays clean while the body underneath stays full.
The Wrapped Ponytail With Extensions

This version delivers the thick, swinging length seen on red carpets, and that length almost always comes from added hair.
- Tie the natural ponytail first, then clip a wrap-around piece or several wefts above and below it so the join stays hidden.
- Curl the natural hair and the extension together with a one-inch iron so the textures blend instead of sitting in two visibly different layers.
- Wrap a strand of the blended hair around the base afterward to disguise every clip.
A couple of extension myths worth clearing up:
❌ Myth: Clip-ins always look obviously fake.
✅ Reality: Properly color-matched and blended with heat, clip-in wefts are one of the harder additions to spot in a finished style.
❌ Myth: Adding length always damages natural hair underneath.
✅ Reality: Clip-ins applied and removed correctly put little to no stress on the hair, unlike glued-in or sewn-in methods worn for weeks at a time.
The Side Ponytail, Done Right

A side ponytail gets typecast as a throwback style, but draped over one shoulder with soft waves it looks far more polished than dated.
The detail that matters most is committing fully to the angle.
- Waves curled away from the face give it a soft, dressed-up feel.
- Slicked roots paired with glossy length read more like evening polish.
- A few loose face-framing pieces keep the shape from looking too severe.
A Twisted Ponytail for a Modern Edge

Twisting two sections back before they meet the elastic adds real structure that looks harder to do than it actually is.
- Part the top into two sections and twist each one back toward the crown.
- Pin where the twists meet, then gather everything together into a mid-height pony, letting the twisted sections sit visibly along the crown.
- Loosen the twists gently with fingertips afterward so they look full and soft.
A couple of terms that come up when describing this technique:
📖Two-strand twist
Two sections of hair wound around each other, as opposed to three sections braided together.
📖Mid-height pony
A ponytail gathered roughly between the crown and the nape, neither fully high nor fully low.
The Bubble Ponytail

A bubble ponytail stays playful without tipping into costume-like, and it needs only a row of clear elastics to pull off.
- Tie a base ponytail, then add another elastic roughly every two inches down the length.
- After each elastic, gently pull the section apart to puff out a rounded bubble shape.
- On fine hair, light backcombing inside each bubble helps it hold its rounded shape longer, especially through a full day of wear.
The French Braid Ponytail
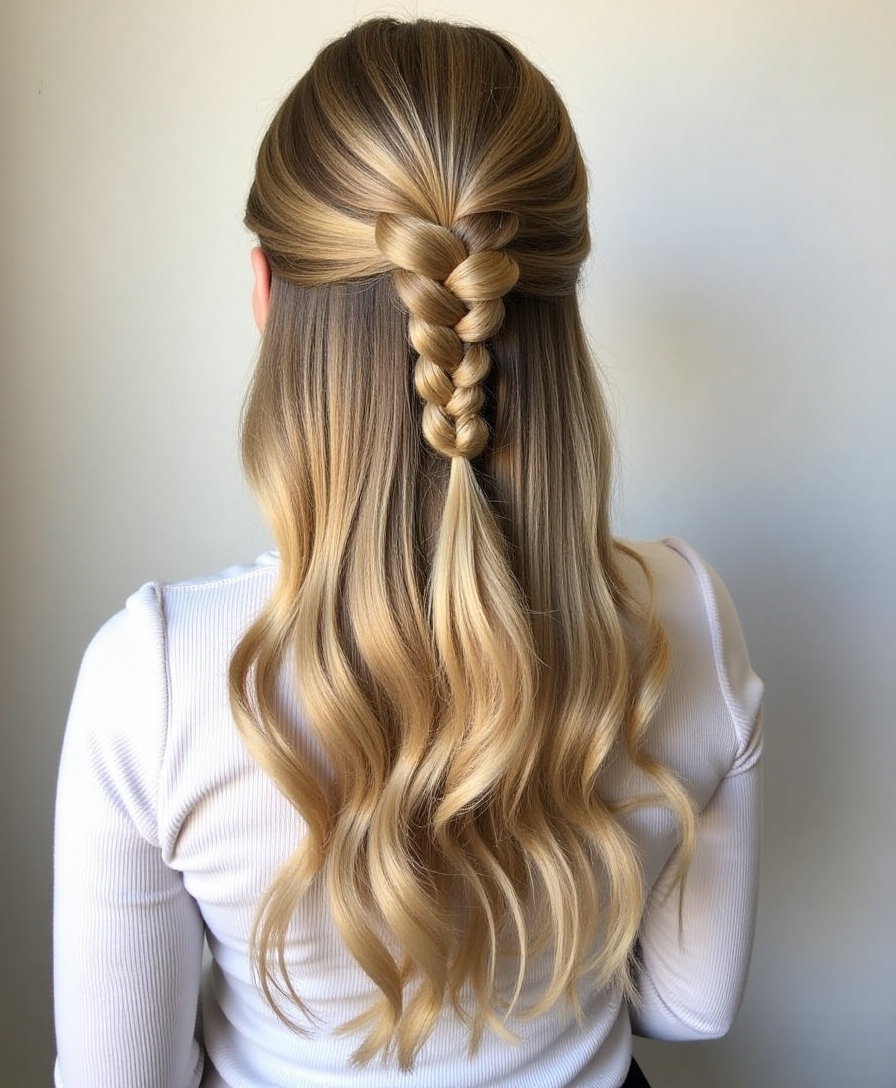
Part braid, part ponytail, this version keeps every strand off the face, which is why it holds up through both a workout and a full workday.
Where the Braid Should Stop
The braid starts at the crown and feeds in hair only until it reaches the point where the rest gets tied off loose, whether that’s mid-crown or closer to the nape.
A Dutch version, where strands cross underneath instead of over, sits higher off the head and tends to hide uneven tension better for anyone still learning the technique. More braid styles live at braided hairstyles.
A Braided Crown Over a Low Ponytail

Wrapping a braid across the top of the head before dropping into a low tail gives a soft, occasion-ready feel that still holds up comfortably for hours. The same idea translates well onto locs, covered at dreadlocks ponytail hairstyles.
- Braid a section starting near one temple, carry it along the hairline, and pin the end behind the opposite ear.
- Gather everything else, including the braid’s tail, into a low ponytail at the nape.
- Small pins or flowers tucked into the crown braid work well for a dressier occasion, and are easy to skip for an everyday version.
🅰️Braided Crown Pony
More occasion-ready, takes longer to set up, holds beautifully through a long event.
🅱️French Braid Pony
Faster to tie, built for movement and workouts, less obviously dressed-up.
The Half-Up Half-Down Ponytail

For anyone who wants hair off the face but still down the back, this version splits the difference honestly.
The top third of the hair, roughly temple to temple, gets tied into a small pony at the crown while the bottom stays loose and waved.
Height matters more than most people expect here: too low and the whole thing sags, so aiming for the crown with a little tugged-in volume keeps it from falling flat. That also makes this a strong option for fine hair, since the gathered top hides thinner roots while the loose length still looks full.
Retro Glam With Curls

Loading the tail with old-Hollywood curls turns a simple ponytail into full event hair, and the curl pattern also helps the style hold since it gives the length something to grip.
A high, smooth base gets tied first, then the tail gets curled in one-inch sections with a hot iron before being brushed out into soft waves.
- A flexible-hold hairspray keeps the curl pattern moving all day long.
- Works best with at least medium length, since shorter tails don’t hold the curl weight as well.
- Photographs especially well under warm, directional light.
The Asymmetrical Ponytail

An off-center ponytail tied behind one ear carries an attitude a perfectly centered one doesn’t, and the imbalance itself is the whole point.
A hard side part set up before gathering anything establishes the asymmetry, and sweeping everything toward the opposite side before tying behind the ear finishes the shape.
- Slicking the shorter side flat keeps the asymmetry looking designed on purpose.
- Suits thicker hair especially well, since there’s enough volume to make the imbalance read clearly.
- Works on straight or wavy textures; very curly hair can soften the sharp line this style depends on.
The line between edgy and slipped is about half an inch of part placement.
The Messy Boho Ponytail
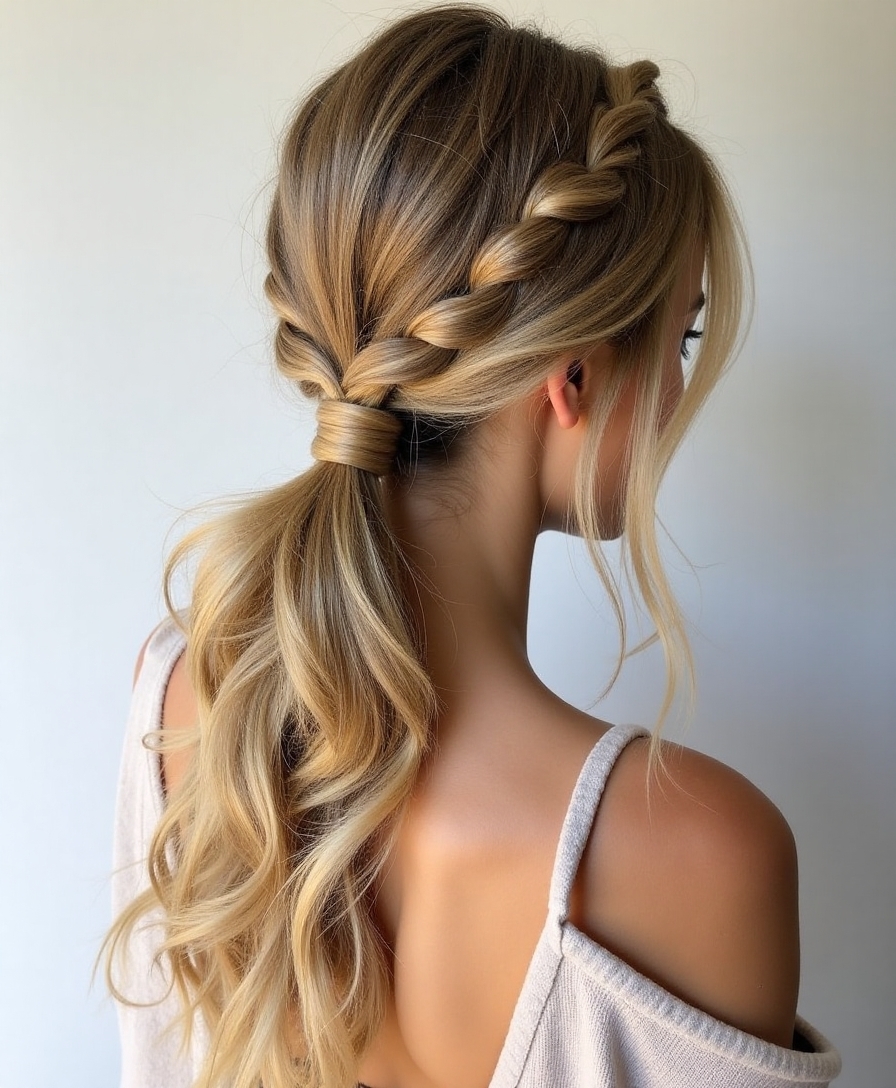
A messy ponytail is often misread as skipping effort, when it actually means undoing the effort on purpose, in specific places.
- Starting on second-day hair with a little texture spray gives the style something to grip.
- A loose, mid-height pony gets pulled apart at the crown and around the face for softness.
- Tugging the elastic down slightly loosens the whole silhouette so the top looks relaxed and soft rather than freshly brushed.
The Dramatic High Ponytail
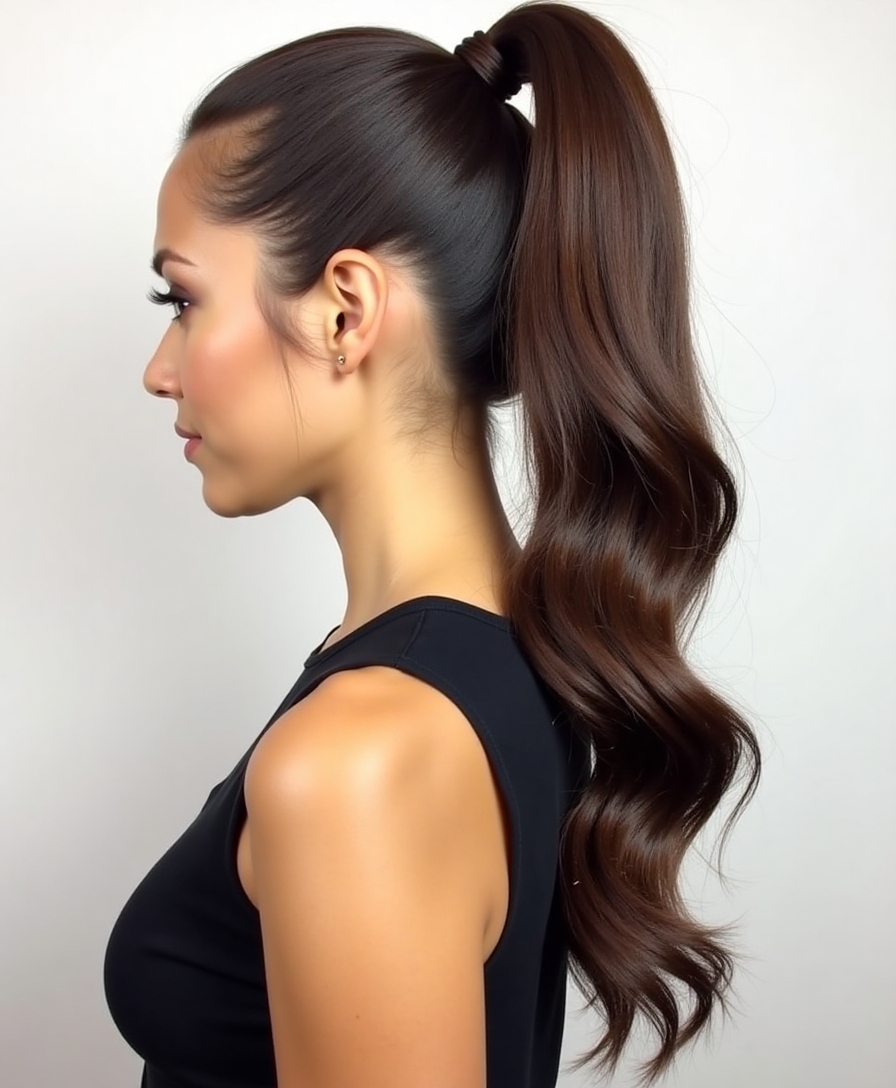
This is the long, sky-high tail seen on stage, and length is truly non-negotiable for the look to come across as dramatic.
Hair that stops at the shoulders needs added length to reach the same visual effect; with enough length already there, the styling itself stays simple. A lower, colder-weather take on the idea lives at winter ponytail hairstyles.
- Tie as high as the crown comfortably allows without pulling at the temples.
- Smooth the surface to a high shine so the length looks like one solid sweep.
- Wrap the base and finish with a light-hold spray so the height holds through the event.
The Knot Ponytail

A knot ponytail tucks a small loop or literal knot at the base, turning an otherwise plain tie into something with a bit more detail. Small detail, real difference.
The gathered hair splits in two at the base, the two halves tie into a single knot, and the tail secures underneath with pins so the knot sits directly over the elastic and hides it completely.
It works best on smooth, mid-length to long hair; very layered or short hair tends to slip out of the knot before it can be pinned properly.
The Twisted Rope Ponytail
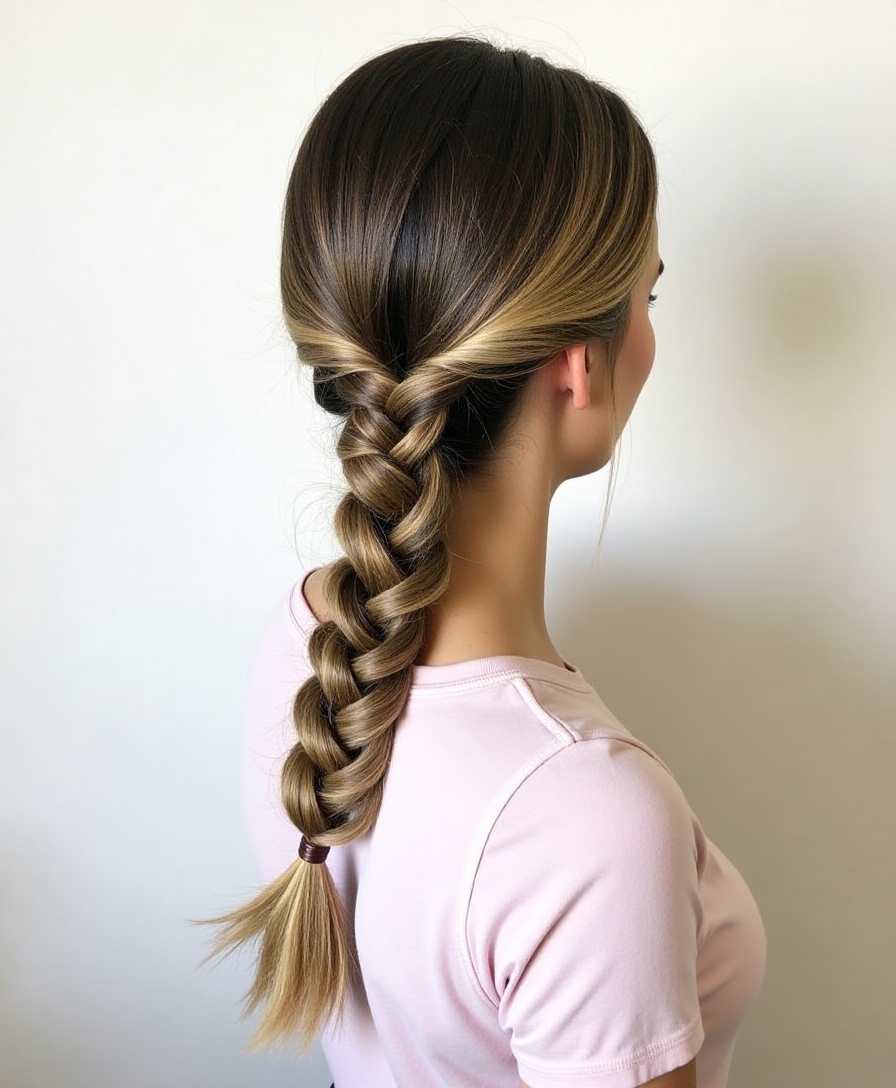
A rope ponytail turns the tail itself into a twisted, braid-like coil without any actual braiding involved, which makes it one of the easier detailed styles to learn.
- Gather a base ponytail, then split the tail into two roughly equal sections.
- Twist each section clockwise on its own, then wind the two around each other counter-clockwise.
- Those opposing twist directions are what actually lock the rope in place; tie off the end once it’s wound.
The Braid-Wrapped Ponytail

A thin braid takes the place of the elastic here, wrapping around the base so no hardware shows at all. Nothing to hide, nothing to see.
- Tie the ponytail normally, then take a small section from underneath the tail.
- Braid that section, wrap it around the base to cover the elastic, and pin the end out of sight.
- A light mist of spray on the braid keeps stray hairs from fuzzing up the wrap.
The Ponytail With a Faux Bang

For anyone curious about bangs but not ready to commit, the tail of an existing ponytail can fake them convincingly for a single day.
Tuck, Don’t Cut
A high ponytail gets tied first, then a section from the front of the tail pulls forward over the forehead and pins where real bangs would naturally fall, with the ends tucked under to shape a soft fringe.
Curtain-style faux bangs, parted in the middle, tend to be the most forgiving version, since they don’t need to sit in one exact line to look intentional. For the real, permanent version, see curtain bangs.
The Low Ponytail With a Center Part

A dead-straight center part feeding into a low, glossy ponytail lands as one of the more minimal, editorial ways to wear hair back right now.
Three details make or break the look: a truly straight part drawn with a comb tail from hairline to crown, roots smoothed flat with gel so the part stays crisp, and a nape-low tie with a hidden elastic so nothing distracts from the clean line.
- Suits straight to slightly wavy hair best; heavy waves fight the straight-line effect this style depends on.
- A dab of gel along the part itself prevents flyaways from breaking the line by midday.
- Reads more formal than most ponytails, making it a strong pick for work settings.
Styling Tips
Across nearly every version here, height decides most of the personality: high looks sporty, nape-low looks polished, and mid-height sits comfortably between the two. Wrapping a small section of hair around the elastic instantly makes almost any tie look more finished, no matter the specific style chosen.
Tying in the exact same spot every day stresses the hairline over time, so moving the part and the height around through the week matters more for hair health than which specific style gets worn. A clip-in piece for added length or fullness typically runs around $90 for a basic synthetic set.
Ponytail Questions
?How do I stop a ponytail from drooping by the afternoon?
Slip a couple of bobby pins through the elastic into the hair above it; they take the weight off the band so it can’t slide down. Second-day or texture-sprayed hair also gives the elastic more grip than clean, freshly washed strands do.
?Why does a ponytail sometimes cause a headache?
It’s usually tied too tight, or in the same high spot every single day. Loosening it by half an inch, switching to a soft, fabric-covered elastic, and moving the placement around helps take pressure off one area of the scalp.
?Can fine or short hair actually pull off a dramatic high ponytail?
To a point. A clip-in piece adds the length and thickness a dramatic version depends on; without extensions, a shorter, fuller-looking pony looks more believable than forcing height that isn’t quite there yet.
?Is it possible to wear a sleek ponytail without heat styling every time?
Yes, especially on hair that’s naturally straight to begin with. A strong-hold gel and a firm brush can smooth the surface enough on non-heat days; very textured hair usually still needs some heat to get that same glass-like finish.
The Same Two Minutes, Reconsidered
A ponytail earns its reputation as the low-effort option mostly because most people stop at one version of it. Shifting the height, hiding the elastic, or adding a twist or a wrap turns the same basic tie into something that looks considered.
Which one of these is worth trying first on an ordinary morning?