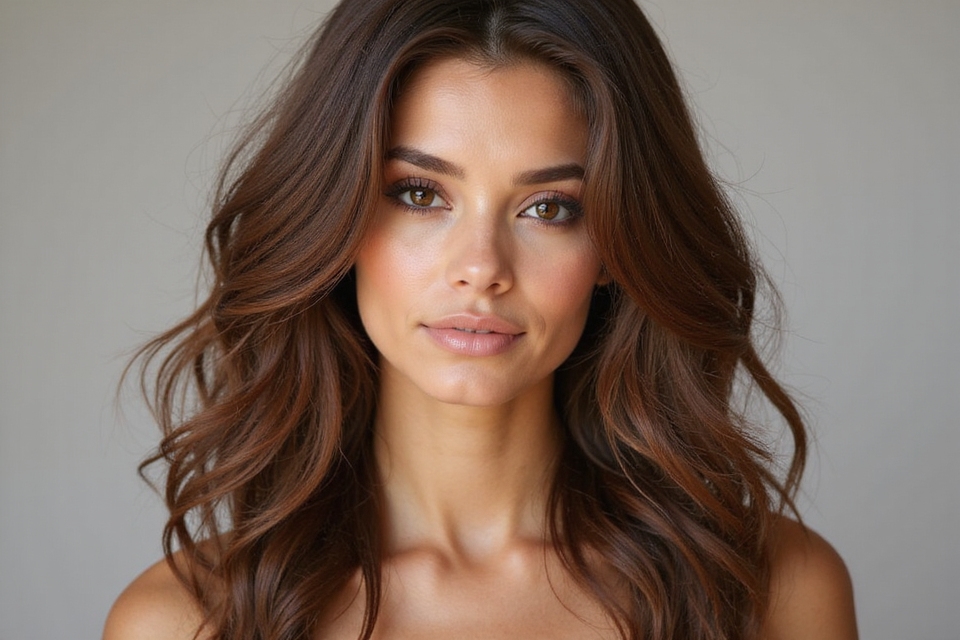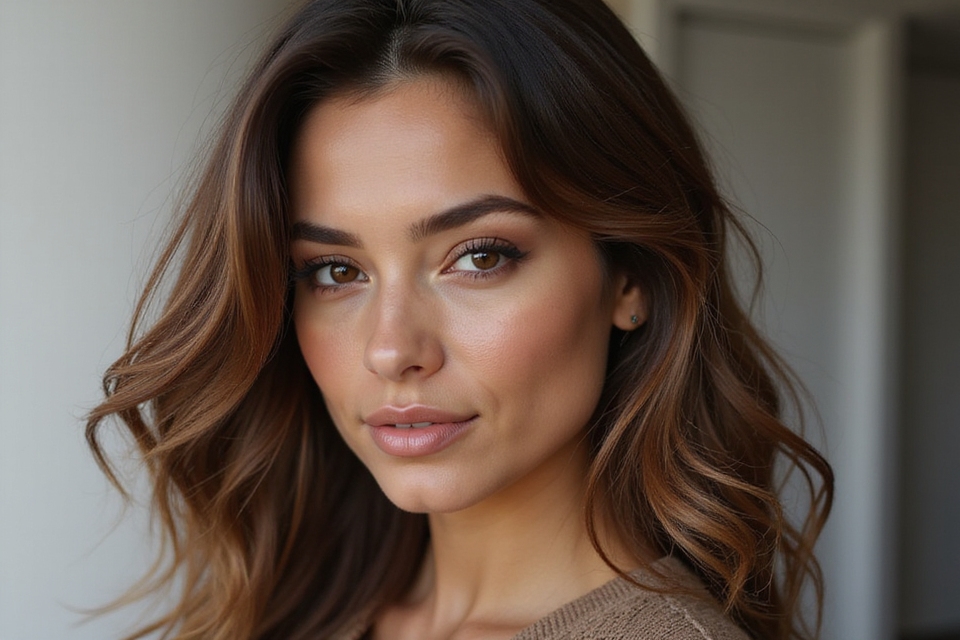
Most people think the secret to great caramel highlights is the shade. It is not. After years of painting brown hair, I can tell you the shade is the easy part. What separates caramel highlights on brown hair that look expensive from ones that look stripy is placement and layering.
Caramel highlights are warm, golden-brown ribbons of light woven through brown for dimension and glow, and they brighten the hair without the contrast, upkeep, or damage of going blonde. This guide covers the parts that actually matter: how to choose and place the shade, how it behaves on your texture and length, and how to keep caramel highlights on brown hair looking freshly done.
Caramel Highlights, Quick Facts
- Keep the caramel only a few shades lighter than your base so you get dimension instead of stripes.
- Placement and layering matter more than the exact shade; brighter up top and around the face, deeper underneath.
- Balayage grows out soft and low-maintenance; foils give brighter, more even lift.
- Caramel is gentler and lower-upkeep than blonde, since it lifts only a few levels.
- A warm gloss every couple of months refreshes the shine without re-lightening.
Understanding Caramel Highlights

Caramel highlights are warm, golden-brown ribbons woven through brown hair to add light and dimension without the contrast of a true blonde. They sit just a few shades above your base. That small jump is exactly what makes the depth believable, a soft lift rather than a hard change. The point is to enhance the brown you already have, not replace it, giving you light and richness at once.
- Sit only a few levels lighter than your base for a natural look.
- Add brightness while keeping the depth and richness of brown.
- Catch the light like sun-grown dimension.

Why Caramel and Brown Go Together

Caramel is basically a warm, light brown, so the two blend almost on their own. That family resemblance is why the highlights melt in as dimension and almost never stripe. It is also what makes caramel the default highlight for brunettes.
On brown, caramel adds the glow and movement that catch the light, turning a flat, one-note base into something with glow. It is the upgrade that quietly makes brunette look more expensive. See the all-over version in the caramel brown guide.
- Caramel and brown share a warm family, so they blend easily.
- The close match is what keeps the highlights soft and blended.
- Best on warm and neutral bases, where the warmth feels at home.
🅰️Balayage
Hand-painted, soft, and grow-out friendly, with no hard regrowth line. The most natural look and the lowest upkeep. Choose it if you want sun-touched dimension you can stretch for months.
🅱️Foils
More uniform, brighter, and more lift at the root. Choose foils if you want even, all-over caramel and do not mind a sooner root refresh.
Choosing the Right Shade of Caramel

Caramel runs a range, from a light, golden caramel to a deeper, richer toffee, so the right shade depends on your base and how much contrast you want. A lighter caramel pops against brown. A deeper one whispers.
How light a caramel to choose
In the chair I always pull the swatch right up to a client’s roots before we commit, because caramel that looks perfect on paper can read too light against your actual base. Keep it only a few levels above your brown, since that small jump is what keeps it natural rather than stripy. The biggest shade mistakes come from going too light too fast.
A colorist matches the warmth and depth to both your base and your skin, which is the part worth paying for. The honey brown guide shows a related warm option.
Caramel Highlights and Skin Tone

Caramel’s warmth makes it especially flattering on warm and neutral skin, where it brightens and glows against the complexion. Golden and olive skin in particular tend to look wonderful with it.
Cooler skin can still wear caramel by leaning toward a softer, less golden version, so it complements your skin. The gold gets dialed back a notch.
The whole game is matching the warmth of the caramel to your undertone. Get that right and it flatters; get it wrong and it can turn brassy against the skin.
Two caramel myths worth retiring before your appointment.
❌ Myth: Caramel highlights are high maintenance
✅ Reality: They are actually lower-upkeep than blonde. Because caramel is warm, not ashy, it needs little toning, and soft-painted versions grow out with no harsh line.
❌ Myth: Caramel always turns brassy
✅ Reality: Caramel is meant to be warm; brass is just warmth gone wrong. The right lift and a finishing gloss keep it clean and golden rather than orange.
Balayage Versus Traditional Highlights

The two main application methods give different results. Balayage hand-paints the color for a soft, sun-touched finish that grows out gracefully with no hard line.
Traditional foils give a more uniform, all-over brightness and more lift at the root, which is the choice when you want even, brighter caramel throughout. The trade-off is a sooner root refresh.
Most caramel looks today lean balayage, simply because the soft grow-out fits how people actually live. A full painted set typically costs $150 to $300 and stays put for months.
Caramel Highlights for Curly Hair

Curly and coily hair shows caramel off beautifully, because every coil catches the light at a different angle and the dimension reads even richer than on straight hair. Placed well, caramel makes curls look sunlit from within.
Texture changes the craft. Color has to be placed with the curl pattern in mind, since it lands differently once the curl springs back, and curls are more fragile, so gentle lightening and a bond-builder are non-negotiable. Plenty of conditioning keeps the lightened pieces soft and defined.
- Ask for a colorist who places color with your curl pattern in mind.
- Expect gentle lightening and a bond-builder to protect the curls.
- Keep up the moisture; lifted curls dry out and lose definition fastest.
“On curly and coily hair, ask your colorist to place the caramel on dry, unstretched curls or to map it to your curl pattern. Color painted on stretched hair lands in the wrong spot once the curl springs back, so the placement looks random instead of intentional.”
Caramel Highlights on Straight Hair

On straight hair, caramel runs as smooth ribbons of light running the length, which means placement and blending are everything; there is no curl to hide a hard line. Soft, varied placement is what avoids an obvious, stripy result.
Here is where the layering comes in: I weave brighter caramel up top and around the face, keep deeper tones underneath, and melt it all together with a gloss. That layering, far more than the shade, is the secret to caramel that looks expensive on sleek hair.
Caring for Your Caramel Highlights

Caramel is lower-maintenance than blonde, but the lightened pieces still need a little care to stay soft and bright. Washing cooler and less often protects both the tone and the condition, since heat and frequent washing flush warm pigment out fastest.
Because caramel is warm rather than ashy, you rarely need heavy toning; skip purple shampoo, which would dull the gold. A weekly mask keeps the lightened sections healthy, and a color-safe shampoo holds the warmth between visits.
👍Caramel highlights
- +Only a few levels of lift, so less damage and brass.
- +Soft, low-maintenance grow-out with gentle fading.
- +Warm tone flatters warm and neutral skin without heavy toning.
👎Blonde highlights
- –More lift, so more damage risk and more upkeep.
- –Brighter, higher-contrast result that shows regrowth sooner.
- –Needs regular purple toning to fight brass.
Products to Maintain Caramel Highlights

You do not need a cabinet full of products to keep caramel highlights healthy, just a few that earn their place. The lightened pieces want moisture and tone protection, and three or four bottles cover both without complicating your routine.
- A color-safe, sulfate-free shampoo to protect the warm tone.
- A rich mask once a week so the lifted pieces stay supple.
- A warm-toned gloss or glaze now and then to refresh the gold.
DIY Caramel Highlights at Home

At-home highlight kits exist, but caramel is one of the trickier colors to pull off yourself, since the placement and blending are exactly what make it look natural. A DIY attempt risks uneven, brassy, or obviously striped results, especially on darker brown that needs more lift.
- Best left to confident home colorists who understand lift and placement.
- Limit any DIY to a few subtle, face-framing pieces on lighter brown.
- Anything brighter or all-over is far safer at the salon.
Visiting a Professional Stylist

For most people, caramel is worth a professional, because the soft, dimensional result depends entirely on skilled placement and blending. A colorist reads your base, your skin, and your hair history, then controls the lift so the caramel comes out clean and golden. The faded, orange home-lift jobs I fix most often all skipped that step.
They also melt the highlights into the brown with a finishing gloss, the step that erases any line between piece and base. The dimension that makes caramel look expensive is the hardest part to copy at home.
Seasonal Trends in Caramel Highlights

Warm color shifts with the seasons, and caramel is no exception, moving subtly through the year. Summer leans brighter and more golden, mimicking the sun, with a few extra face-framing pieces to freshen the look.
Fall and winter pull toward deeper, richer toffee tones that feel cozy against colder light. Most of these tweaks happen with a single gloss rather than new foils, which keeps the look current without the cost of a full appointment.
Combining Caramel With Other Tones

Layered with other tones, caramel gets far more interesting, and combining it is where real depth comes from. Paired with deeper lowlights, it builds rich contrast; blended with honey or golden pieces, it gives a soft, multi-tonal glow. The pairing that adds the most depth is caramel with a darker lowlight, since the light and dark together read as natural, sun-grown variation.
- Caramel plus deeper lowlights gives the most three-dimensional result.
- Caramel plus honey or gold lands soft and multi-tonal.
- A colorist balances the tones so none of them takes over.
Face-Framing Caramel Strands

Placing caramel right around the face is the single most flattering move in color, since the warm brightness draws the eye up and lights the complexion. A caramel money piece or a few soft face-framing strands change the whole look.
Because only a handful of pieces carry the brightness, this is a low-commitment way to add warmth exactly where it counts, and it grows out softly with no obvious regrowth.
Think of it as the hair equivalent of good lighting on your face. A little brightness in the right spot does more than a full head in the wrong one.
Caramel Highlights for Every Age

At every age, caramel flatters, because the soft, natural depth brightens the complexion and eases the face without the harsh contrast of high-lift blonde.
Warmth flatters as skin tone shifts
That softening is why it is such a favorite for adding light and a youthful glow to brown hair at any stage, and why it tends to suit faces better than a stark blonde as skin tone shifts over time.
It also ages gracefully on the calendar, blending as the hair changes and growing out without a stark line, so you are never chasing an awkward regrowth.
Transitioning From Darker Colors

If you are moving from a darker brown or an old box dye, reaching caramel takes some lifting, and an experienced colorist plans it carefully. Built-up box color in particular needs working around, since it lifts unevenly and can grab warm.
Going gradually across a couple of appointments protects the hair and gives a richer, more dimensional result than rushing it in one sitting. An honest consultation about your color history is the real first step, since what is already on the hair decides what is possible.
Enhancing Your Natural Color

The most natural caramel work simply enriches the brown you already have, adding light and depth that looks like sun-grown variation. The aim is your own color, only richer and brighter.
Placed within a few shades of your base, caramel passes for natural, sun-grown depth, which is why it suits people who want subtlety over a big change. It is enhancement, plain and simple, and it is the safest way to test the water before going bolder.
- Keeps your natural color recognizable, just lit up.
- Ideal for anyone who wants subtle over dramatic.
- A low-risk first step before committing to more brightness.
Minimizing Damage During Coloring

Because caramel only lifts the hair a few levels, it is gentler than going blonde, but lightening still stresses the strand, so a little protection goes a long way. The modest lift is your biggest ally here; the rest is care around it.
- Ask for a bond-building additive in the lightener to protect the structure.
- Deep-condition before and after coloring to keep the pieces strong.
- Limit heat afterward, since lightened hair dries out faster.
Styling Tips for Caramel-Highlighted Hair

Caramel shows its dimension best when the hair moves, so styling that adds texture and shine makes the highlights glow. Soft waves are the easiest win. They bend the light through the pieces and reveal the depth.
Movement reveals the dimension
Shine does the rest. A glossing serum on the mid-lengths keeps the caramel luminous, while air-drying or low heat protects the color from dulling.
Skip heavy oils at the root, which weigh the hair down and flatten the dimension you paid for. A cool blast of air at the end sets the shine.
Caramel Highlights on Long Versus Short Hair

Any length works, but the effect shifts, so placement should follow your cut. On long hair, caramel shows as flowing ribbons of light with plenty of room for dimension to build down the lengths. On a bob or short cut, the same color delivers punchy, face-framing brightness and movement instead. The trick is adjusting where the pieces sit, more face-framing on short, more length-running on long.
- Long hair: sweeping placement draws the eye down the lengths.
- Short hair: face-framing pieces give the most impact.
- Match the placement to the cut, not the other way around.
Layering Effects in Caramel Highlights

The most dimensional caramel uses layered placement, weaving lighter and deeper pieces at different depths through the hair the way real hair varies in the sun. Brighter caramel on top and around the face, with deeper tones tucked underneath, creates a lit-from-within effect no single shade can fake.
This is the difference between rich caramel and flat, obvious highlights, and it is where a skilled colorist’s eye really shows. If you take one thing from this guide, let it be that layering, not the shade on the swatch, is what makes caramel look expensive.
Addressing Common Concerns

Before you book, it helps to name the worries you might have, since most have simple answers. Some fear brassiness, but caramel is meant to be warm, so the goal is clean warmth, the golden kind, reached with the right lift and a finishing gloss.
Others worry about upkeep, which is clearly lower than blonde; soft regrowth and gentle fading mean fewer salon trips and rarely any heavy toning.
Damage is also a smaller concern here than with high-lift color, since caramel only lifts a few levels. None of these are reasons to avoid it, just things to plan for.
Reviving Faded Caramel Highlights

Over time, caramel softens and loses some warmth, so a refresh keeps it looking freshly done. A gloss revives the warmth and shine in one quick salon step. Often there is no re-lightening at all.
Because the regrowth is soft and blended, a full highlight top-up is needed far less often than with blonde, so a gloss between appointments is usually all it takes.
That is a big part of what makes caramel such a manageable color. The refresh is cheaper, faster, and gentler than starting over. A gloss runs $40 to $80 and takes about twenty minutes.
Caramel Highlights as a Lasting Trend

Caramel highlights have been a fixture on runways, in editorials, and across everyday style for years, precisely because they look expensive and natural at the same time. That combination is hard to beat, which is why the look shows no sign of dating.
The best inspiration comes from seeing the full range of warm and deep caramels on brown bases like yours, rather than one celebrity photo. Save a few that feel like you, and bring them to your consultation.
Planning Your Next Appointment

Getting the caramel you want starts with a good consultation, so come prepared. Bring clear photos, say whether you want subtle or bright and warm or deep, and be honest about your color history and how much upkeep you are willing to do. Ask for a soft, balayage-style placement if you want low maintenance, and a gloss to melt the caramel into your brown. A skilled colorist turns all of that into a dimensional, flattering result.
- Bring photos of what you want and one of what you want to avoid.
- Be honest about your color history; it decides what is possible.
- Ask for balayage placement and a finishing gloss for the softest result.
Common Mistakes to Avoid With Caramel Highlights
A few avoidable mistakes are behind most disappointing caramel highlights. The biggest is going too light too fast, which turns soft dimension into stripes; keeping the caramel only a few shades above your base is the fix. The second is even, uniform placement, which reads flat. Real richness comes from layering, brighter pieces up top and around the face with deeper tones underneath.
The last two are about upkeep. Using purple shampoo dulls the very gold caramel is built on, so reach for a warm-toned gloss or conditioner. And skipping moisture leaves the lightened pieces dry and dull, since they are more porous than the rest of your brown. Treat the highlighted pieces a little, and the whole color stays rich.
Brown Hair, Lit From Within
Caramel highlights are the brunette upgrade that never really dates, adding warmth, light, and dimension to brown without the contrast or upkeep of blonde. The shade matters, but placement and layering matter more; that is what separates caramel that looks expensive from caramel that looks stripy.
Keep the caramel a few shades above your base, match the warmth to your skin, and lean on a colorist for the layering and the finishing gloss. Save the looks that caught your eye, bring them to your appointment, and let your brown hair glow from within.
Hand-Picked for You