Most graduation-day planning goes toward the dress, the photos, the after-party. The one variable that actually decides how the hair looks all day gets skipped: the cap itself. A mortarboard sits flat, presses down about an inch above the brow, and leaves a visible dent in anything built for height.
Planning around the cap from the start, rather than fighting it after the fact, changes everything. The looks below are organized by how well each one survives a mortarboard, a long ceremony, and a hundred photos, before, during, and after the cap comes off.
Cap-Proof Hair, Summarized
- Low and back beats high and voluminous, since the cap crushes anything built for height at the crown.
- Pin the cap through its inner corners into the hair itself, so it stays put without a hand holding it in place.
- Take hair-down photos before the cap goes on; it leaves a visible dent that no amount of fluffing fully erases.
The Classic Low Bun

A bun anchored right at the nape sits exactly where a mortarboard can’t reach it, which makes this close to the most foolproof option on this entire list. It holds through hours of standing, sitting, and hugging without needing a single mid-day fix. A quick guide to building it:
- Gather hair low at the nape, well below where the cap’s back edge rests.
- Secure with enough pins that it survives hats, hugs, and a long walk across a stage.
- Takes about five minutes and needs no special tools beyond a brush and pins.

The Halved French Braid

Starting a French braid at the crown and releasing it into loose hair partway down solves two problems at once: the braided section lies flat enough for a cap, while the length left down keeps the day feeling less formal than a full updo. To build it:
- Braid only the top section, close to the scalp, then secure and release the rest.
- Set the loose ends the evening before with a wand or rollers so they hold overnight.
- Check the braid lies completely flat before committing; any bulk near the crown will lift the cap.
The Sleek High Ponytail
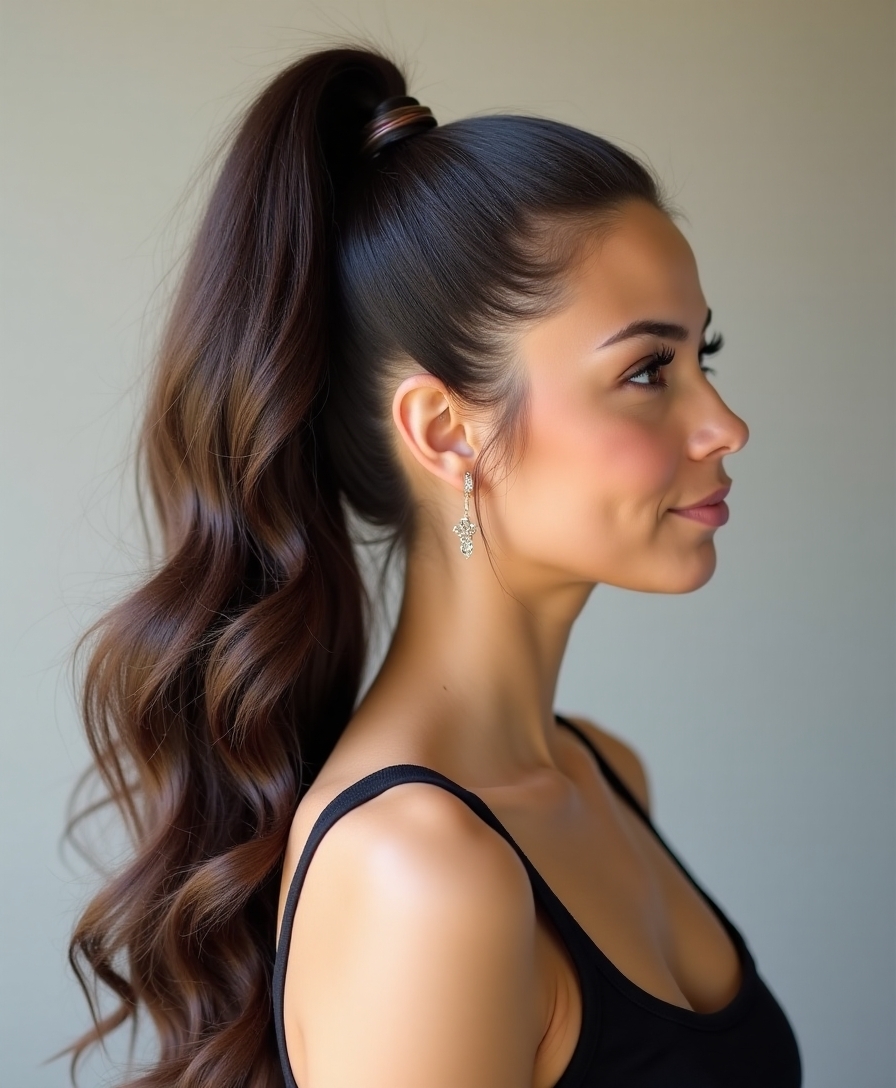
A tall ponytail sounds like a cap risk, but placement saves it: gathering the hair behind the crown rather than directly on top means the mortarboard still has a flat surface to rest on.
Setting the tail slightly lower and further back than usual clears the back edge of the cap cleanly. A section of hair wrapped around the elastic hides it and reads noticeably more formal than a bare band.
This version works especially well for anyone with thick hair sitting through a warm, crowded ceremony, since it pulls every strand off the neck while still looking polished in photos. The birthday hairstyles guide has more high-ponytail variations for other occasions.
The Twisted Side Braid

Sweeping hair to one side into a soft, twisted braid keeps everything low against the shoulder, well clear of where the cap sits. The asymmetry also happens to photograph well from nearly any angle. A few notes on wearing it:
- Loose, slightly imperfect twists read more elegant than a tight, precise braid here.
- Position the finished braid against one shoulder, fully below the cap’s reach.
- Pin the cap into the hair before lining up, rather than adjusting it by hand all day.
Shoulder-Length Waves

Soft waves worn down prove an updo isn’t required to look put-together, and with no height at the crown, there’s nothing for the cap to flatten in the first place. A few things worth knowing:
- No volume at the root means the cap sits without crushing anything underneath it.
- The cap still presses a visible line into the length, so shoot hair-down photos first.
- Tucking the front sections behind the ears once the cap is on keeps hair out of the face.
Trying to decide between a secured style and something worn down? A quick way to choose:
🎯Ceremony runs long, outdoors, or windy
Choose something braided or pinned; loose waves won’t survive hours of movement cleanly.
🎯Ceremony is short and mostly indoors
Waves or a soft half-up style can work fine, since there’s less time for the cap to press a dent in.
The Elegant Chignon

A smooth coil pinned at the nape reads as the dressiest of the low, cap-friendly options, closer to what a stylist would build than something done solo in a bathroom mirror. A salon version typically runs $40 to $70, though ten minutes and enough pins gets remarkably close at home. Building one:
- Twist the gathered length into a coil and pin flat against the nape.
- Placement matters more than technique; it needs to sit low enough to clear the cap entirely.
- Holds for hours without a single restyle, staying just as neat at dinner as it did that morning.
The Bohemian Fishtail Braid

A loose fishtail worn over one shoulder brings a relaxed, undone feeling to an otherwise formal day, and the intricate-looking weave is considerably easier to execute than it appears.
Because it hangs low and to the side rather than sitting on top of the head, the cap has a clean, flat surface to rest on with nothing in its way.
- Gently tug the edges of the finished braid to widen and soften it, turning a tight plait into something full.
- This style grips noticeably better on unwashed, day-old hair than on freshly cleaned strands.
- Position the braid over one shoulder, clear of the cap’s back edge entirely.
The Textured Loose Bun

For anyone who finds a sleek bun too severe, a textured version softens the same cap-friendly shape by leaving a few pieces loose and keeping the overall finish deliberately undone.
Building it on unwashed hair, or adding texture spray to freshly cleaned strands, gives pins something to grip. Slippery, just-washed hair fights every attempt to hold a shape.
Letting the bun look gathered rather than perfectly smooth is the whole point here; a little looseness reads as intentional rather than unfinished.
📋Packing Kit for Cap Day
- ✓A handful of extra bobby pins in a matching hair color.
- ✓Travel-size hairspray for flyaways after the cap comes off.
- ✓A small mirror, since ceremony bathrooms rarely have one handy.
The Half-Up Floral Crown

A half-up style with a few small flowers or a delicate clip pinned in solves the cap question cleverly: the secured top section lies flat enough for the mortarboard, while the loose bottom half keeps the day feeling celebratory rather than strictly formal.
Placing Flowers So They Don’t Fight the Cap
Keeping any flowers small and positioned low, toward the back of the secured section rather than at the crown, avoids lifting the cap even slightly.
Silk blooms hold up considerably better than real ones through the heat of a packed gym or an outdoor ceremony in direct sun.
Side-Swept Curls

Sweeping soft curls over one shoulder brings an old-Hollywood quality to the day, and gathering everything to one side happens to leave the crown low and flat, which works in the cap’s favor. Worth knowing:
- All the length sweeps to one side, keeping the crown clear for the mortarboard.
- The asymmetry photographs flatteringly from nearly any camera angle.
- Pin the swept section discreetly so it holds through the walk across the stage.
The Soft Ribbon Braid

Weaving a thin ribbon through a simple braid adds a small, occasion-specific touch, and matching it to school colors turns it into a quiet detail rather than a costume element. To build it:
- Weave the ribbon in alongside the hair from the very start of the braid, not after.
- Tie it off at the very end rather than the top, so it doesn’t slip loose as the day goes on.
- The braid itself stays flat and cap-friendly; the ribbon adds the occasion without adding height.
The Crown Braid Halo

A braid that wraps fully around the head like a halo is truly striking, and also the one style on this list that needs real forethought about the cap specifically.
Because it sits up and around the crown by design, it has to stay low and snug or the mortarboard simply won’t settle flat. Building it lower toward the back of the head, then testing the cap before the actual day, catches problems early.
- Budget real time for this one, twenty to thirty minutes, since it’s the most involved style here.
- Braid it noticeably lower than a typical halo braid photo suggests.
- Always test-fit the cap before the ceremony, not for the first time that morning.
The Voluminous Blowout

A big, bouncy blowout looks glamorous and also ranks as the riskiest style choice on a day built around a mortarboard. Every bit of root volume it depends on is exactly what the cap flattens first. A realistic way to wear it anyway:
- Treat it as a before-and-after look, photographed at its fullest before the cap ever goes on.
- Keep bobby pins on hand to tidy the crushed crown once the cap comes back off.
- Where this style struggles most is the middle of the ceremony, so plan expectations accordingly.
Two things people assume about cap-proof hair that aren’t quite accurate:
❌ Myth: Myth: only buns and braids work under a cap
✅ Reality: Reality: several down styles work fine too, as long as there’s no height built up at the crown specifically.
❌ Myth: Myth: a bigger, more voluminous style always looks better in photos
✅ Reality: Reality: styles that survive the full day intact tend to photograph better overall than ones that looked great for the first ten minutes only.
Retro Finger Waves

Finger waves bring a vintage, sculptural quality that stands out in a sea of ordinary ponytails, and because they lie flat against the scalp by design, they rank among the more cap-proof looks on this entire list.
They take real patience to set, generally twenty minutes or so with strong-hold product and a fine comb, but hold remarkably well once fully dry. This also works well on shorter hair that can’t support a bun.
- The flat-to-the-head construction means the cap rests without disturbing the shape at all.
- Set with gel or a strong mousse for the cleanest, most defined wave pattern.
- A great option specifically for shorter lengths where updos aren’t realistic.
The Messy Side Bun

For anyone who wants cap-proof and fast with zero fuss, a low, messy side bun answers both needs at once. It clears the cap entirely, takes only a couple of minutes, and the deliberately undone finish still photographs well. A quick guide:
- Gather hair low and off to one side, well clear of where the cap sits.
- Leave it looking gathered rather than smooth; the imperfection is the actual look.
- Works especially well on a rushed morning when there’s simply no time for anything elaborate.
The Chic Lob With Volume

A long bob with soft, tousled waves suits anyone with shorter hair who’d rather wear it down than build an updo. There’s no height to crush and no updo to construct, so a quick tuck behind the ears once the cap is on covers the rest.
Setting the wave with a curling iron the evening before, then adding a little texture spray the morning of, keeps the whole routine short. The same dent everyone faces still applies here, so hair-down photos come first.
| Style | Time Needed | Cap Safety |
|---|---|---|
| Low bun | About 5 minutes | Very high |
| Voluminous blowout | 20+ minutes | Low |
| Messy side bun | 2-3 minutes | Very high |
Double Dutch Braids

Two Dutch braids running back along the scalp count as about the most secure option on this entire list, which makes them a strong choice for a day involving a lot of movement, hugging, or an outdoor ceremony in wind. The same logic applies to the back-to-school hairstyles guide, where mornings move just as fast.
Because they sit flat and tight against the head, the cap settles on top without any trouble at all. Leaving a little texture in the hair before braiding helps the plaits grip and hold through hours on their feet.
The Curled-Ends Bob

A neat bob with the ends curled gently under reads timeless and tidy, a strong option for anyone wanting to look polished without attempting anything complicated on a busy morning.
The short length leaves nothing for the cap to meaningfully flatten, and the curled ends give the whole shape a finished, deliberate quality rather than a plain, flat one.
- Curl only the bottom inch or two under, using a flat iron or a small barrel.
- A drop of serum smoothed over the surface adds shine without weighing the ends down.
- Fast and close to foolproof, staying neat through a long, demanding day.
The High-Centered Braided Bun

A braided bun counts as the rare style here that can sit a little higher on the head and still cooperate with a cap, as long as it stays centered and doesn’t climb too tall.
Why Placement Matters More Here Than Anywhere Else
The braid wrapped into the bun’s structure adds visible detail that reads more intentional than a plain coiled bun would on its own.
Placement matters more here than anywhere else on this list: keeping the bun low to mid on the back of the head, never up at the crown itself, gives the mortarboard a flat surface. Testing the cap beforehand catches a bun sitting even an inch too high.
Celebrating Your Natural Texture

Graduation is a day to wear hair as itself, and natural curls and coils deserve real consideration here rather than getting flattened into something else for the sake of a photo.
It’s a Volume Question, Not a Texture Question
A defined wash-and-go, a curly updo, or coils gathered low all work well under a cap. For coily and curly textures specifically, the real question is volume placement rather than texture itself.
Gathering height toward the back or into a low puff keeps the front and crown flat enough for the mortarboard, while refreshing curl definition with a little water and cream the morning of keeps everything looking intentional.
The Subtle Pin-Back

For anyone wanting hair mostly down but out of the face, a simple pin-back is about as gentle an option as this entire list offers. Sweeping the front sections back and securing them with a couple of pins leaves everything else loose.
Because the front stays pinned flat and the back hangs low, this slips under a cap without any complaint and keeps stray pieces from blowing across the face during candid shots.
It works across nearly any length and texture, and it’s a reasonable answer for anyone who really can’t decide between a full updo and wearing hair completely down.
Styling Tips
A few habits matter more than any single style choice on the actual day. Starting on slightly unwashed hair helps almost every technique here, since freshly cleaned, slippery strands fight both pins and braids. A light texture spray fakes that grip reasonably well if a wash was unavoidable.
Setting anything worn down the evening before gives it hours to hold rather than minutes. Most of all, pinning the cap itself through its inner corners into the hair means not spending the whole ceremony holding it in place by hand.
Plan Around the Cap, Not Against It
Stripped down, good graduation hair comes from one decision made early: planning around the cap instead of fighting it after the fact. Something low and secure, set the night before, with the cap itself pinned into place, keeps hair-down photos looking good before that dent ever shows up.
Save whichever look actually fits the length, texture, and pace of the day ahead, and give it one practice run before the real one. The hair that photographs best is rarely the most elaborate; it’s the one nobody has to think about once the cap goes on.
Favorites to Revisit